
Samsung Galaxy Note 2 Replacement Screen Front Glass Repair Kit TITANIUM GREY


Samsung Galaxy Note 2 Screen Repair Tutorial
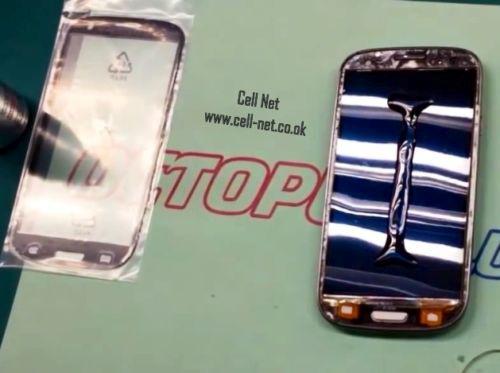
Part 1: Phone Disassembly (to separate the screen from rest of the phone)
To watch Note 2 Disassembly, visit youtube. This process is simple and there so many videos there.
Keep 2 simple rules in your mind at this stage
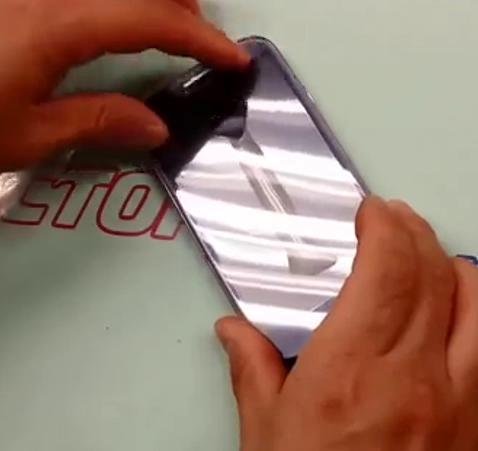
Precaution !
While inserting the card between the glass and the screen, be careful and don’t damage the ribbon pointed by red arrow in the image below. This flex ribbon controls the touch function of lcd.

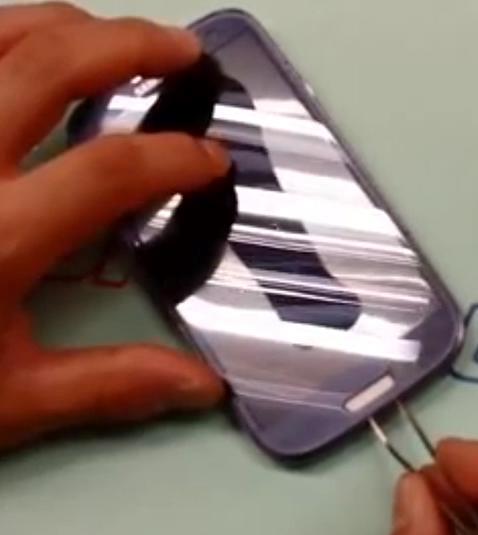
Some Tips:
Digital therm o-meter (used in this video) is NOT necessary. You can use finger tips of your left hand while holding the hot air gun or hair dryer in your right hand. Heat up the screen to a level where you could not place your finger tips on it for more than 1-2 seconds. If you feel that it is still hard to insert the card between the broken glass and screen, give some more heat. Avoid using power here and don’t heat it up to its boiling point. The broken glass would start coming off. Completely remove it and then clean the screen with the help of the glue remover provided.
To get the best possible display results, UV glue is used to bond the new glass on the screen. The UV glue is applied in a particular pattern on the screen. There are a number of different patterns however we have shown the best one below, based on our experience. Here don't forget to remove bubbles or dust particles from the glue or screen, if any. See these images;
To watch it, Click Here
Drying the UV Glue
Our UV glue can be dried in sunlight. Approximate time is 45 minutes. Alternatively UV torch can be used .With UV Light, Drying time of the UV glue is around 10-12 minutes. If you need UV Torch to dry the glue! Click HereThanks for Watching