The pods for Krieger and Mixuko are cool but they're afterthoughts, add-on's to existing designs, and as such there are compromises involved. And you know that doesn't sit well with me...
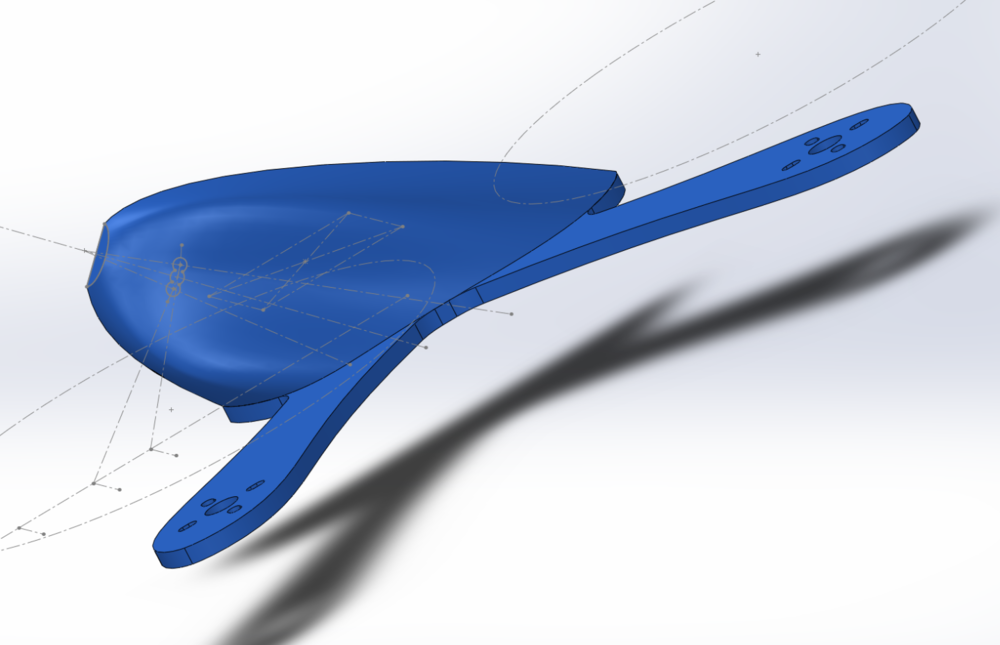
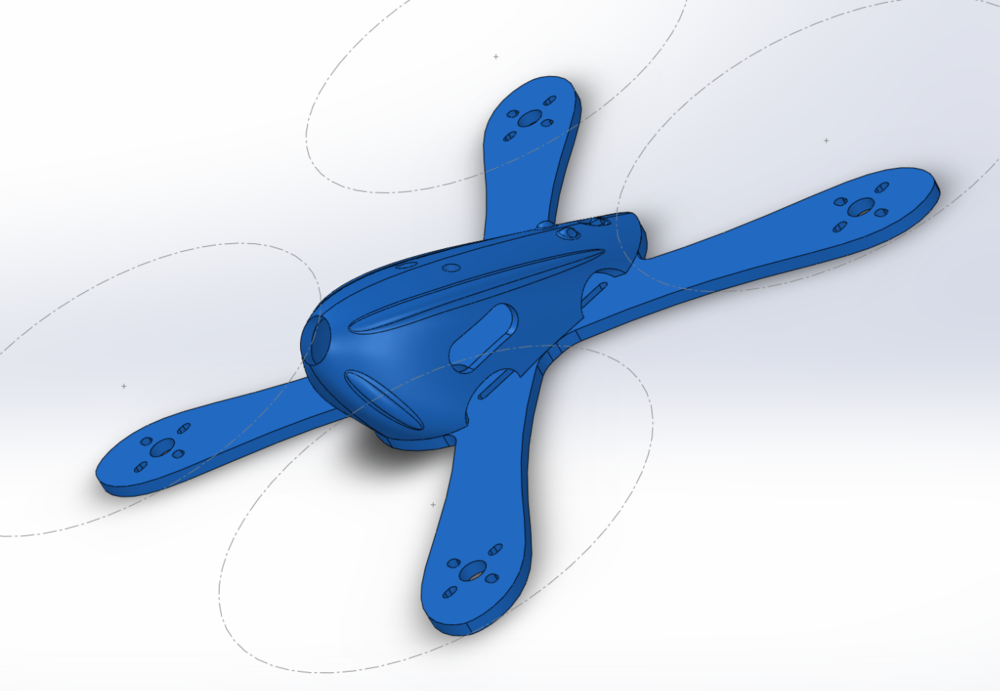
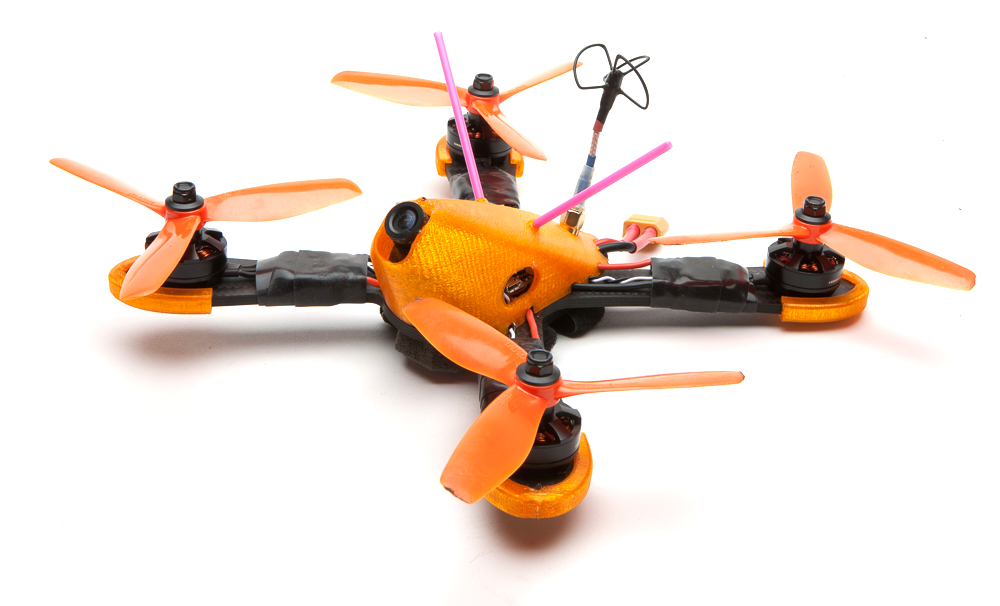
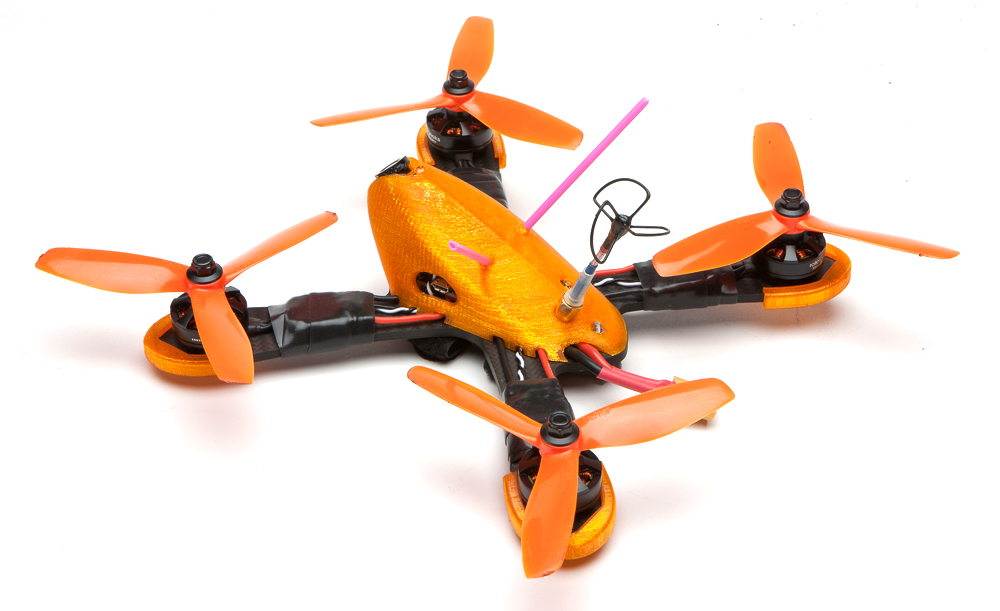
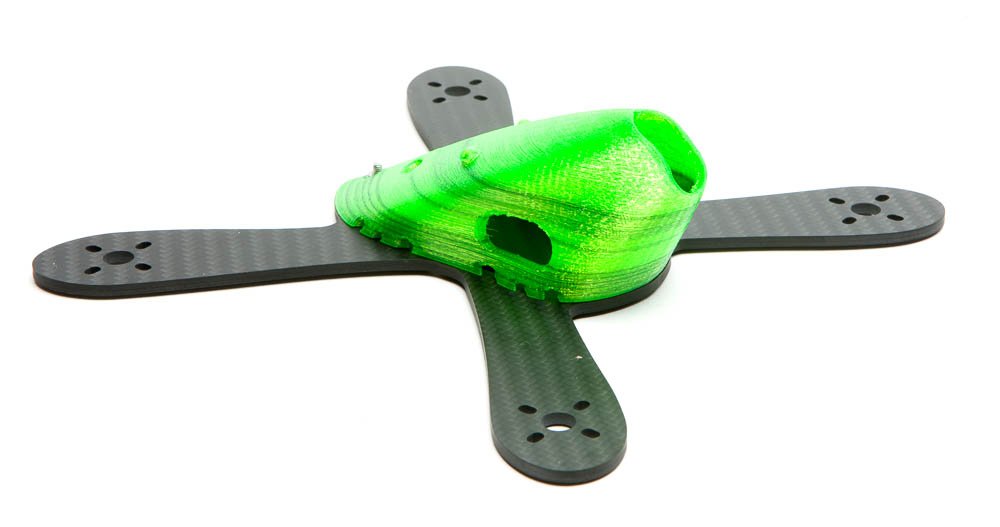
I wanted to design a pod frame from the ground up, a 4mm monoplate like Mixuko but with mounting points farther away from the FC so the pod design isn't so tortured. It would be even more aero if the pod shielded the battery as well, so the pod grew to be more of an H quad body. I've already explored this configuration for super secret Solidworks project #1, so I knew that I need to start with a 220mm footprint.
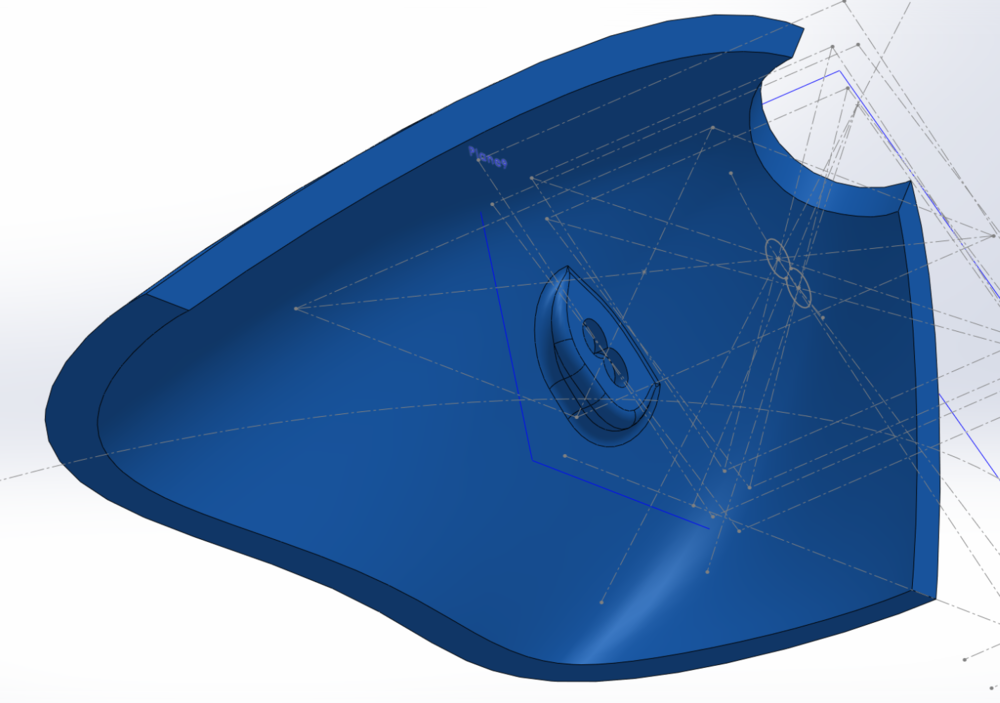
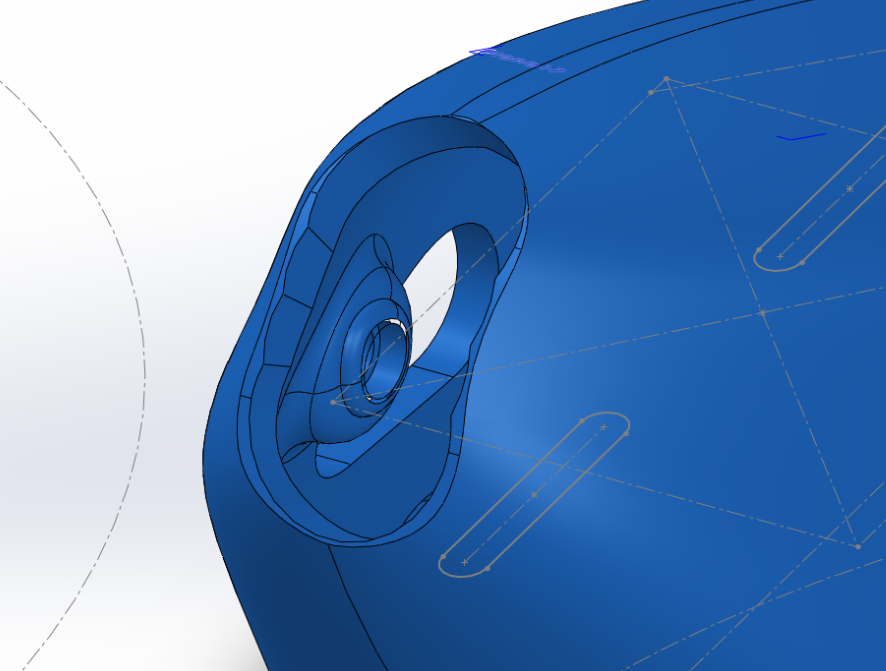
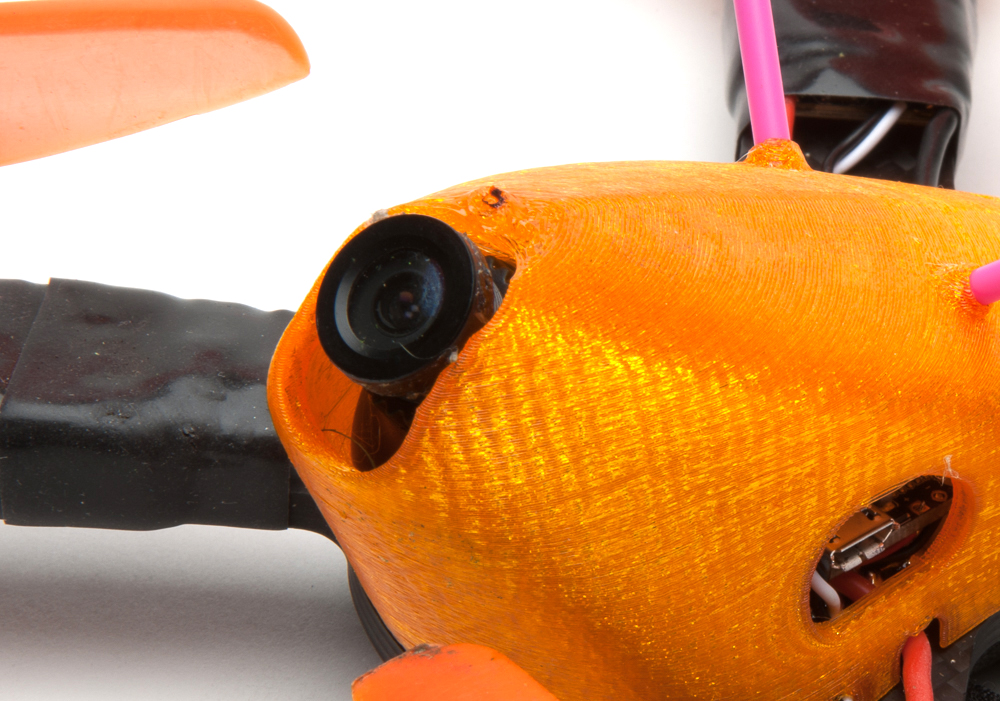
I drew up half a quad to start. The basic shape is a loft between the fpv cam hole and a teardrop shape that covers a 1300 battery. Most pivoting cam designs have a slot in the pod for angle changes, but I thought it'd be aerodynamically cleaner to lock the lens and rotate the cam, so I drew a 15mm hole for the lens and three mounting holes for the cam at 38, 45, and 52 degrees.
I showed it to the boys and Josh promptly dubbed it the Boobcopter. The first version of the Krieger was codenamed The Dong, so with the Boob and the Dong I must surely be the #1 miniquad brand for 13 year old boys.
The range of angles made the front end wider than I liked, so I limited the angles to 45 and 52. Hey, it's supposed to be a fast quad, right? With the angle limited the front end got slimmer. I added blocks for the cased cam to snap into.
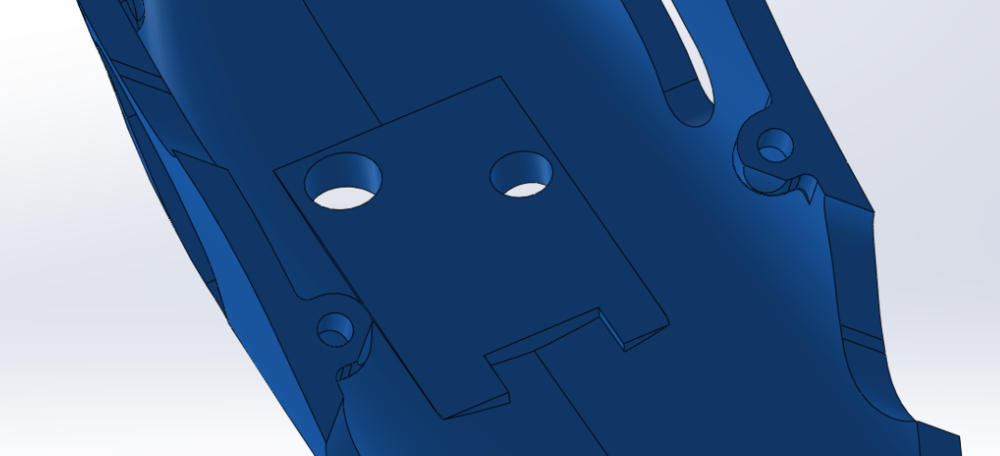
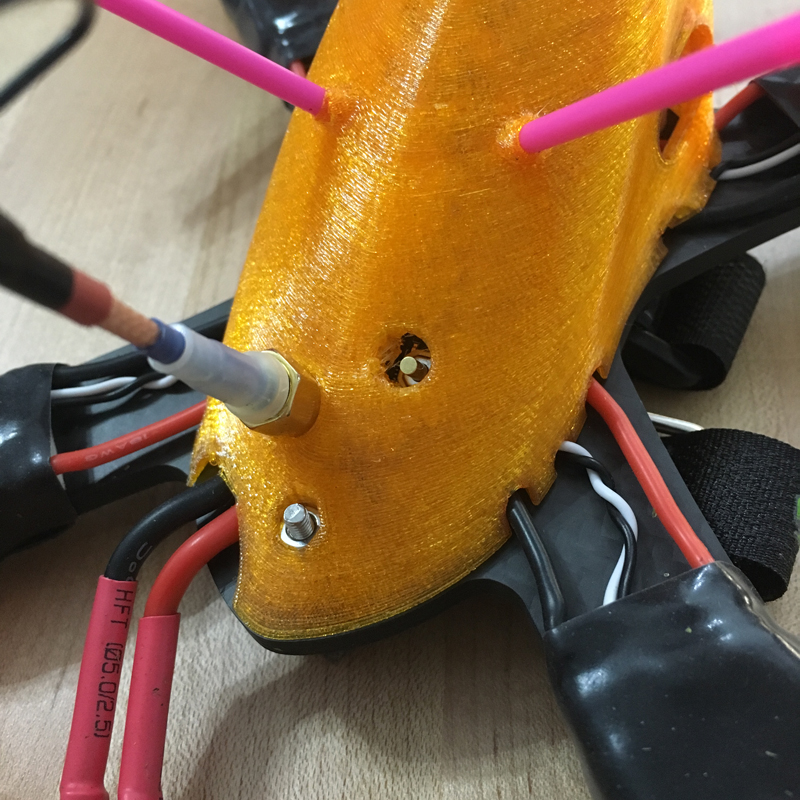
The FC stack will sit slightly forward of center – this keeps the pod nice and low profile. The receiver can go behind the stack, and that just leaves the vtx without a home. Vtx's are tough with pods, it's hard to configure it so you can still change channels, and rounded shapes aren't conducive to mounting. I opted to use a 90 degree vtx here, and made a special place for it, complete with a hole for the channel changer push button.
With that done, all there's left is to add ribs for strength and rad-ness, as well as holes for rx antenna straws.
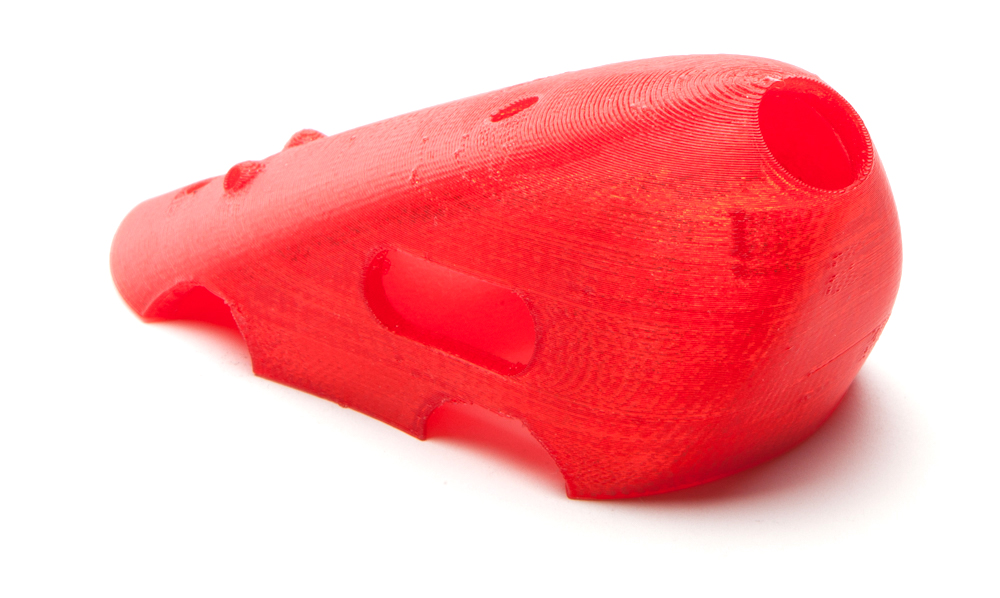
Chris Griffin printed an earlier version, without ribs, and sent it to me. The print is just stunning in its perfection, makes me believe in TPU as a legitimate end product even more.
My 'one hole two nubs' idea didn't work too well, the notches in the nubs are so small and close together that it's just one jumbled mess. So it was back to the drawing board with a slotted lens opening, with snaps for 30, 40, 50, and 60 degrees. There's not much meat in those snaps so I was curious to see how well it would hold the camera.
By now I had my own printer working, so I printed this next one myself. I bought a cheap kit and built it myself, and it vibrates on some movements. You can see how consistent the vibrations are in the vertical ripples in the print – that's the same shake printed out layer after layer. Pretty crazy.

The camera did snap into those angles, but I could see it slipping if you tapped the ground mid flight, so I tightened up the opening and printed it again.
Also, now that I have my own printer and can see the process play out, I can design the part to print as cleanly as possible. I changed the big openings for esc leads to three small slots, and gave the usb hole a curved top. Now even my cheap printer can make a decent print.

Nothing like watching a print to learn how to design it better.
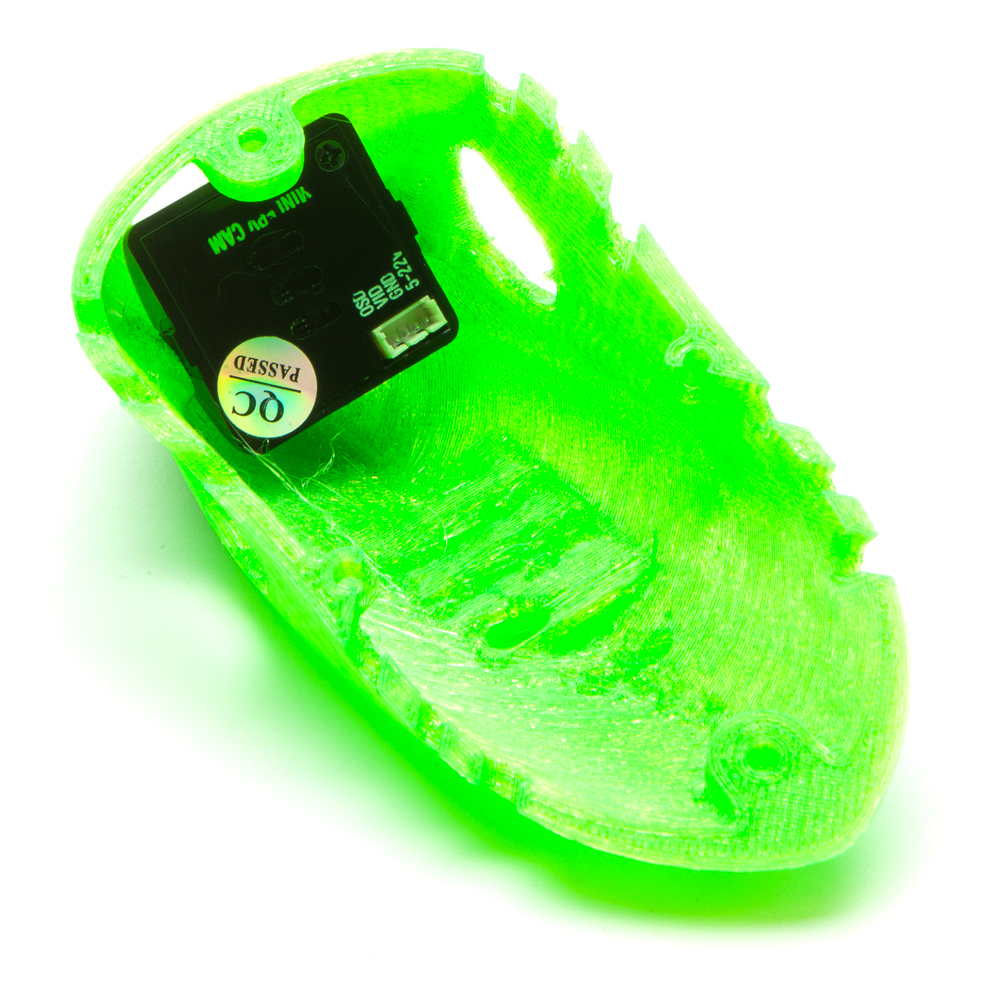
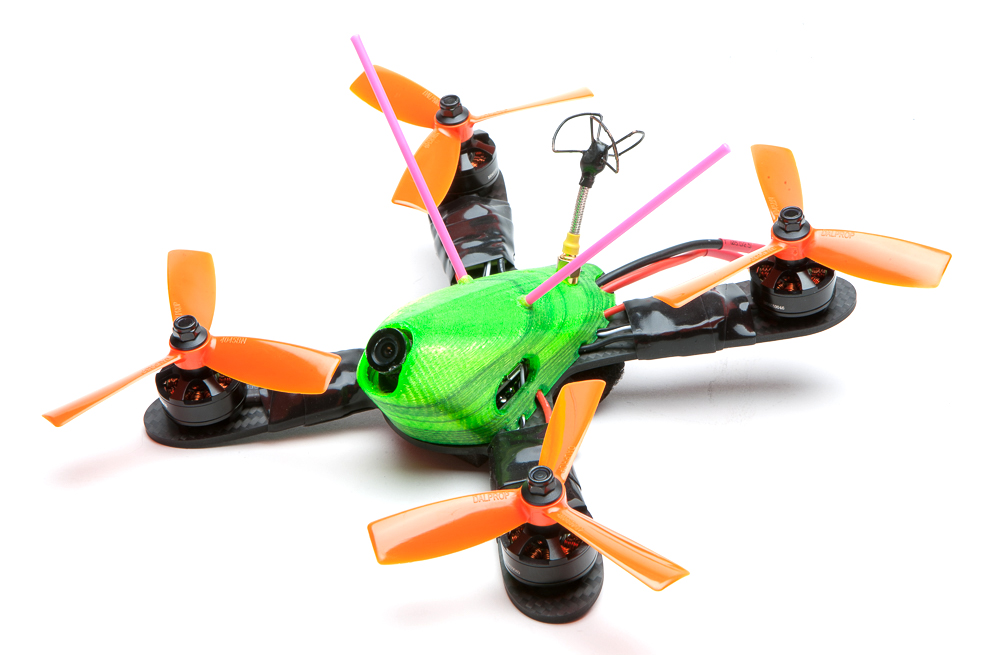
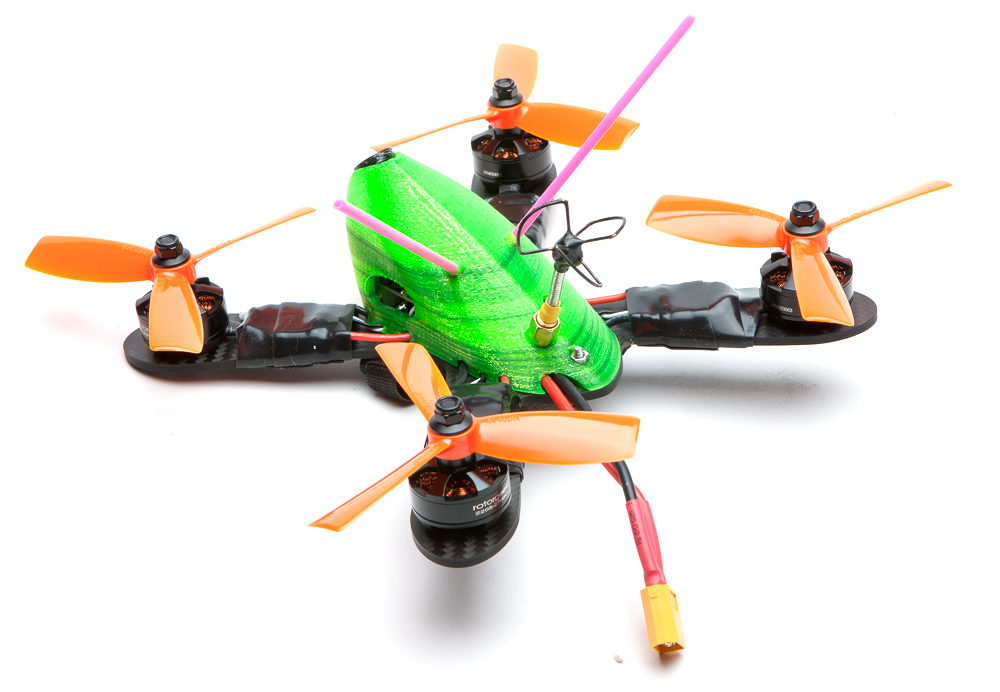
I built it up with the green pod only to find the components a bit too smushed, so I moved the vtx to the tail and reprinted it.

You can change channels!
I also rubbed some Foam Tac on the lens barrel of the fpv cam and let it dry. With the extra tackiness the camera now holds real well, and bashing the quad on the ground doesn't shift the lens.
I've been having a lot of fun with the new 3d printer, here's some TPU booties that slip on and hold real tight. I just gotta learn to print it cleaner so it slips all the way in and clears the motor screws.

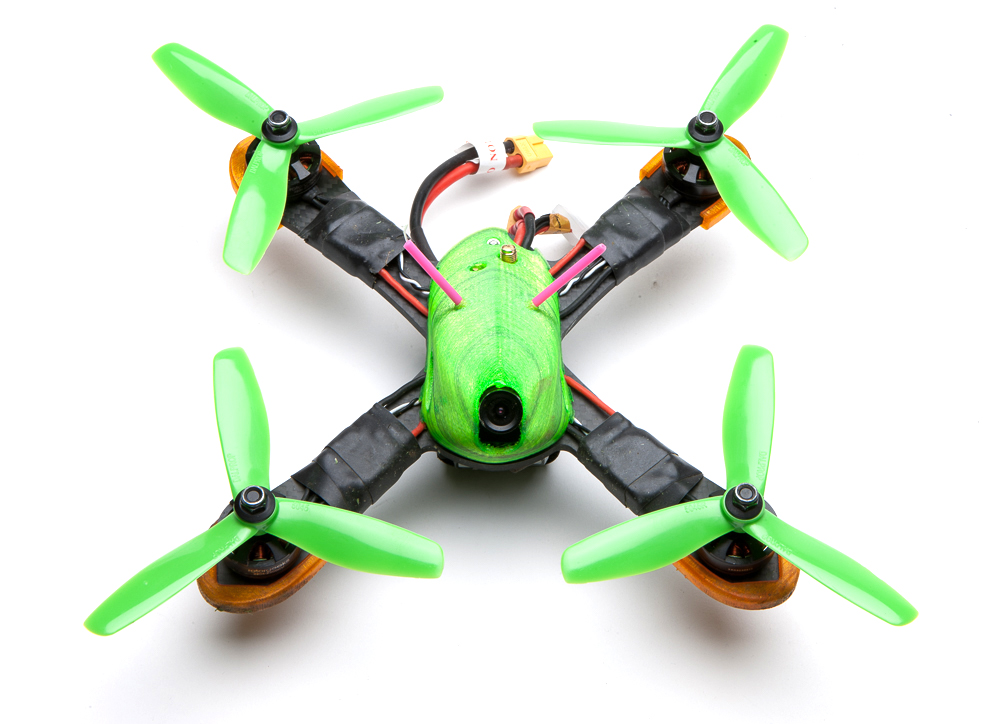
I have a Mixuko pod, which is 195mm across and has super low pid's, as well as a Krieger pod which is 225mm and close to default pid's. This guy is 220, so I loaded in pid's between those values but closer to Krieger for the maiden. I was surprised to find that the pid's wound up closer to Mixuko than Krieger after a few flights. Other than that the maiden was terrific, the same great flight characteristics of the other pods. Unfortunately the maiden was on a Saturday near a crowded field and some trees, so I never got to open it up and really test its aero qualities – that'll come soon.
The booties got a little more refined.
I guess I should call them socks now, 'cause they slip onto the arms and need no glue. They have to printed vertically, so I adapted the opening to adhere to the 45 degree rule. I like this concept for arm guards – practice with them on, and easily slip them off to race, kinda like ankle weights. The files are here.
Flying Bear and XY.fpv both noticed that it flies quieter than an identically built Krieger or Mixuko. I would've discounted this to the placebo effect but it's interesting that they both mentioned it, independently of each other. I'm hoping that speaks to its aerodynamics, of course.
I also got some 4" versions cut, and these were incredibly fun to fly – very flickable, incredibly easy to put into gaps.
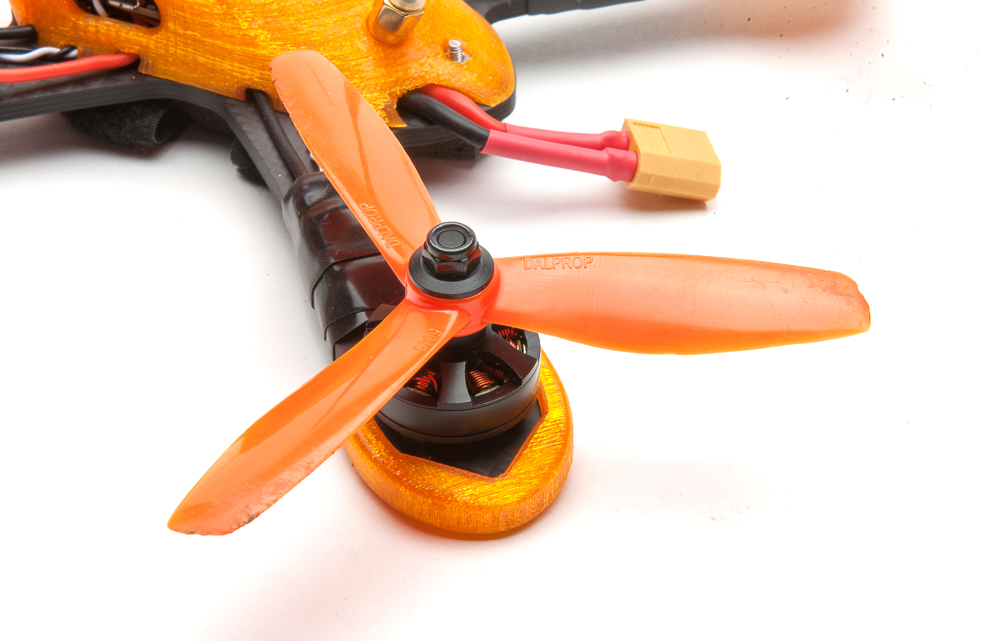
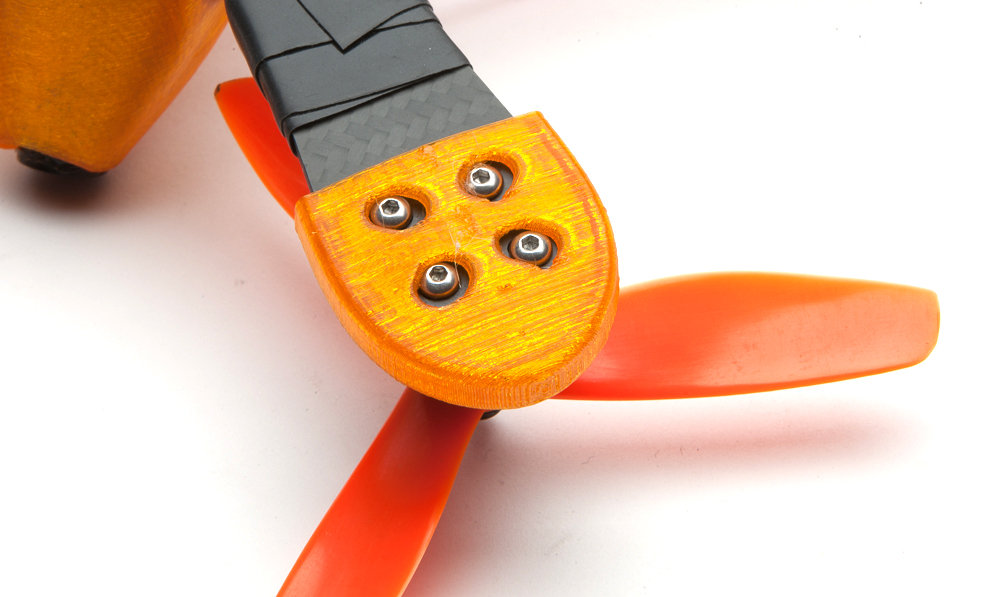
The pod underwent some refinements – I put more material around the nut in front so it'd stay put better during installation. The two screws on the sides of the pods thread directly into the TPU, and I made those holes bigger at the start and smaller at the end, so the screw can find its way more easily, and then hold tighter. The two side screws are more like guides, the front and back do most of the work, and they're threaded through nuts, not TPU.
Also, I noticed a tendency for lenses to get unscrewed. I finally realized that it was from me constantly demo'ing the angle changes. One side would drag on the opening and loosen the lens. So you're going to want to grip the lens securely when changing angles, and don't idly play with it, no matter how much fun it may be. (Side note, I spent an entire day trying to tune out shakes, only to later realize it was a loose lens.)
And here's it's entire raison d'etre: you don't see the battery, and neither does the air.