|
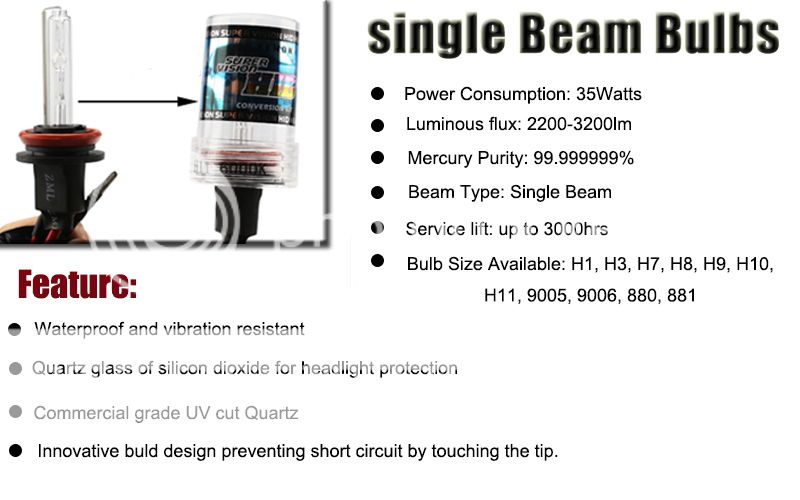
Pair of 35W/55W
HID Xenon Replacement Bulbs for HID Conversion Kit -
Chose Size and Color
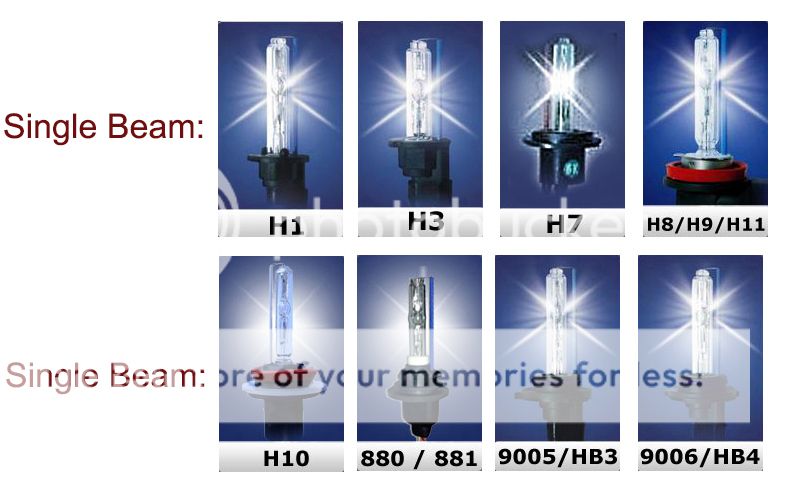
Bulb Size:
H1 / H3 / H7 / H8 / H9 / H10 / H11 / 9005/HB3 /
9006/HB4 / 880 / 881
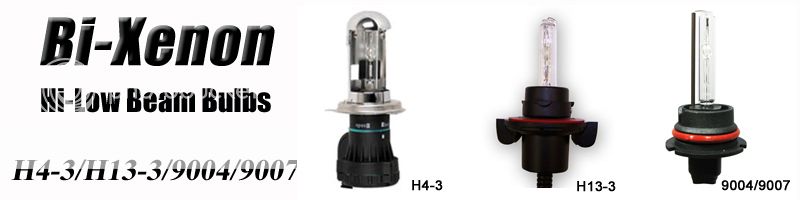
Dual Beam HID Bi-xenon Hi/Lo Bulb Size:
H4-H/L / 9004-H/L / 9007-H/L / H13-H/L
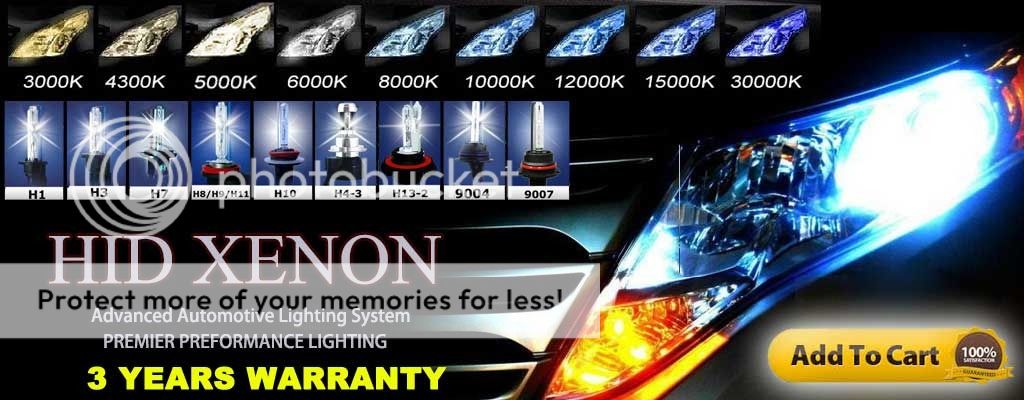
Color Temperatures Available:
4300k / 5000k / 6000k / 8000k / 10000k / 12000k


What is HI/LO bi-xenon?
This will
depend on the type of vehicle you drive. For most vehicle, the headlights have 2
bulbs each: one for low beams and one for high beams. In this case, you will
need one regular HID kit for the low beams. If you also want your high-beams to
be HID lights, you will need a second regular HID kit.
On some
other vehicles, the headlights have one bulb each. This bulb performs the
function of both the high beam and low beam. In this case, if you want to keep
the high beam and low beam functions, you will need to install a special HI/LO
kit. The HI/LO HID kits have special bulbs that perform both high and low beam
functions.
Available Bulb Types:
H4-Bixenon (9003/HB2), 9004-Bixenon, 9007-Bixenon and H13-Bixenon (9008)
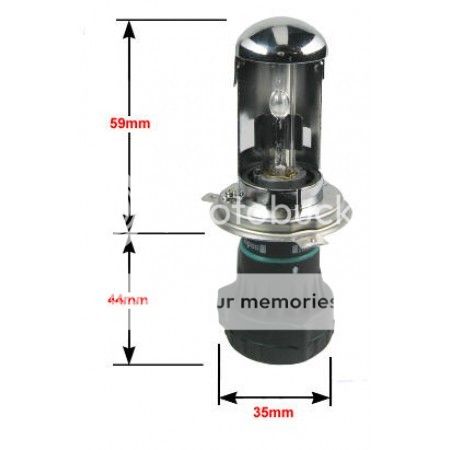
A Bi-Xenon
bulb replaces a H4 halogen bulb that produces low beam as well as high beam. A
H4 halogen bulb has therefore two filaments, one for low beam and one for high
beam. The Bi-Xenon bulb however, only has one 'light cell'.
(See The Pic.
Below)
By means of an ingenious electro-magnetic construction, this light cell can
change position. One position is low beam, the other is high beam.
Product Show
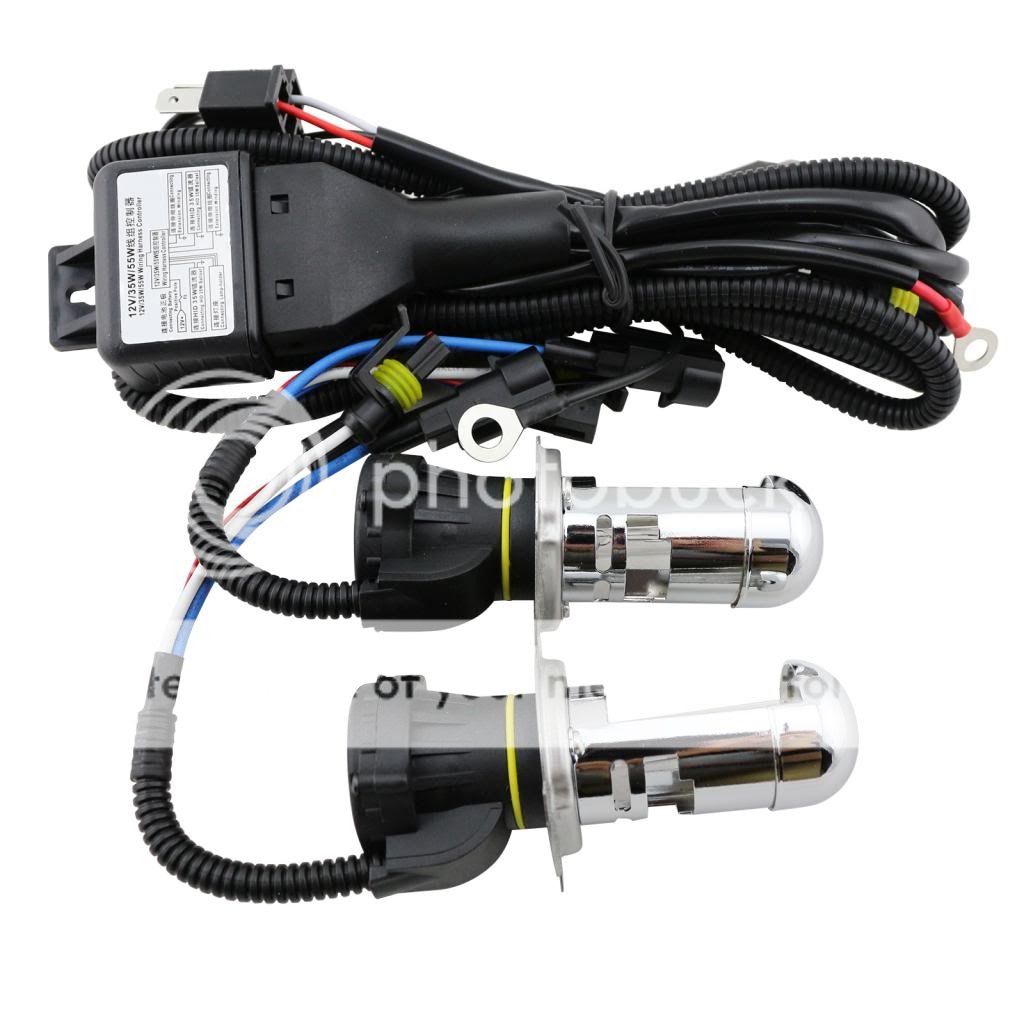
Dual Beam
HID Bi-xenon Hi/Lo Conversion Kit
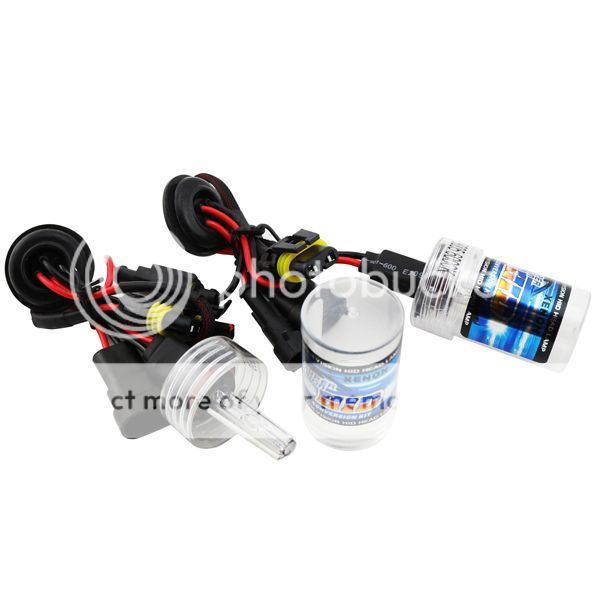
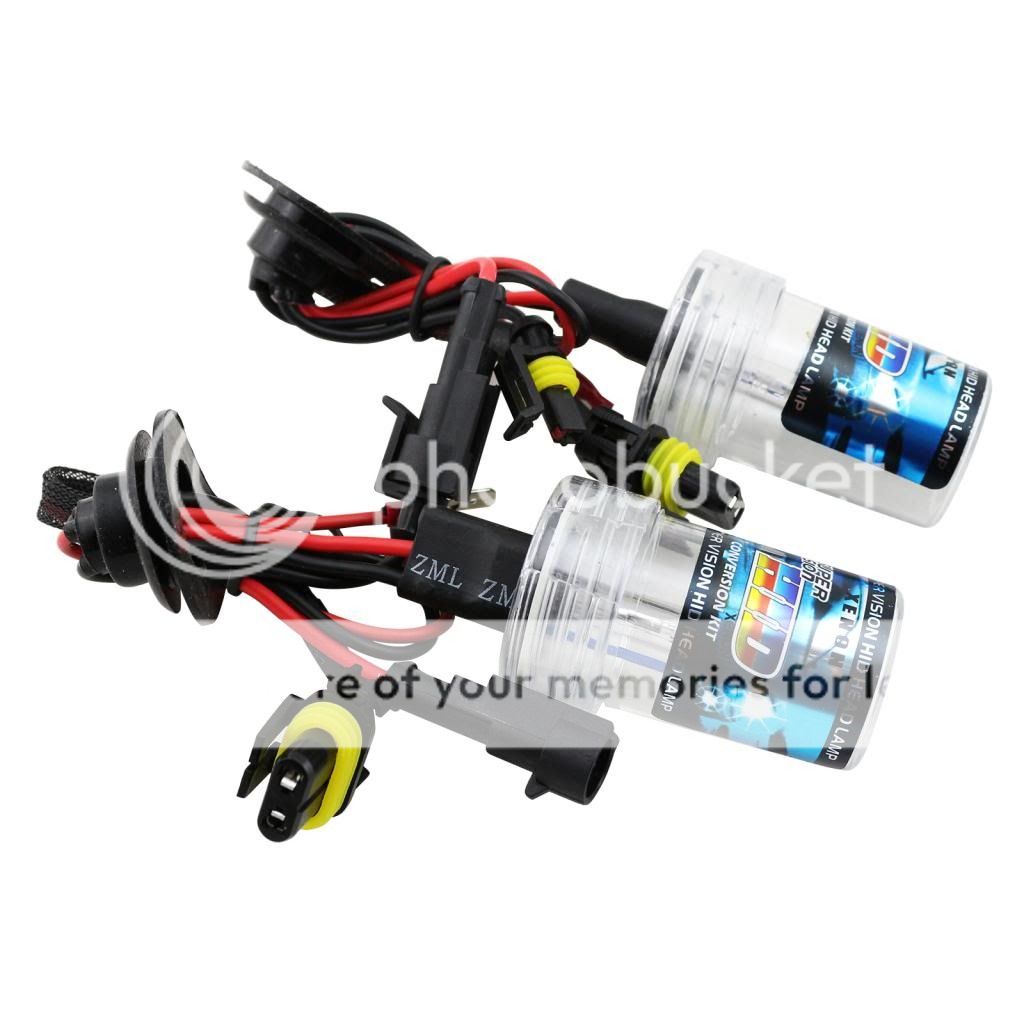
Single Beam HID Xenon Conversion Kit

HID Temperature
and Color
Color Temperatures Available:
4300k,5000k,6000k,8000k,10000k,12000k

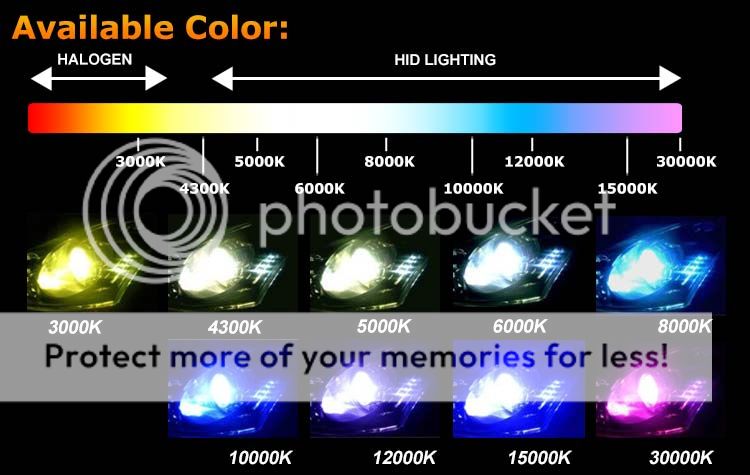
Color Temperatures:
-
3000K GOLDEN YELLOW, most penetration in rain and adverse weather.
-
4300K-OEM white, the light appears fairly white, and has light yellowish
hue. Recommend for low lights.
-
5000K PURE WHITE, very clean.
-
6000K YELLOW WHITE, has a little hue of blue, popular choice!
-
8000K ICEBURG BLUE, light blue
but still gives out good amount of light.
-
10000K BRILLIANT BLUE, more blue, 80% output of the 5000K.
-
12000K EXOTIC VIOLET
BLUE , less lumen, however “exotic”.
-
30000K Extreme Blue, most extreme and most exotic looking lights.
-
The higher the color, the less the light output, we recommend 6000K or
8000K
-
Choose from our crisp Xenon colors for a cool and unique light for high
visibility driving.
HID VS HALOGEN

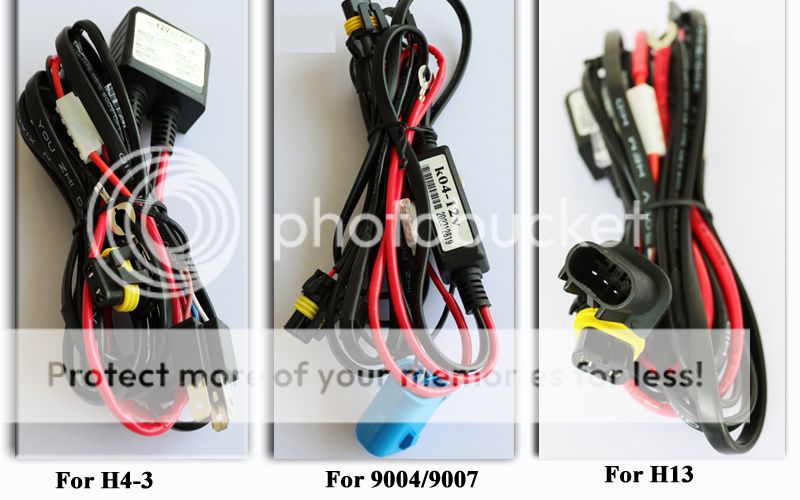
Relay Harness
Single Beam don't need the relay harness
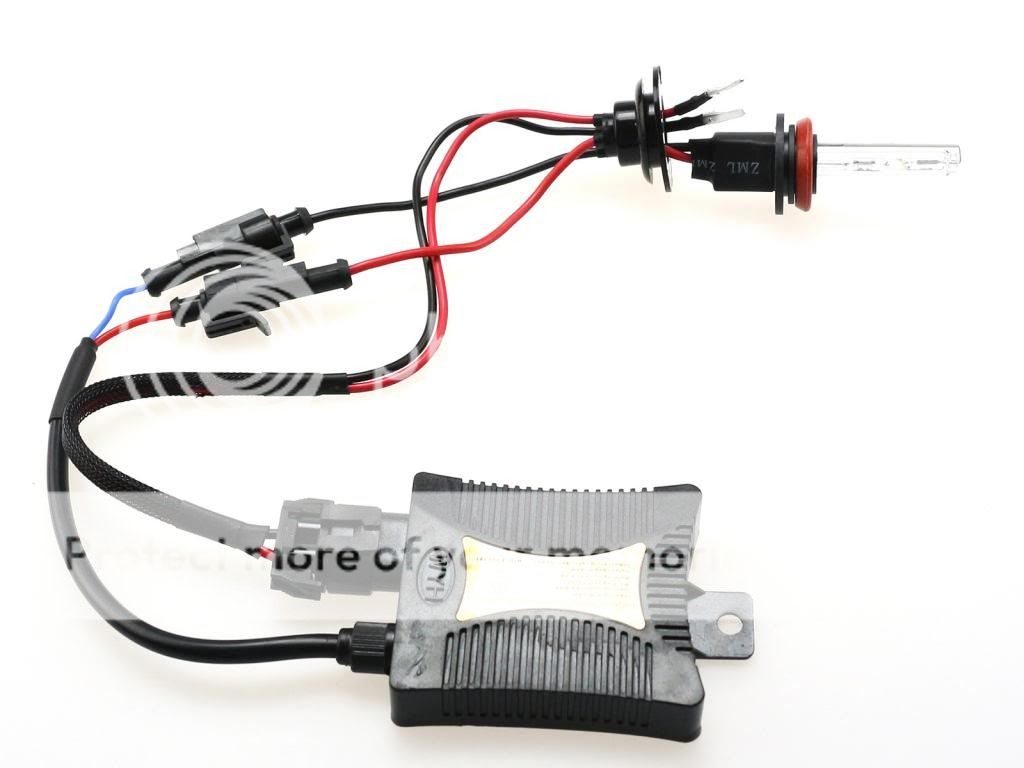
Bi-Xenon Relay Wiring Harnesses are used with H4-3, 9007-3 and H13-3 Bi-Xenon
bulbs
35W VS 55W
The 35W HID kits use 35W of power to produce HID
light. The 55W use more power to produce more light. The 55W HID kits cost
generally more than the 35W HID kits.
This is a question of personal choice. If you
need maximum light output, if you drive on very dark roads, you will want to
install a 55W HID kits for more lighting power.
Package Include
This kit contains everything you need to
upgrade your existing car's headlight system to the best lighting available
today!
Package Includes:
A: Single Beam HID Xenon
Bulbs
B: Dual Beam HID Bi-xenon
Bulbs
Installation Guide
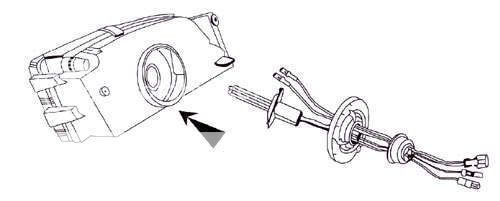
Step
1: Open
hood and locate the factory light bulb you are trying to convert. If fog
lights, you may need to pull out your factory fog light housing to access the
back. On some vehicles you can access factory bulbs from the engine bay or from
the wheel wells with your wheels fully turned on direction. Please consult your
owners manual or dealer on how to access your factory light bulbs. In 90% your
bulbs are easily removed without too much trouble. Once your factory light bulb
is removed, you can prepare for the HID bulb insertion.
Step 2:
Remove the plastic capsule preinstalled on the HID bulb and insert into your
headlight socket. HID bulbs should fit similar to your factory light bulb, but
the tolerances may be slightly different on certain vehicle models. Bulb
installation will vary from twisting to clamping from the back depending on the
bulb type. Be very gentle with the HID glass portion. Do not touch the glass
with your fingers. If it does end up getting dirty, simply wipe with clean cloth
gently
Notice:
Some vehicle models may require adapters for the bulb to fit into the socket.
These include H7 bulbs. Some parts off of your original headlight may be be
required depending on car model. Example, 9007 light bulbs will require the
reinstallation of the plastic bulb holder adapter. Some BMW/VW/Mercedes/Saab
will require a metal adapter or plastic adapter to hold the bulb in place.
Step 3a: Once
the HID bulb is fixed into place locate the factory connector where the
original halogen bulb was connected to. You will now connect the supplied wire
(may be a plug or 2 metal tips) that you must insert into your factory connector
as shown below. When we say factory connector, this is the connector your
original bulb was feed power with.
If you purchased a Bi-xenon kit, or a kit with relay, your
installation will be a little different than above. See steps 3b or 3c.

Step 3b:
If your kit included a relay you will not use the provided extra wires shown in
Step 3a. that connect ballast to factory headlight plug. Instead the ballast get
connected to the relay as shown below. The relay then will connect to your
factory headlight plug. Some relays will have two plugs one for each side, while
others only one headlight plug. Remember a relay simply gets a signal from your
headlight plug, then allows power to flow directly from your battery.

Step 3c: If
your kit purchased is a bi-xenon kit also known as hi/low (low beam + high
beam HID with movement). This only applies to kits with bulb types 9004 9007 H4
H13 9008. Notice on these kits there will be only 1 headlight plug connector.
One of your headlight connectors may not be used.
Step 4:
Before mounting ballast permanently please test the system. Low beam, high beam
and fog light function if it applies to your install. It is best to turn the
vehicle on to test the system as some vehicles do not give full voltage when
vehicle is running only from battery.
Step 5:
Mount the ballasts on any existing bolt or flat surface away from excessive
heat. We do not recommend mounting on top of the radiator or in front or behind
it. Ballasts are electronic devices which excessive heat can ruin. Make certain
the wires with your kit cannot get tangled into the belt line or are resting on
very hot components of the engine.

• Paypal:
We accept Paypal Only.
• Please
complete the payment within 24 hours via Paypal.
• For
wholesales, bulk order, retail etc, please send email
to us ,we will reply in 24 hours.
• We
Ship to Worldwide.
• Item
will be shipped within 24 hours after full payment is
received.
• We
are not responsible for any custom duty or import tax.
a) Import duties, taxes and charges are not included in
the item price or shipping charges. These charges are the
buyer's responsibility.
b) Please check with your country's customs office to
determine what these additional costs will be prior to
bidding/ buying.
If you are not satisfied when you receive your item,
please return it within 30 days for refund. Please
contact me before you return it.
For non-defect Item buyer require to pay for the two
way shipping freight.
If item is defective within 3 years, you can still
send it back to us. We will send you a new one after
receiving the defective item.
But you need to pay the two way shipping freight.
• Your
fully satisfaction is our utmost priority.
• If
any questions, please don't leave negative or neutral
feedback before contact us, as we always try our best to
help you solve problems entirely.
( You will be replied within 12 hours work day )
• If
you are satisfied with this purchase, please take
minutes to leave 5 star positive feedback, we appreciate
your positive feedback.
|