onlinesheep mainly sells some practical, economical products including decoration,tools,kitchen utensils, baby product and soon on.Welcome to our store, hope all of you happy shopping with us!
This inexpensive kit saves hundreds of dollars and restores crucial night time visibility by restoring your own lenses,It can helps restore clear plastic by removing haze and discoloration, to improve visibilty and safety.One kit is intended to restore two headlight lenses.
Headlight Restoration Kit

About it
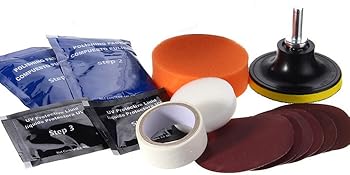
Headlight Restoration Kit lets you shine and restore plastic lenses, including headlights, taillights, fog and directional lights. By restoring clarity to the lens, the performance of the headlight is improved and the appearance of the vehicle is enhanced Now you can produce professionalresults with the Headlight Lens Restoration Kit. Kit includes all Kit includes all items necessary to perform the task.
belupai Headlight Headlamp Restoration Kit Repairs Dull Headlight Lenses Restorer Suitable For Cars Bikes Motorcycles
Feature
Low power consumption, durable and long lasting
High/low beam car headlight bulbs, fast cooling with perfect cooling design
Plug and play, no need to cut wires; no regulator required
High power and high brightness
Explosion-proof, shockproof, high temperature resistant, high pressure resistant, etc

Prepare
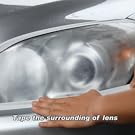
Clean the lens with water, tape the surrounding of lens to avoid scratches.

Sanding
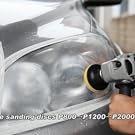
Wet the velcro sanding disc and attach it to the backer pad.Sand with three different grits to make a completely removal of the heavy yellowing, fading and corrosion.(Note: Use the sanding disc from coarse to fine:P400-P800-P1000, otherwise will result in failure)

Polishing
Attach the sponge disc to the backer pad,apply the polish paste(step 2)to lens and polish till shining as original condition.Note: If polish by hand,you`re suggested to polish no less than 200 circles clock wise.Will results better if do with a polish machine.

Protection
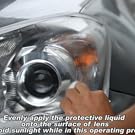
Clean the headlight lens and make sure the lens is dry enough before protection step.Use a sponge disc white provided by kit,evenly apply the protect liquid (step 3) on the surface of lens.Protect liquid will form a magic layer on the headlight surface when it fully dry.(fully dry need 2 hours under direct sunlight)
Note:After step 3, keep the lens dry and don`t wash the car within 24 hours

Note
1.Outdoor operation is prohibited
UV repair fluid is particularly sensitive to ultraviolet light. Without coating evenly, the UV will quickly solidify after UV irradiation, resulting in a blurred headlight surface.
2.Avoid cloudy, rainy, snowy use
Uv protection solution evenly coated, after exposure to the sun for two hours, UV curing effect can be more perfect.
- The headlight lens restoration kit improves the performance of the headlights, to restore clear and bright lights.
|- Designed to restore clarity to the lens of the headlights that are yellowing, oxidation, aging, scratching, etc.
|- 3 simple steps: sand, polish and protect. Easier than replacing an old lighthouse.
|- Comes with an adapter for the power drill, quickly repairing with less time and effort.
|- Suitable for car headlights, taillights, fog lamps or directional lights.
|- A complete car headlight restoration kit. Designed for repairing the car headlamps yellow, oxidation, aging, scratches and other issues in few steps. Get great results on most plastic lenses, such as tail lights, trailers, boat windows, helmet visors, motorcycle windscreens, snowmobiles and more.
Specifications:
Type: Headlight Restoration Kit
Color: As Shown
Functions: Repair yellowing, oxidation, aging, scratching
Package Include: 1 X Backer Pad M10 Thread 1 X Adapter 1 X White Flat Sponge 1 X Orange Flat Sponge 1 X Mask Tape 2 X 3ml Protective Fluid 2 X 40ml Polidh Paste 2 X P800 Sanding Discs 2 X P1200 Sanding Discs 2 X P2000 Sanding Discs 1 X Manual |  | |||||
How to Use:
Step 1: Prepare the Headlight Lens by Cleaning It with Water. Cover the Area Around the Lens to Avoid Scratching the Nearby Painted Surface. Attach a Disc to the Sanding Tool and Use a Sanding Machine If You Have One, or Sand Manually If You Don't.Use Sandpaper from Coarse to Fine P800-P1200-P2000. (Note: the Sanding Effect Is Known to Completely Polish the Lamp Surface Yellowing Oxide, some Headlamps Have Internal Yellowing and This Cannot Be Operated).
| Brand | Unbranded |
|---|---|
| Manufacturer Part Number | Does Not Apply |
| MPN | O151855HAO8B1481 |
| Type | Headlight Restoration Kit |
| Functions | Repair yellowing, oxidation, aging, scratching |
| Colar | As the picture show |
| Material | Plastic (self-adhesive disk) |

