Underground Metal Detector EPX10000 Outdoor Treasure Hunting Gold Sands Gold Silver Copper Salt Iron Nickel Titanium Gemstone Jade Detector
Specifications:
1.Detection depth range:5-50m
2. Detection distan cerange :100-1000m
3.Rechargeable battery:8 hours of continuous work
4.Voltage:12VDC
5.Thtemperaure range:45 to 85
6.Humidity:0~95%(non condensing)
7.16 bit processor speed,40MIPS –16MHz
8.32 bit DSS synthesis chip,wave from output
9.Digital frequency synthesisX20PLL,automatic frequency stabilizer,0.1MHz
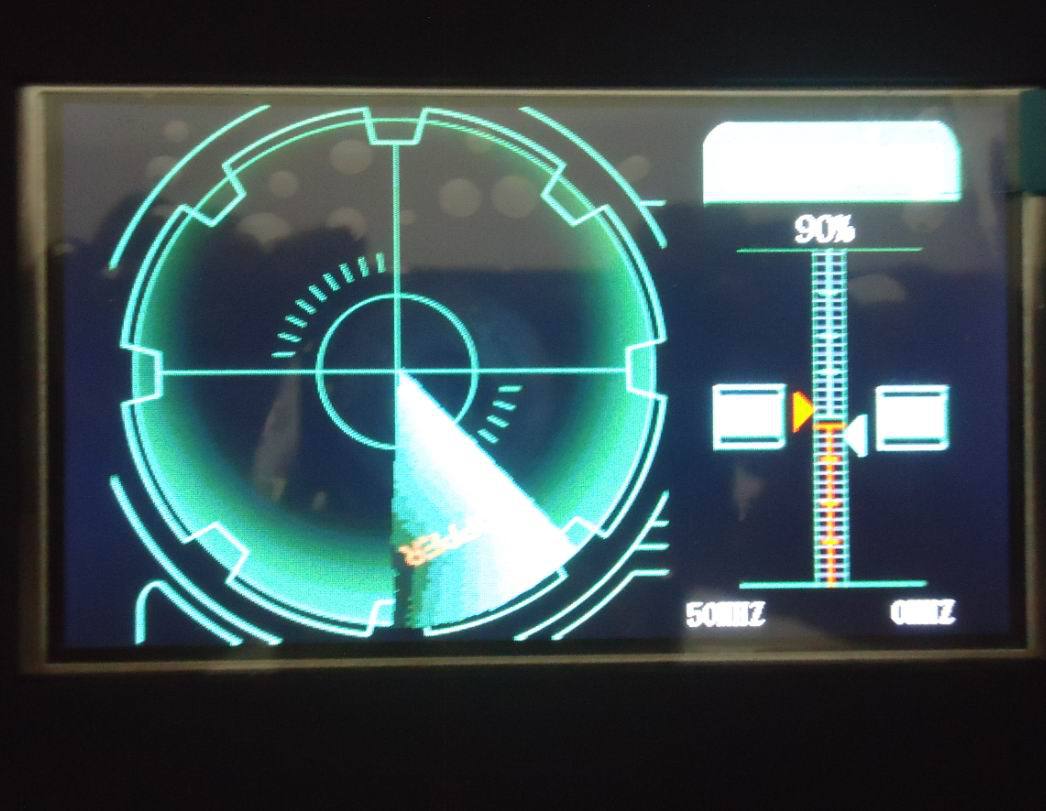
10.Color LCD display,a resolution of 480 x 320 pixels
11.Net weight:6.6kg,Gross weight:10.5kg
12.Product size:47X37X13.5cm
2. Detection distan cerange :100-1000m
3.Rechargeable battery:8 hours of continuous work
4.Voltage:12VDC
5.Thtemperaure range:45 to 85
6.Humidity:0~95%(non condensing)
7.16 bit processor speed,40MIPS –16MHz
8.32 bit DSS synthesis chip,wave from output
9.Digital frequency synthesisX20PLL,automatic frequency stabilizer,0.1MHz
10.Color LCD display,a resolution of 480 x 320 pixels
11.Net weight:6.6kg,Gross weight:10.5kg
12.Product size:47X37X13.5cm
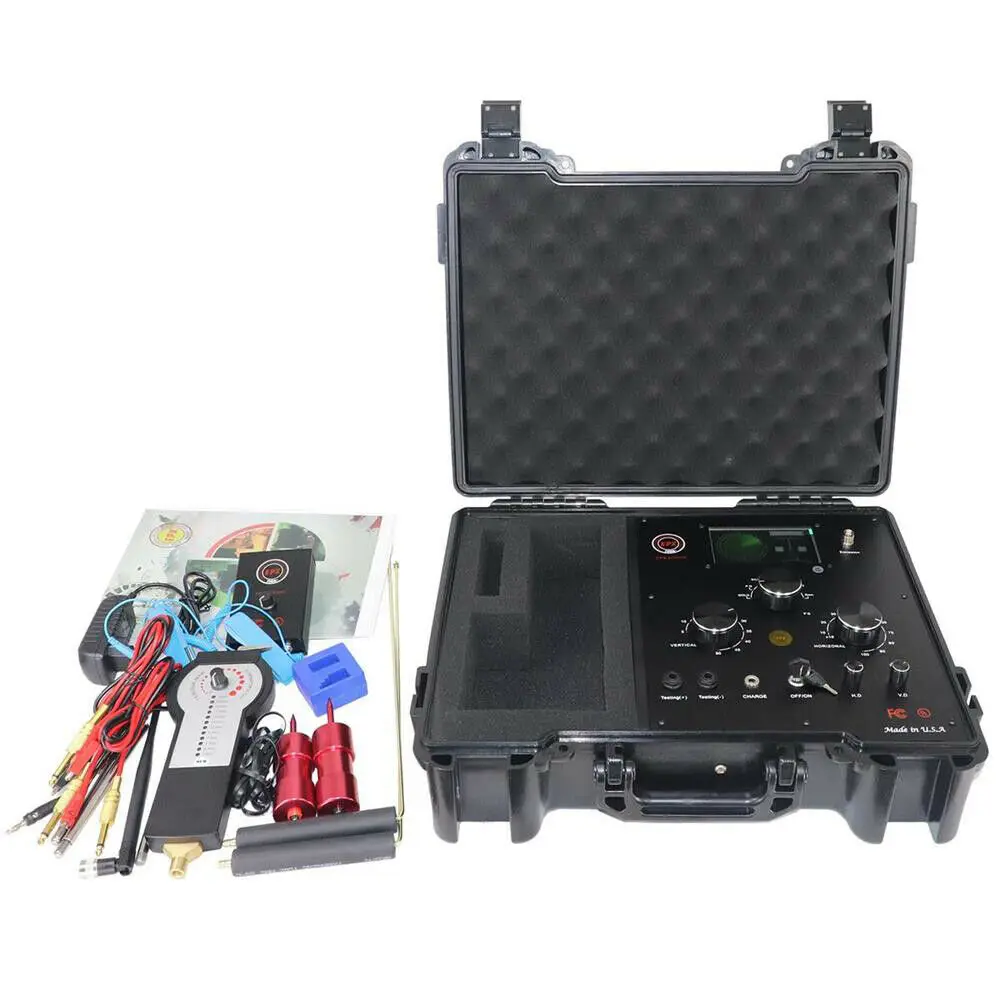
INSTALLATION
Scanner control installation
Note: Before the daily operation, the battery must be fully charged! If you do not charge it, the EPX10000 might go wrong. If abnormal , this may be the first time warning that the battery power is too low and must be charged. If the battery power is charged a whole night, after that, the battery is still no power, you need to replace the battery or charger, or AC power outlet without electricity. If the battery is charged,but it is not full of power,you may need to replace the built-in battery. A new fully charged battery can let EPX10000 continue to work about eight hours.
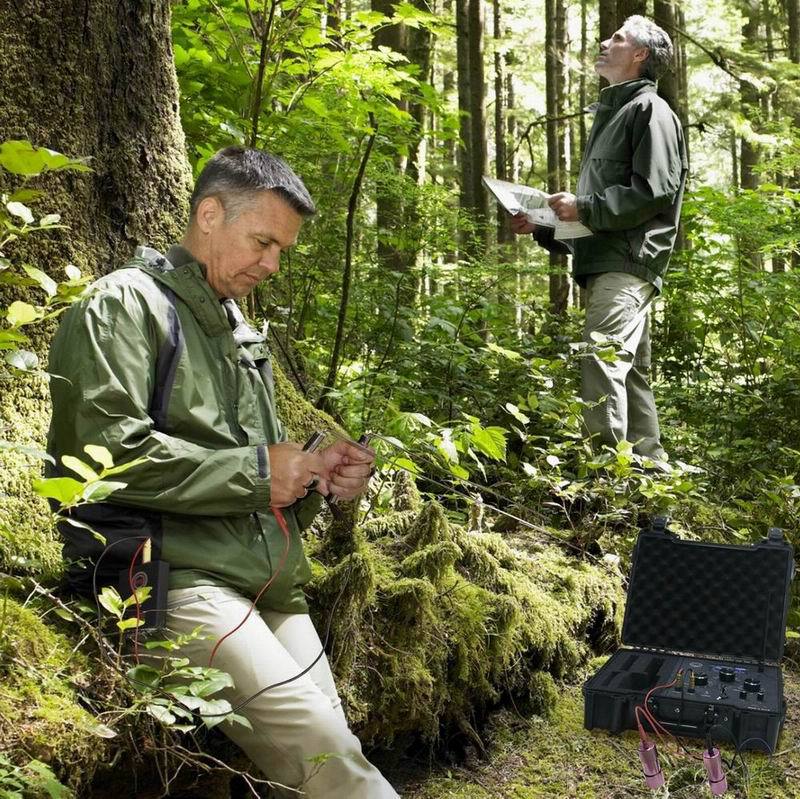
Before turning on the scanner, put the EPX10000 transmitter on the ground, the sensor antenna is connected to the corresponding jacks of the transmitter. When open the transmitter,never plug the sensor, if doing it, it will cause damage to the machine.
Previously used EPX10000 scan,first make all the necessary connections.
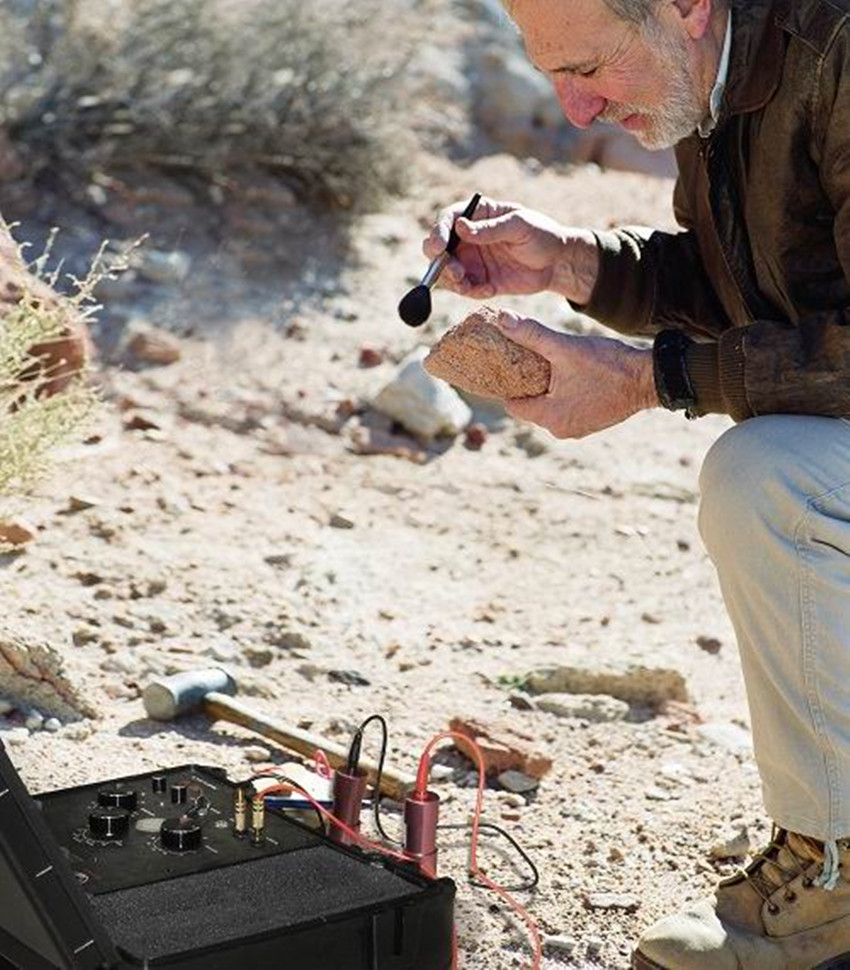
1.The sensor is connected to the scanner testing (+) testing (-) on the jack, insert the probe of sensor on the earth
2.The transmit antenna signal transmission is mounted on the corresponding interface
3. with the power key is turned "On / Off" knob, turn on the power. At this time, in the LCD area, power indicator,horizontal trmming,longitudinal trmming indicator lights.
4. at this time, EPX10000 is scanning all selected element . Before starting the detection process, please let it work 3-5 minutes, which will be briefly explained later.
5.after the end of the operation, remember to turn off EPX10000. For ease to use,the instrument requires the use of a smll battery charger is connected to the power line charg instrument.
Receiver - The rotary switch on the top of the receiver panel are the headphone and the antenna jack. When do not use, do not connect the antenna rods with the receiver! If the antenna rod is saved with it inserted in the receiver , it will cause the battery to drain.
Receiving antenna rod - rod antenna is designed to point out to the operator that he / she has entered a power transmission line between the sensor and the target. Under normal circumstances, the operator should hand held the antenna rod stably and balanced, as high as your waist, and slightly in front of the operator. When hand held the antenna rods, rod antenna should is pointed to the front and parallel to each other and separated by 8-18 inches away. Everyone needs to find their own best distance. It takes trial and error to find. Please remember, the people who operate this device, calm relaxed person will do better than the tense stiff! When you enter the RF energy line, measured metal,the antenna rod will naturally cross.
And the radar scan pointer will stop in one location. When the antenna and radar cross and the scanner pause, you see the dawn of victory would come.
Method of operation:
The key points of the molecular frequency detector are the method of holding the receiver rod and the position and walk of the body.
The user must stand in a relaxed position with feet slightly apart and arms close to the body but not too tight. When holding the receiving pole, the palms and wrists should not be too hard, so that they automatically reach a state of balance in the hands and are always parallel to each other. Hold the bar in your hands so that it is parallel to the ground to increase its sensitivity, or tilt it slightly downwards by 5-8° to achieve a better balance (if you are new to molecular frequency detection).
The most important thing is to practice holding the rods until they no longer "move away" from each other.
After balancing the receiver rods, the operator should learn to walk, step by step, while keeping the rods balanced. This is another trial-and-error method: the pace must remain normal, firm and even. Each step spans the same distance or both poles will be out of balance. Shrugging the shoulders will cause both poles to be out of balance. Both shoulders should be kept at the same height. Try the exercises and take care to maintain these conditions.
Receiver bar grip, position and walking exercises should follow the requirements of the test target test, where the operator should place the test target object on the ground and observe the response of the receiver bar.
Once the "Start Scanning" message appears on the screen, start walking in a circular motion at a distance of 3 metres from the EPX10000 detector, keeping the receiver bar balanced and plugged into the power module.
If there is a target object present, the poles will be fully crossed as we walk the transmission line between the target object and the EPX10000 ground detector. This transmission line is typically 15cm wide for a single target object. We can determine if it is a stable signal by careful inspection. The operator will then need to return, relax, and move to the transmission line again. If the receiver bar crosses each time, we can then track the target signal following the signal tracking diagram in Example 2. When the operator crosses the buried object, there will be no display. The target object is located between the position of the latter pole crossing and the position where no crossing is indicated. A metal detector can be used to pinpoint the target object. Refer to our example and continue to practice for better results.
How the scanner works and positioning by the law of triangles:
It took years of experimenting with various theories, ideas and devices at the SCANMASTER Research Centre to develop the transmitter, which is small and powerful enough to transmit radio frequency (RF) signals remotely through the soil. The signals emitted are directed into the soil in a 360o full range. It is this inductive energy that makes the target detectable.
The signal emitted by this scanner enters the ground through a power sensor. If the target sought is within range, the signal is absorbed by the target. The indicator bar is inserted into the power amplifier to make the receiver circuit complete. This circuit is formed by the capacitance of the operator's body and the inductive components of the power module. The circuit will play an active role as the operator walks across the transmission line between the scanner and the target. The inductive RF energy from the transmission line interacts with the inductive capacitance of the operator's circuit. At this point, the normal response is for the indicator bars to attract each other. This actually communicates to the operator that the target being sought is within the range of the scanner.
The range of the scanner varies with many factors. The first and most important variable is target size. Next are soil conditions (presence of electrolytes) and length of time in the ground. Another factor that enhances the operational performance of the scanner is the chemical changes in the soil surrounding the target. For targets that oxidise easily, either the object itself or its container will give a stronger signal. The potential for the target to amplify the signal transmitted by the scanner will be greater due to the oxidation factor. There are targets within range, and as your feet begin to cross into the energy line, under normal circumstances, the antennae rods will be attracted to each other. Under normal circumstances, a single target has an energy line width of 20 inches.
Once the energy line has been determined, the next step is to measure the target using either S-line measurement or triangulation.
Loop around the transmitter to find the signal line, as shown in the diagram trace the signal line by walking back and forth in an S. When you first pass the signal line the receiving antenna should cross (mark where the antenna crosses each time), when the antenna does not cross you are off your target. When you walk past the target, indicate that the antenna no longer crosses.
How to locate in hard-to-reach areas using the rule of triangles:
When one is trying to locate a target that is located in a body of water, cliff, etc. that is difficult to access (e.g., a lake or stream), the scanner operates just as well as if the target were located on level ground. The most important issue to remember is that the operator must be able to get between the target and the power sensor so that the antenna bar can indicate any potential targets. Obviously, you can't get the antenna bar underwater. The best approach is to speculate on the situation, and to apply some basic geometry when triangulating the target from shore or from a large deck boat.
When operating from shore, first see if there are any targets within the scanner's measurement range. If there are, the first step is to move the scanner, which is also the easiest step, so that it operates on one of the four main compass bearings (north, south, east or west). The second reading should be at a 45° angle to the first reading. For example, if the first reading position is located due west of the target, the second reading position can be either due northwest or due southwest. Refer to the diagram below.
Operating from a boat has some interesting challenges for the operator. The first challenge is deck size. The operator must be able to have a radius of about 5′-10′ centred on the power sensor. Second, the probe of the power sensor must be in contact with the deck of the vessel. To solve this problem, a wet towel is used to wrap around the probe and the wet towel is in contact with the deck. The RF energy will be directed in the direction of the target and along the deck surface. The use of buoys is required to help triangulate the target. The rest of the process is very similar to the first method
Note that Position #1 is located due west of the target. Position #2 is located due southwest. Given that situation, we end up with 2 45° angles and a 90° angle. Therefore, the distance from Position #1 to Position #2 is equal to the distance between Position #1 and the target. The result is that you have triangulated the target and now know the distance from position #1 to the target.
Note that Position #1 is located due west of the target. Position #2 is located due southwest. Given that situation, we end up with 2 45° angles and a 90° angle. Therefore, the distance from Position #1 to Position #2 is equal to the distance between Position #1 and the target. The result is that you have triangulated the target and now know the distance from position #1 to the target.
Equipment Maintenance:
The EPX1000000 requires little maintenance. The indicator rods are susceptible to salt and moisture corrosion in the environment and need to be cleaned regularly with a good quality brass cleaner to keep the appearance and performance intact.
The EPX1000000 requires little maintenance. The indicator rods are susceptible to salt and moisture corrosion in the environment and need to be cleaned regularly with a good quality brass cleaner to keep the appearance and performance intact.
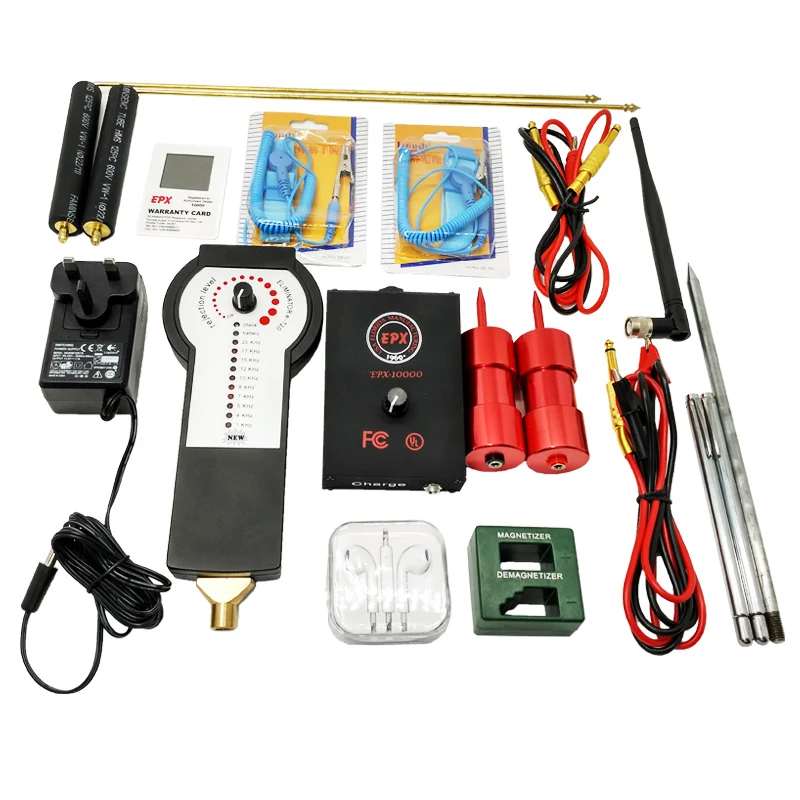
Package includes:
1 x EPX10000 underground metal detector ( with UK plug )
1 set of accessories
Note:
Import duties and taxes are NOT included in the item price or shipping cost, buyer is responsible for it.
The real color of the item may be slightly different from the pictures shown on website caused by many factors such as brightness of your monitor and light brightness.
Please allow slight manual measurement deviation for the data.