Tips:
1.Connect the USB cable before connect the HDMI cable.
2. Connect the USB cable to the same raspberry pi or computer, don't use power adapter, or the touch can't work.
3. IPS screen, resolution 1024x600
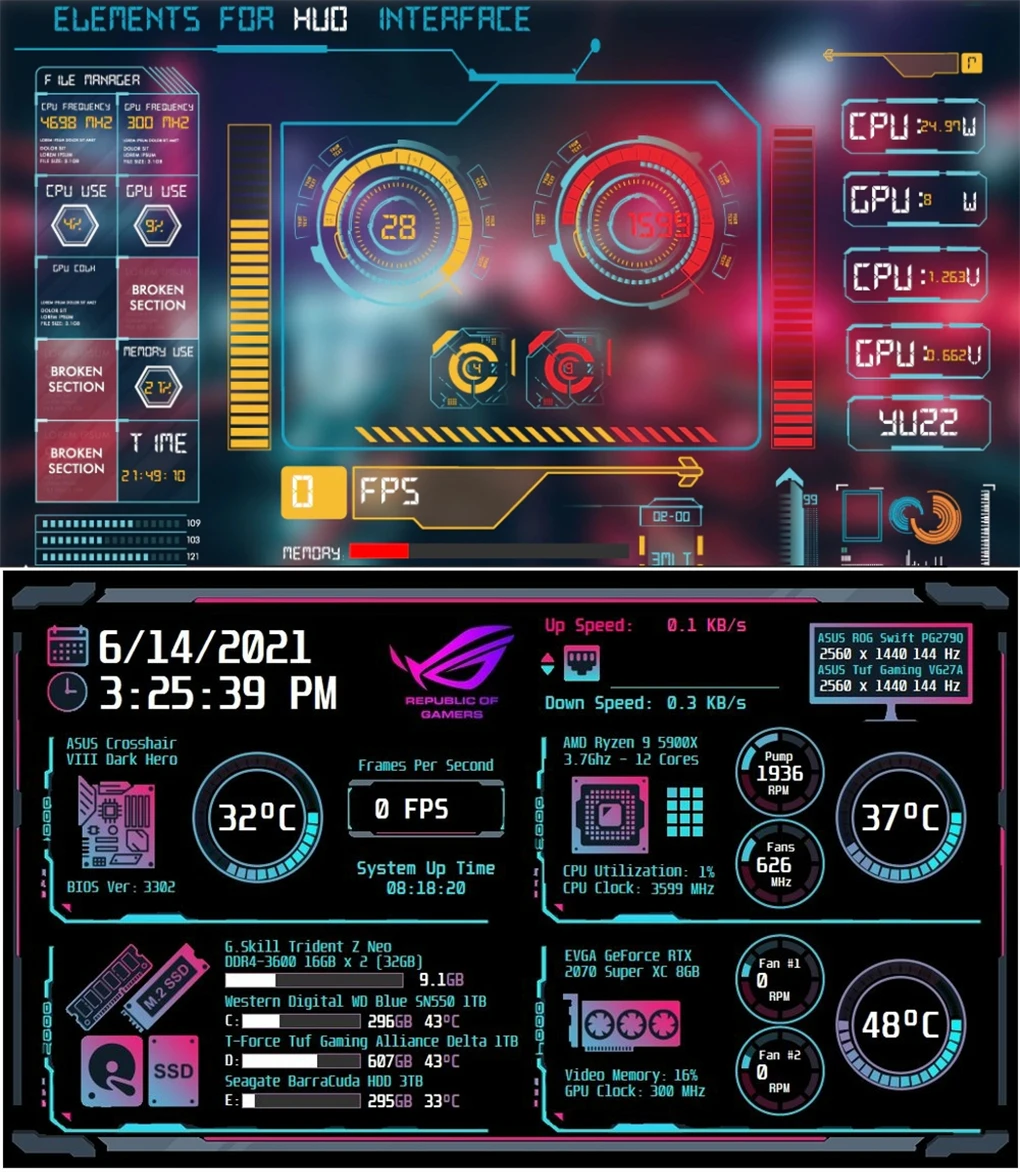
4. Can use as secondary screen, listing page include the download link of theme file for aida64.
Features
Come with customized standard
Free driver in Raspberry Pi support Raspbian, Ubuntu, Kali, win10I0T and other single touch
Free driver in computer xp (single point), win7 (some single point) win8, winl0 five point touch
Support for HDMI devices such as set-top boxes, BB black, Banana/0range pi, Jetson nano and car recorders
Support backlight switch control, open 400ma current, turn off 120ma current,
Support universal Android usb interface, usb voltage input does not affect, usb touch interface card off
USB touch interface supports USB touch, supports display power supply, does not affect usb voltage interface
Free driver Support for Ubuntu, Debian, Cent0S, Arch, Kali, Redhat, etc.
Full HD fidelity stereo audio output, support 44. 1Khz to 196Khz audio track
Parameters
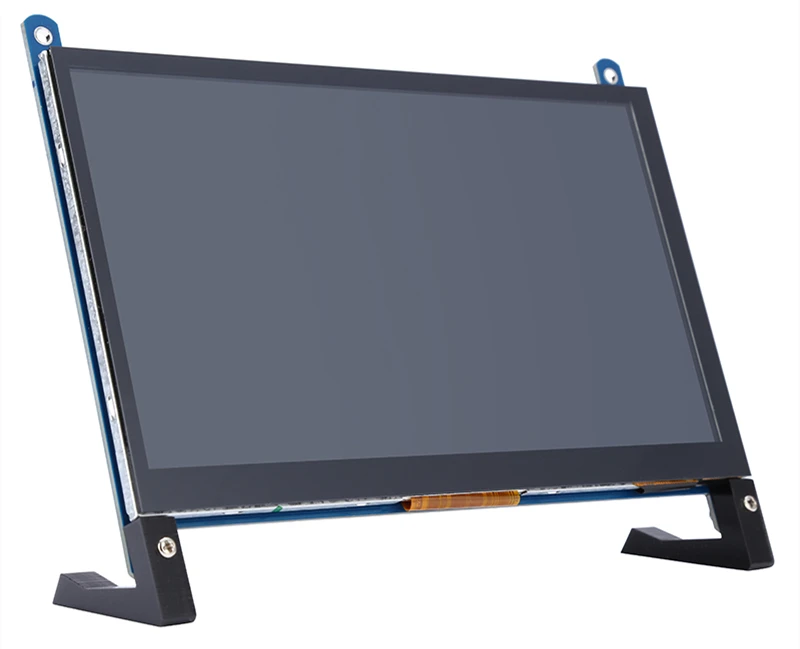
LCD display size: 7 inch
Module structure:HDMI Display + USB touch +PCB
Display resolution:1024x600
Module dimensions:165x12x7.75mm
Active area dimesnsions:154.21x85.92mm
Pixel pitch:0.1506x0.1432mm
Color pixel arrangement:RGB stripe
Display mode:Transmissive type, Normally white mode
View direction(Gray inversion): 6'clock
LCD interface type: HDMI
CTP interface type: USB
Numbers of colors:16.7M
CTP structure type: Cover Glass + ITO Glass (G+G)
CTP structure hardness:>6H
Brightnees:600(typ) cd/m2
Contrast Ratio:300:1
Operating temperture:-20 ~70C
Storage temperture:-30~80C
Weight:376g
How to use with Raspbian/Ubuntu Mate/Win10 IoT Core System
Step 1, Install Raspbian official image
Download the latest image from the official download.
Install the system according to the official tutorial steps.
Step 2, modify the “config.txt”
After the programming of Step1 is completed, open the config.txt file of TF card root directory and
add the following code at the end of the file, save and eject Micro SD Card safely:
max_usb_current=1
hdmi_force_hotplug=1
config_hdmi_boost=7
hdmi_group=2
hdmi_mode=87
hdmi_drive=1
display_rotate=0
hdmi_cvt 1024 600 60 6 0 0 0
Step 3, Drive the 7inch HDMI display with the Raspberry Pi
Insert the TF Card to Raspberry Pi, connect the Raspberry Pi and LCD by HDMI cable;
connect USB cable to one of the four USB ports of Raspberry Pi,and connect the other end of the USB cable to the USB port of the LCD;
then supply power to Raspberry Pi; after that if the display and touch both are OK,it means drive successfully (please use the full 2A for power supply).
How to use as PC monitor
Connect the computer HDMI output signal to the LCD HDMI interface by using the HDMI cable
Connect the LCD's USB Touch interface (Either of the two MicroUSB) to the USB port of the device
It can use as a secondary screen,use with AIDA64 to shows the status of your computer.
This is the download link of the theme file for aida64, but we can't provide the aida64 software and guide
Link 1:https://www.adrive.com/public/yDHP3W/1024x600%207inch.rar
Link 2:https://drive.google.com/file/d/1KlGopHaOdnN_EKbE8bp73BHqK-xHrLOg/view?usp=sharing
Packagei include
1 x 7 inch display
1 x HDMI cable
1 x Micro HDMI adapter
1 x USB cable
1 x Standard