Complete Service Manual
for
SINGER CLASS 237
SEWING MACHINES
*********
Includes:
Timing and Adjusting Instructions, Inspection and Replacement of Machine Parts, Electrical Diagrams, Illustrations, Repair and Replacement of Motor, and much more
for
Singer 237 Machines
*********
Singer 237 Service Manual. (photo 02)

This is NOT a standard "Xerox"
copy of the Singer manual!
This manual is professionally printed
on the same heavy-weight pure-white paper as the
original Singer manual!
Heavy-weight pure-white paper. (photo 6)

Description:
This listing is for a professional reproduction of the Singer Manufacturing Co. Service Manual for class 237 sewing machines. This is NOT a standard "Xerox" copy of the Singer manual! It is professionally printed on the same heavy-weight pure-white paper as the original Singer manual! It is super clean, the text and the illustrations are very sharp, and it is nearly identical in size and in paper type to the original Singer manual. This manual is not a bunch of pages stapled at the top corner. This manual is professionally bound, just like the original Singer manual.
Manual is professionally bound. (photo 3)

***************
This manual is professionally bound,
just like the original Singer manual.
***************
Unlike the original 50 year old manual that has become frail, brittle, mildewed, stained and yellowed after so many years, this manual looks like an original Singer manual that has been preserved in NEW CONDITION!
Just like the Singer company printed their manual on their in-house printing press, we printed this manual on our in-house printing press. This manual may also serve you for the next 50 years.
In fact, if we didn't tell you,
you could not tell the difference
between this manual and the
original manual!
This 31-page full-size Service Manual is complete and very clean with no "black dots," smudges, stains, or any other imperfections. No pages are missing, dirty, or damaged.
The manual includes descriptions and illustrations which will show you how to do the following:
Description of Machine 237
Preparation of Machine for Inspection
Lubrication
Set Presser Foot at Correct Height
Set Feed Dog at Correct Height
Set Feed Dog Lengthwise in Throat Plate Slots
Set Feed Dog Sidewise in Throat Plate Slots
Eliminate End Play or Binding of Feed Rock Shaft and Feed Lifting Rock Shaft
Set the Take-Up Spring
Adjust Needle Thread Tension
Set Needle Bar at Correct Height
Check for Binding or End Play of Upright Shaft
Eliminate End Play or Binding in Thread Take-Up Mechanism
Removal and Replacement of the Needle Thread Tension
Removal and Replacement of the Hand Wheel and the Clamp Stop Motion Flanged Bushing
Removal and Replacement of the Bobbin Winder
Removal and Replacement of the Stitch Length Regulator
Removal and Replacement of the Feed Lifting Rock Shaft
Removal and Replacement of the Oscillating Rock Shaft
Removal and Replacement of the Shuttle Race Frame
Removal and Replacement of the Feed Rock Shaft Assembly
Removal and Replacement of the Feed Bar Assembly
Removal and Replacement of the Crank Connecting Rod
Removal and Replacement of the Feed Forked Connection
Removal and Replacement of the Needle Bar
Removal and Replacement of the Presser Bar
Removal and Replacement of the Needle Bar Vibrating Bracket
Removal and Replacement of the Thread Take-Up Mechanism
Removal and Replacement of the Upright Arm Shaft
Removal and Replacement of the Horizontal Arm Shaft
Check Position of the Needle in Relation to All Purpose Throat Plate
Time the Pendulum Movement of the Needle Bar
Eliminate End Play of Horizontal Arm Shaft
Eliminate End Play Between Needle Bar Vibrating Cam and Gear, and Worm Gear
Wiring Diagram - Machines with B.A. 60 Motor, Controller and S-7 Light
Wiring Diagram - Machines with B.Z. 60 Motor, Controller and S-7 Light
Fit Complete Motor Set on Machine
Hints for Adjusters and Mechanics
"Run-In" the Machine
Index
Here are photos of some of the pages from the manual. You can see the superb quality of the print, photos, diagrams, and the quality of the paper itself.
Professional machine lubrication. (photo 05)

Setting Height of Presser Foot and Feed Dog. (photo 07)

Setting Height of Needle Bar. (photo 09)

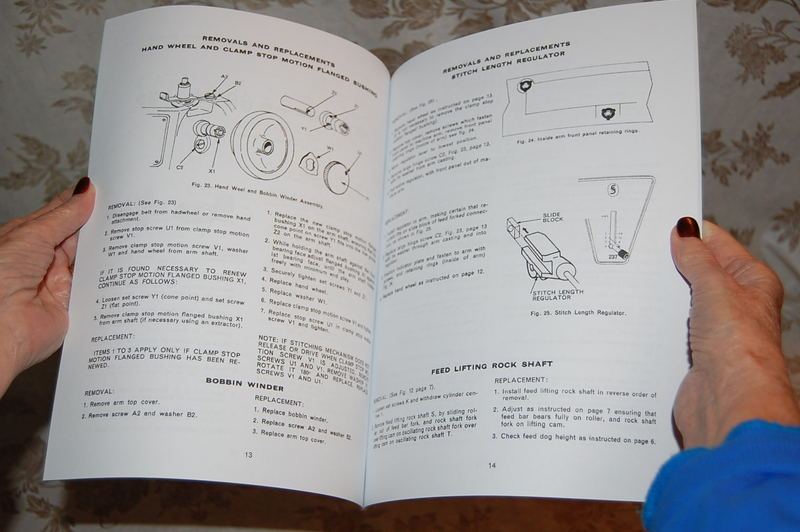
Removal and Replacement of: Hand Wheel, Bobbin Winder, Stitch Length Regulator. (photo 11)
Removal and Replacement of: Needle bar, Presser Bar, Vibrating Bracket. (photo 13)

Wiring Diagram of Class 237 Machines. (photo 15)

These service instructions are very detailed and utilize diagrams and illustrations to make it easy to understand and carry out the instructions. In most cases a simple tool, like a screwdriver, is needed to do the task. And, once you know what to do, you may be able to perform the timing or the adjustment in just a couple of minutes! And when needed, you may be able to expertly remove and replace every single part of the machine!
These Service Instructions
are a
MUST
for every owner
of a
Singer 237 Sewing Machine!
*****************
Note for users of “Singer Service Manual for Class 237” :
Most people who use this manual also use an additional manual which includes service information that is directly applicable to Class 237 machines.
This additional manual is:
“Illustrated List of Parts for Class 237”
(available at our eBay listing # 202920575923)
The additional “Illustrated List of Parts Manual” includes parts list, description and illustrations of every single component, screw, nut, spring, plate, rod, hinge, handle, arm, etc. All these parts and components are illustrated in the proper size with respect to their actual size and with respect to each other.
This “Illustrated List of Parts for Class 237” manual is available at
our eBay listing # 202920575923.
SHIPPING POLICY:
The shipping cost stated above is ONLY for the 50 US states. Inquire about shipping cost to Canada and other International locations.
All orders are shipped next business day after payment is received and cleared.
FEEDBACK POLICY:
We guarantee to leave all customers positive feedback the next day after positive feedback is received.
PAYMENT NOTICE:
We accept PayPal. Please note that we ship ONLY to confirmed PayPal addresses.
Return Authorization:
You may return your entire purchase within 7 days of receipt. Please request a Return Authorization prior to returning the items. The items must be returned with all the accessories and in the original box, with all packing materials. Please insure the shipment against lose and damage. We will refund your original purchase price, less shipping and handling fees.
IMPORTANT NOTE
eBay 5-Star Rating System:
Due to eBay's new Star rating system and it's lack of explanation and clarity, I would like to try to give you an insight as to how it affects our business. You would think that a 4 star rating would be good as eBay says. Not So! Anything less than a 5 star rating on all categories might as well be a Negative feedback score. If you are not completely satisfied with any transaction and believe it to be our fault, your fault or nobodies fault, contact us and we will take care of the problem.
Here is Our promise:
1. We inventory and have in stock every item that we list for sale.
2. We ship every item within 24 to 48 hours.
3. We offer the fastest shipping in the industry, and pack each item securely.
4. We offer superior customer support and quick response to your eBay message or email.
5. We strive to achieve 100% customer satisfaction.
-----------------------------------------------------------------------------------------------