MAX 1618 A/B
Performance Resin System Suitable For Many Application
1 Quart PART A Resin And 1 Pint PART B Curing Agent
(48 Fluid Ounce- 1.5 Liters Combined Volume)
PRODUCT HIGHLIGHTS
- Easy 2:1 Parts by Volume Mix Ratio, Brush, Roller Coat, Pour Applied
- The Clearest Epoxy Resin System Available
- The Low Viscosity Formulation For Fast Fiber Wet-Out and Flow
- 100% Reactive, No Excessive Plasticizer Fillers
- Balanced Working Time For Dry and Wet Lay-up
- Excellent Gloss and Color Retention, Non-Blushing
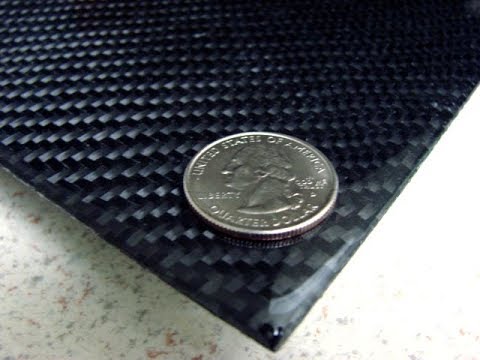
- Excellent For Fiberglass, Carbon Fiber, Aramid Fibers (Kevlar, Nomex)
- Excellent Impact And Shatter Resistance
- Balanced Strength And Flexibility
- Excellent Water/Salt Water Resistant For Marine/Aero Applications
- Excellent Chemical And Solvent Resistance
- Low Shrinkage And Dimensional Stability
- Tested For Aerospace Application Under NASA Low Out Gassing Specifications
MAX 1618 A/B is a two-component epoxy-based resin system that specifically addresses the performance aspects of crystal clarity and good color stability while demonstrating high mechanical performance suitable for structural composites fabrication. It is low in mixed viscosity and offers 60 to 80 minutes of working time, and cures within 24 hours at 75°F (24°F).
MAX 1618 is mixed 2:1 by weight or by volume. The mixed consistency is similar to glycerin or baby oil.
It exhibits high gloss and absolute water clarity upon cure when used as an aesthetic or protective coating for wood and a variety of other substrates. MAX 1618 A/B is also an excellent choice for composite fabric lamination; it works well with carbon fiber, fiberglass, Kevlar, and various hybrids, natural and synthetic fabrics.
MAX 1618 A/B bonds very well to various substrates such as glass, fiberglassed surfaces, soft and hard metal alloy with the proper surface preparation. It also creates a permanent bond to concrete, masonry, ceramic,and stone substrates.
With proper surface preparation, MAX 1618 A/B bonds to plastic substrates such as
polycarbonate, ABS, PVC, and polypropylene (PP) . Low Surface Energy (LSE) plastics such as UHMW and high-density polyethylene will require a
MAX 1618 A/B can also utilized as an electrically compound suitable for electronic potting or encapsulating printed circuit boards and other high and low AC/DC voltage circuitry.
MAX 1618 A/B is non-conductive and does not promote oxidation in copper circuitry.
It demonstrate excellent anti-corrosion protective coating for ferrous metals and metals prone to oxidation.
MAX 1618 bonds to glass, metals, concrete, stone, plastics, wood, and FRP substrates. With proper surface preparation the bond will be permanent and is suitable for extreme cold temperatures and up to 180ºF.
MAX 1618 A/B resists extreme and repeated thermal shocks making it well suited for bonding substrates with dissimilar thermal expansion and contraction coefficients. It performs well in a wide range of service temperatures. MAX 1618 A/B is generally room temperature cured but can be snap-cured at elevated temperatures for a short period.
MAX 1618 A/B is 100% solids and does not contain Ozone Depleting Chemicals (ODC), non-reactive plasticizers, or solvent fillers. It is low in toxicity and is practically odor-free. Upon full cure, MAX 1618 is safe for direct skin contact and does not outgas, leach, or exude any of its chemical constituents. Please visit this link to view mixing and other application video tutorials and other application demonstration.
Available Kit Sizes
|
MAX
1618 A/B 48 Ounce Kit |
|
|
MAX
1618 A/B 96 Ounce Kit |
|
|
MAX
1618 A/B 1.5 Gallon Kit |
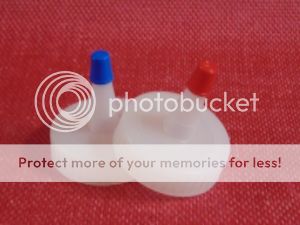
THIS KIT INCLUDES A SET OF YORKER CAPS FOR CONTROLLED DISPENSING.
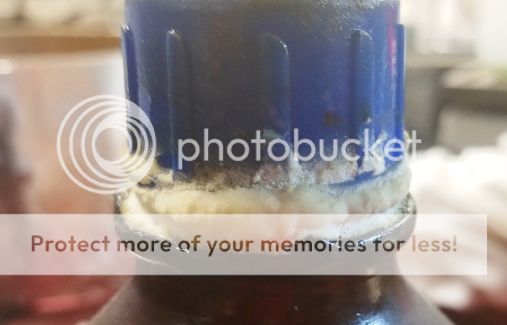
CARBAMATE CRYSTALS THAT FORM ON THE PUMP WHEN THE CURING AGENT IS EXPOSED AMBIENT MOISTURE AND CARBON DIOXIDE.
THESE CRYSTALS ARE INSOLUBLE IN EPOXY RESIN RESULTING IN CONTAMINATION AND CAUSES POOR CURE AND AMINE-BLUSHING.
Use these spouted Yorker caps and cut the tip for accurate dispensing.
When done, just replace the tip cap and it will exclude ambient moisture and air and keep the resin system viable for years.
Unless the kit is used continuously and within a short period of time, using dispensing pumps will cause more problems than ease-of-use.
Dispensing pump leaves the bottle open to moisture from the pressure-relief hole.
Unless you plan on using the whole kit in less than a month, the curing agent degrades if exposed to high humidity and free oxygen in the environment.
To use the caps, cut off the tip to the desired hole size, and attach, do not cus pass the ridgeline that keeps the tip cap in place.
To dispense, lay the plastic jug unto its side and apply pressure on the bottle to dispense the contents.
When done replace the tip cap and the container is sealed and it will be usable for years.
We highly recommend using a scale to measure the mix ratio accurately.
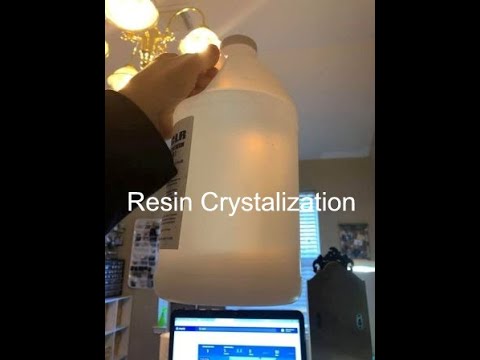
RESIN CRYSTALLIZATION FROM PROLONGED STORAGE OR COLD WEATHER EXPOSURE
The resin component or the PART A may crystallize due to cold temperature exposure.
Please inspect the resin component for any solidified crystals which will appear as waxy solid or cloudiness on the bottom of the PART A bottle.
An information postcard is included with each package.
Please Cut And Paste This Link For More Processing Instructions
https://theepoxyexperts.com/coldweathernotice/
View The Following Video For Identification And Processing.
DO NOT USE UNLESS PROCESSED TO REVERT ANY CRYSTALIZED RESIN BACK TO A LIQUID STATE AND AVOID POOR CURED RESULTS.
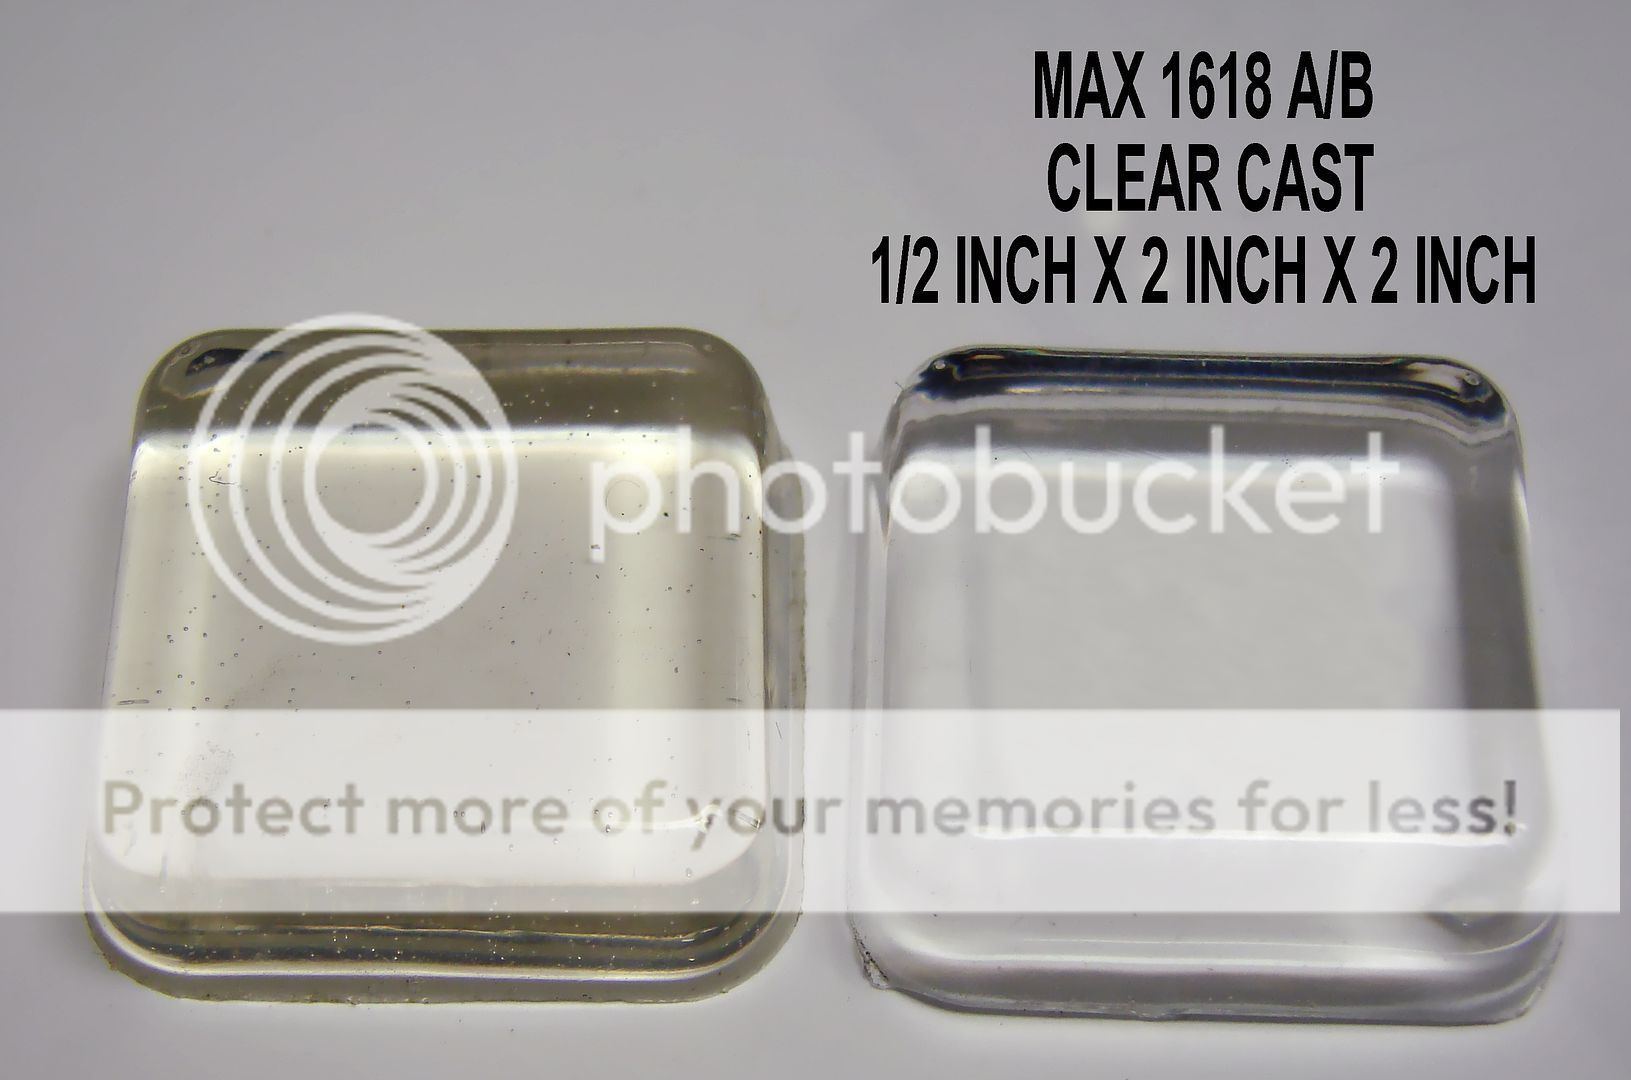
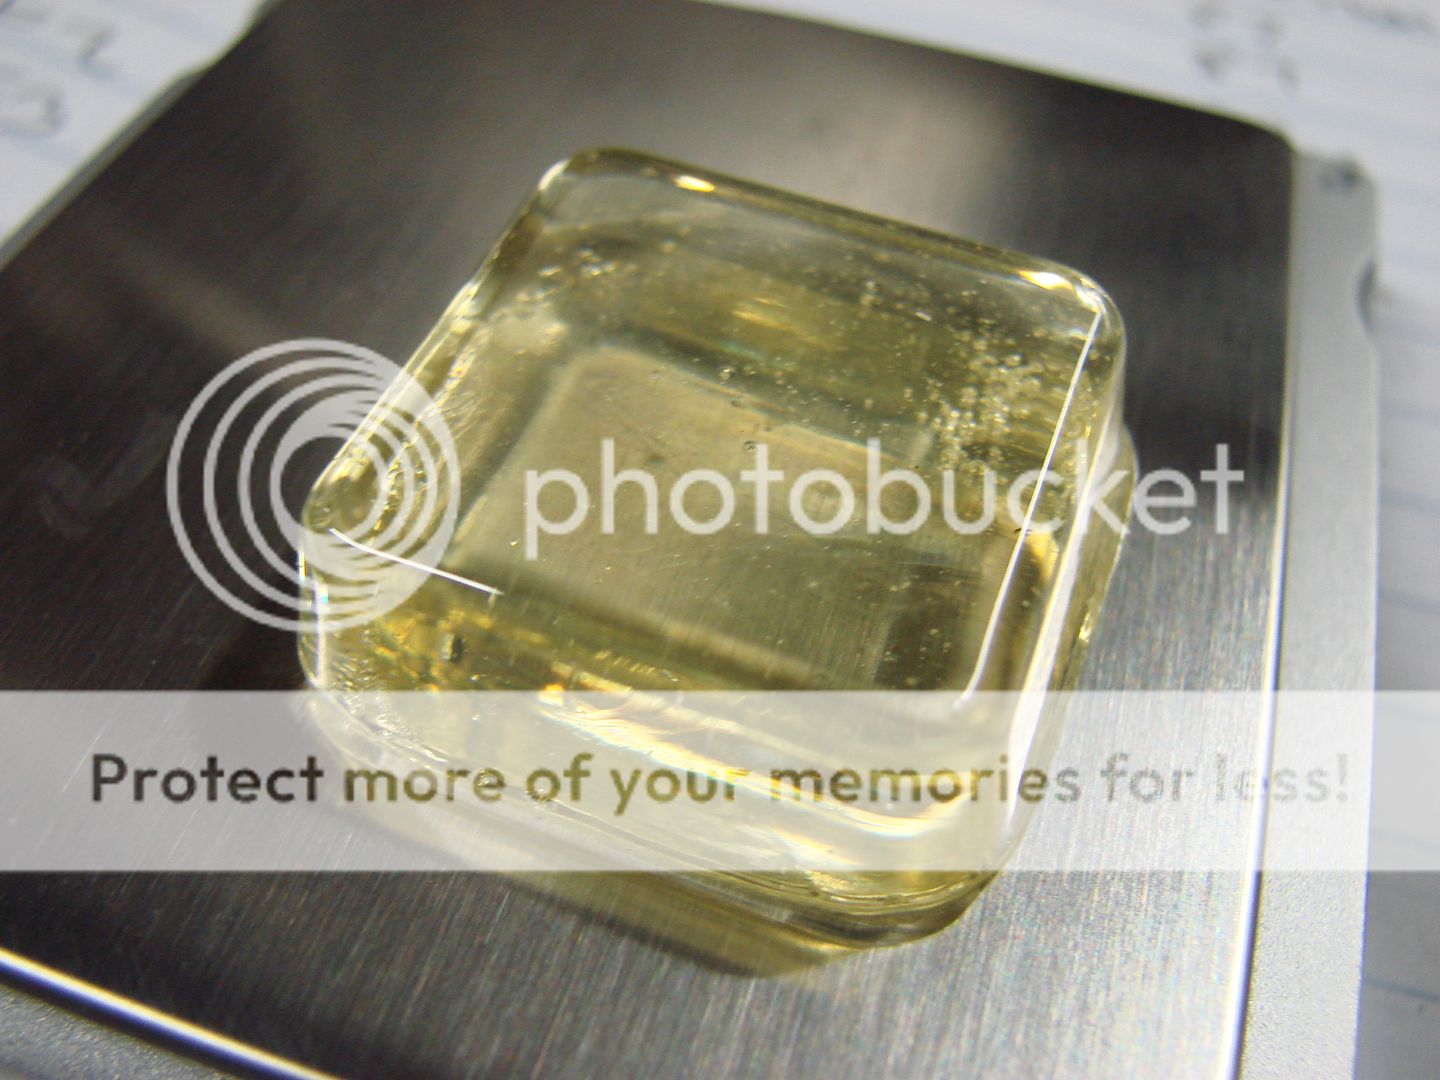
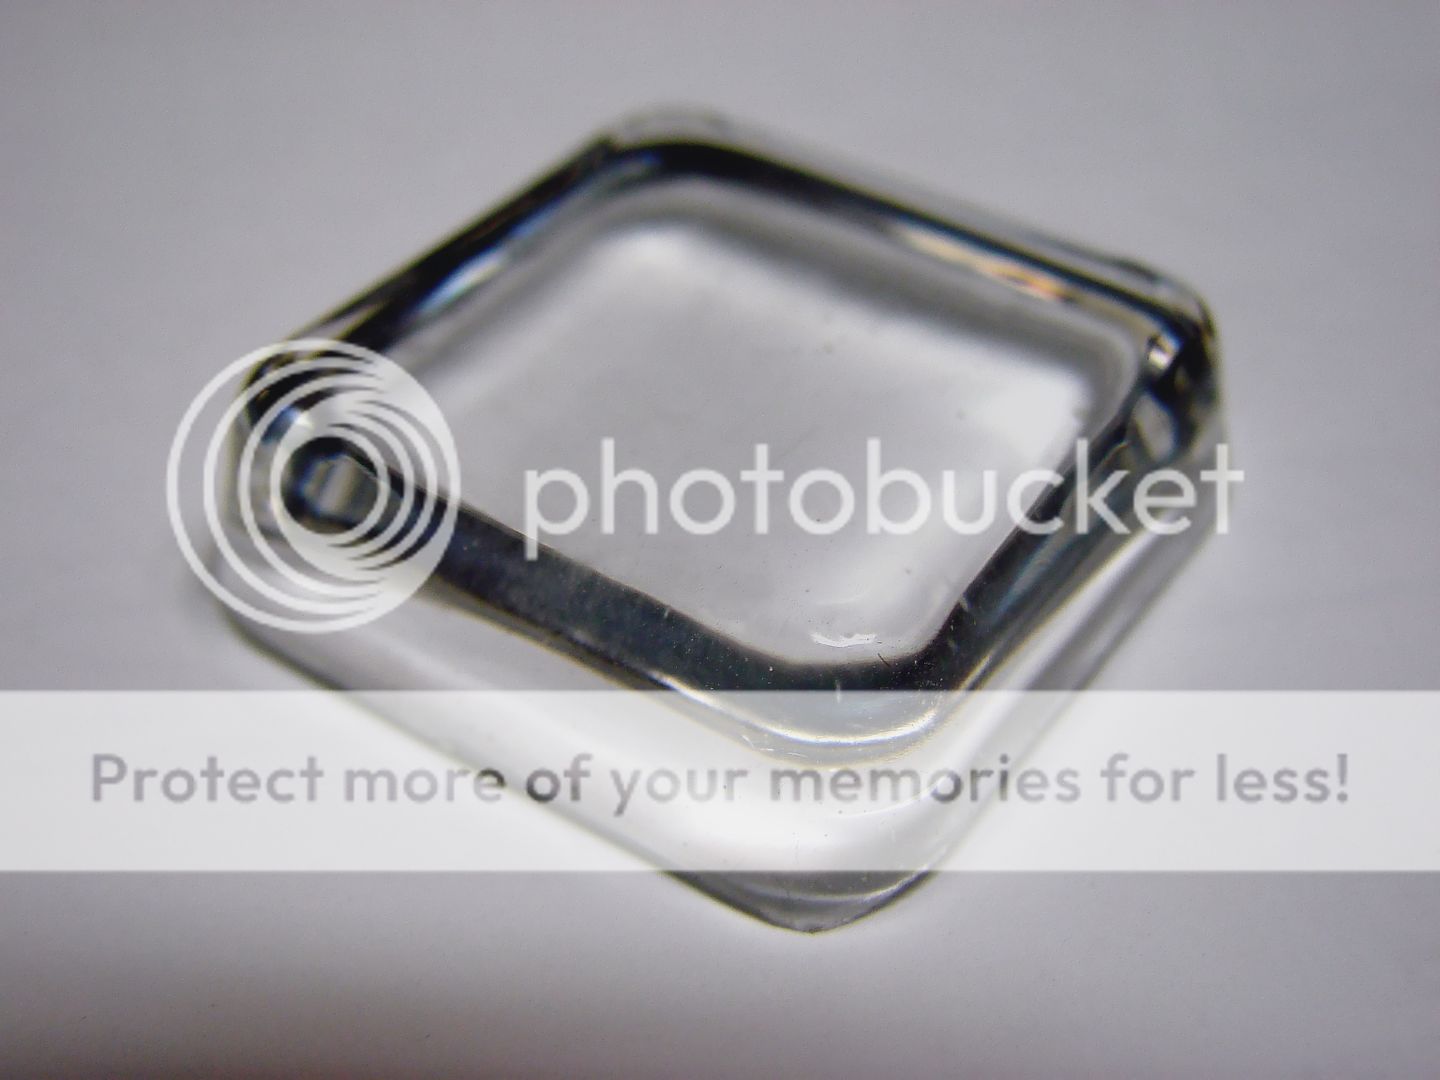
MAX 1618 A/B COLOR STABILITY COMPARISON
Clear epoxy systems formulated using plasticizers and accelerators are more susceptible to discoloration or extreme yellowing over time.
The left specimen is a typical 1:1 mix ratio resin system that causes poor color stability even if it is unexposed to direct sunlight or elevated temperature.
Note the MAX 1618 A/B dramatic difference in color stability.
Both samples were formed at the same time and kept in a temperature controlled (25.0°C +/- 0.5 °C) chamber that filters out any UV radiation from an ambient light source.
MAX 1618 A/B SUNLIGHT EXPOSURE STUDY
Note the low yellowing performance of MAX 1618 A/B
compared to a common brand epoxy resin after equal direct sunlight exposure of 2 months.
Competitive brand clear resin system formulated with nonylphenol plasticizers after sunlight exposure.
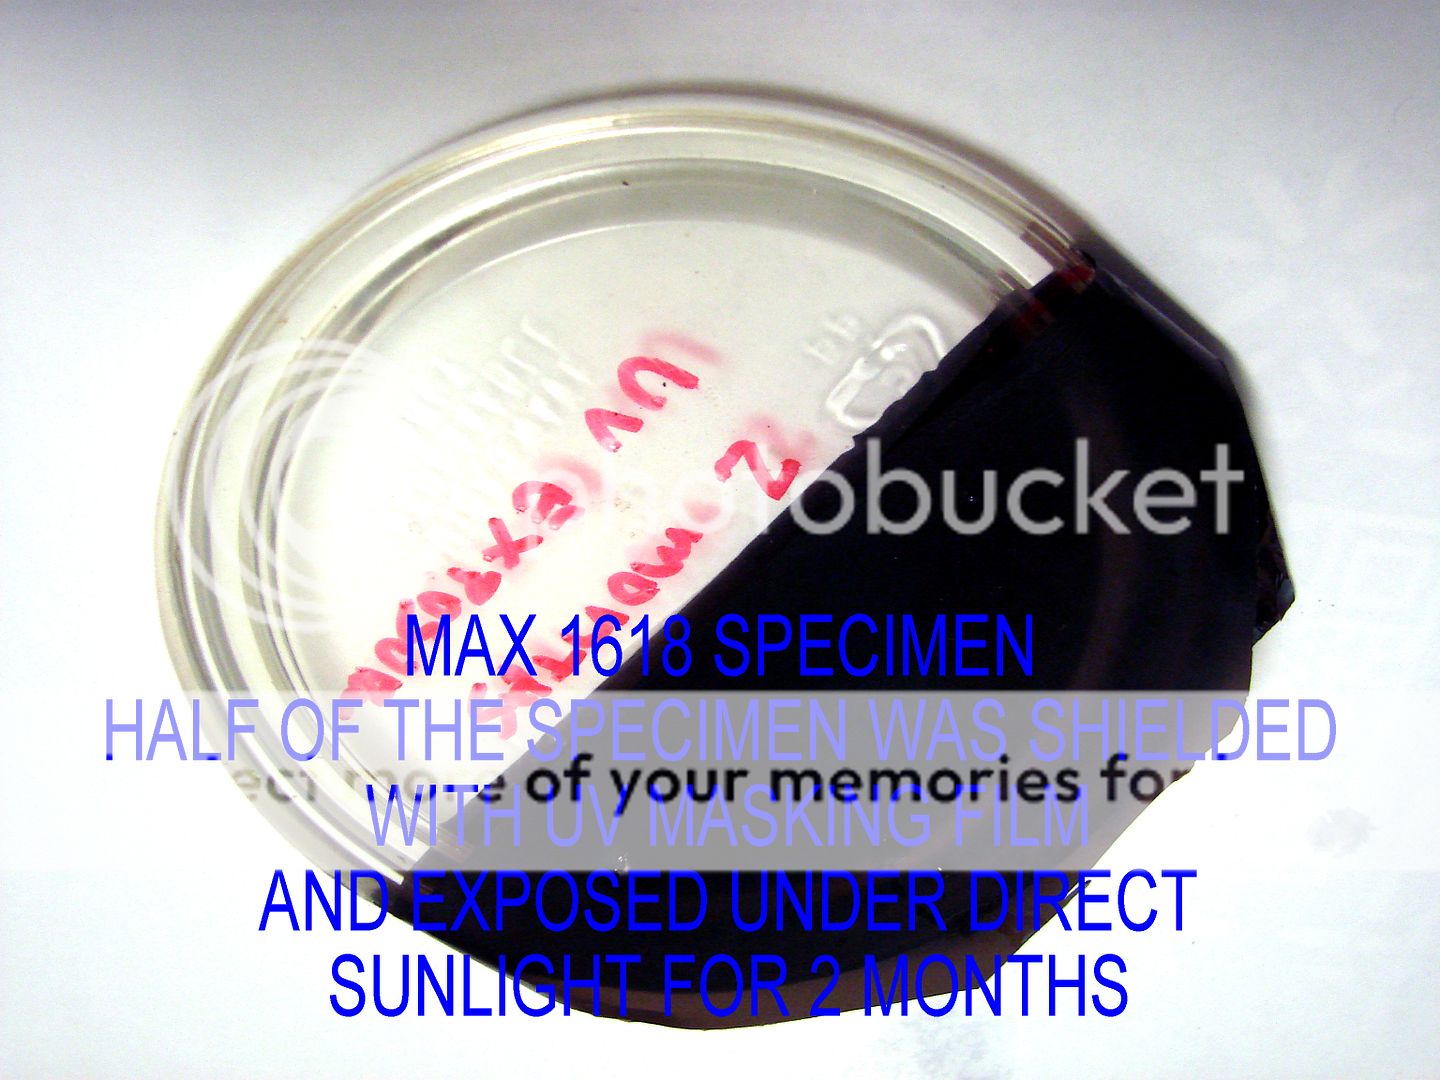
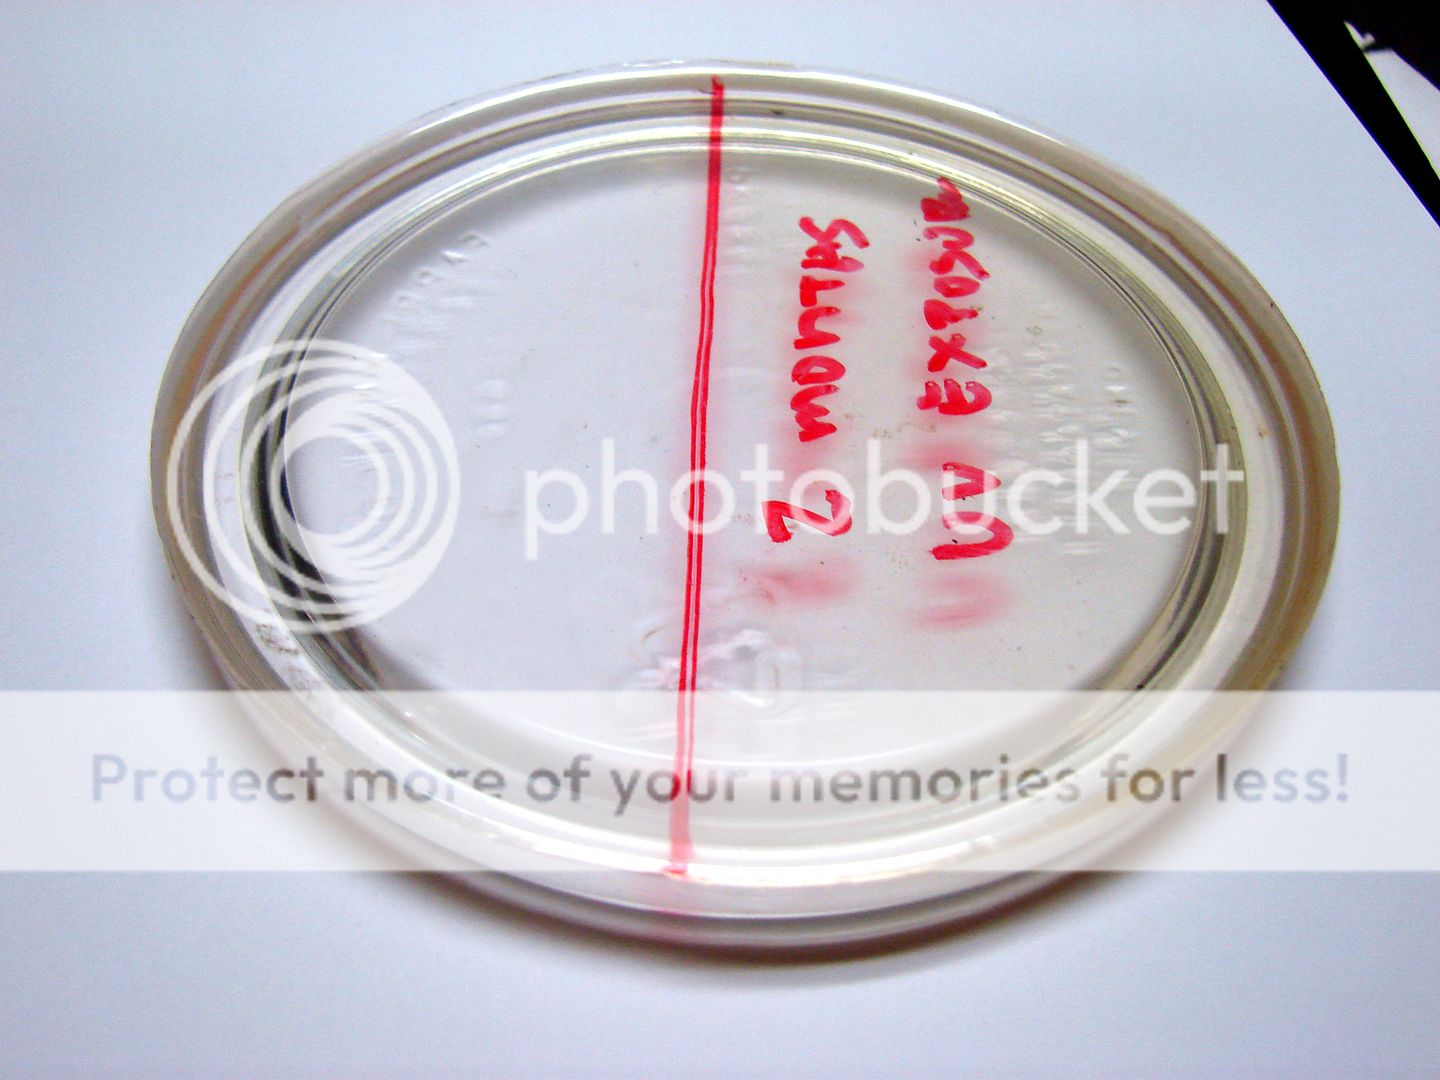
COLOR STABILITY STUDY BY ACCELERATED UV EXPOSURE
Note the absolute clarity of the MAX 1618 A/B specimen exhibiting excellent crystal clear transparency
EPOXY RESIN MIXING TECHNIQUE
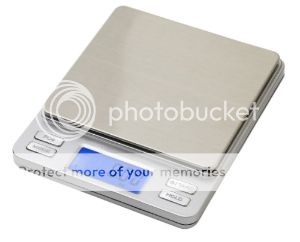
Purchase this scale with any of our product offering and the shipping cost of the scale is free.
https://www.ebay.com/itm/222630300203
MIXING TECHNIQUE

How To Mix Epoxy Resin For Food Contact Coating. Avoid Tacky Spots, Minimize Air Bubble When Mixing - YouTube
Video will open in a new window
Using the eBay App? Paste link into a browser window:
EVIDENCE OF POOR MIXING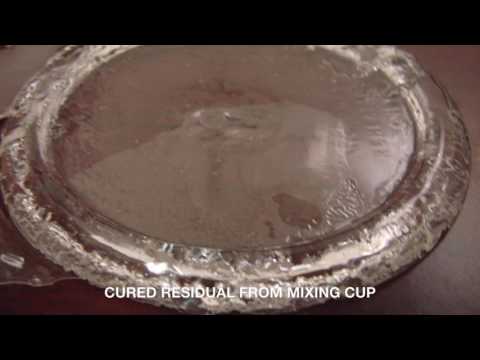
Air Bubble Removal Technique
Cutting And Polishing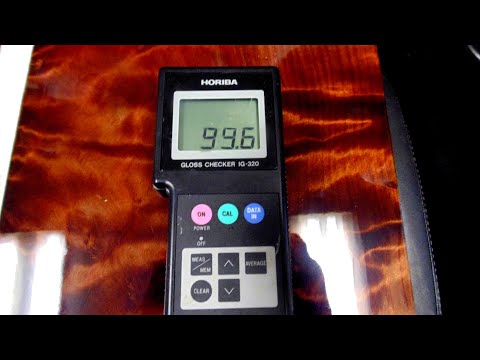


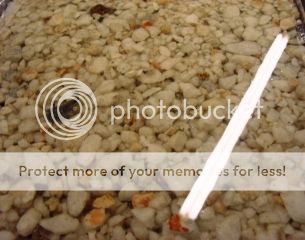
River rock embedding with MAX 1618 A/B
PRACTICAL GUIDE ON HOW TO USE THIS RESIN SYSTEM AS A COATING
Review All Published Data Regarding This Product.
Proper Usage Data And Other Detailed Information Are Posted At This Page.
Mix the Resin And Curing Agent Only After The Surface Is Prepared For Application.
Finally, Ensure The Application Must Be Fully Cured Before Use In Any Application, Especially For Food Contact Application.
STEP 1. SURFACE PREPARATION
The quality of adhesion of any coating or adhesive application is dependent on how well the surface is prepared. The resin system must be able to properly 'wet-out' the surface to form a continuous film. Surfaces demonstrating poor wettability prevents the liquid resin from forming a cohesive bond.
It is highly recommended that the MAX CLR comes in direct contact with the base substrate to achieve the best performance.
Application of MAX CLR over an existing coating limits the adhesion performance of the MAX CLR of the coating it is applied to.
Improper surface wetting yields poor coating application(crawling) and cured adhesion that will delaminate during use.
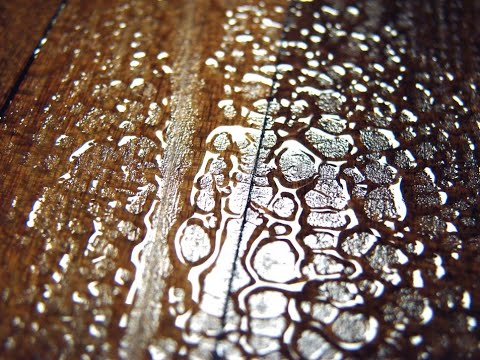
POOR WETTING OF THE RESIN (CRAWLING) DUE TO OIL-BASED STAIN APPLIED ON WOOD


This hydrophobic characteristic is commonly seen in nature when leaves repel water that keeps the surface dry.
It limits the interaction between liquids and solids.

Wetting is the ability of a liquid to interfaces or wet-out a solid surface. Its dynamics is expressed as surface tension. A surface that demonstrates low surface tension, such as waxed surface, oily surface or slick plastics like Teflon will prevent the liquid resin to wet-out and cause poor adhesion.
In the same respect, if the surface is coated from a previous application, the epoxy adhesion is limited to adhesion quality of the coating is applied over. Make sure to remove any loose or peeling old coating before application to avoid delamination. If possible remove the old coating by mechanical sanding or power washing so the applied epoxy is in direct contact with the base substrate. Applying a coating over oil-based stain should be avoided.
View the following video that demonstrates a method of testing the surface to determine the wettability by using tap water.
Why Epoxy Coatings Bead-up. Testing & Preparing Surface Before Applying Epoxy Coating Or Adhesive. - YouTube
Video will open in a new window
Using the eBay App? Paste link into a browser window:
The Following Surface Preparation Procedures Are Recommended.
METALS AND CONCRETE Degrease Metals– Wipe surface with a lint-free rag dampened with Methyl Ethyl Ketone (MEK) or acetone to remove all oil, dirt, and grease. Etch Metals – For optimum results, metal parts should be immersed in a chromic acid bath solution consisting of:
The solution is held at 160°F (71°C), and the parts left immersed for 5 to 7 minutes. Rinse – remove metal parts from etching bath and rinse with clean water. (distilled water is recommended). Etch Concrete- Use commercially sold concrete etching solution (hydrochloric acid based works best). Neutralized per instructions, rinse and allow to dry thoroughly. ALTERNATE PROCEDURE Degrease and dry – Degrease the surface as noted above, sand or sandblast the surface lightly but thoroughly. Rinse with acetone or Methyl Ethyl Ketone (MEK), and dry. | GLASS Degrease – With MEK as above, or with a strong boiling solution of a good grade household detergent. Etch – For optimum results, degreasing can be followed by the chromic acid bath outlined above. WOOD Sand – Bonding surfaces should be sanded lightly, but thoroughly to remove all external contamination. Clean – Carefully remove all dust, or particles of wood from sanded areas. A stiff and clean brush or compressed air can be used. PLASTIC Clean – Remove all dirt, oil, or other surfaces contaminated with detergent soap or degreasing solvent and water, followed by thorough rinsing and drying. A solvent that does not have a detrimental effect may also be used. Sand – Surfaces to be bonded should be sanded lightly, but thoroughly to remove surface sheen. Clean – Carefully remove all dust or particles of plastic from the sanded area. A clean brush, lint-free cloth, or compressed air may be used. |
STEP 2. CHECK THE PART A OR RESIN BOTTLE FOR CRYSTALLIZATION
COLD WEATHER NOTICE
RESIN CRYSTALLIZATION FROM COLD TEMPERATURE EXPOSURE
OR AFTER PROLONGED STORAGE
This Is The Common Cause Of Poor Cured Results During The Winter SeasonThe resin component or PART A may crystallize due to cold temperature exposure or after being stored. This resin system was developed for high strength applications and other mandatory applications.
It is of a high purity grade that makes it prone to crystallization. Similar to high purity compounds like honey that freezes when placed in cold temperature like the refrigerator (below 50ºF or 10ºC); high purity epoxy resins freeze or crystallize below 57°F.
All kits are heat-processed before packaging to ensure PART A is in its liquid form. Please inspect the resin component for any solidified crystals, which will appear as waxy solid or cloudiness on the bottom of the PART A bottle.
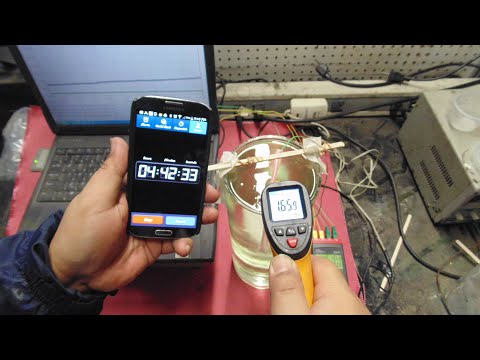
To ensure a trouble-free cure, heat-process the PART A bottle, especially for pigmented resin systems and destinations where the cold temperature is expected.
Crystallization also occurs if the kit has been stored over the winter months.
Please inspect the resin component for any solidified crystals, which will appear as waxy solid or cloudiness on the bottom of the PART A bottle.

All kits are heat-processed before shipping to ensure PART A is in its liquid form. However, during the winter months the kit may be exposed to cold temperature during shipping. Store the kit above 65°F with caps securely in place and the kit will remain viable for up to 3 years or longer and prevent crystallization.
Visit this link for more details:
https://www.youtube.com/watch?v=x31gkzdZkiI&list=PL6x6YfnNMffz_q_ZdTRPDjhjFtkVeZZuf
Cut And Paste To A New Browser.
New eBay Guidelines Does Not Allow Direct Links Outside eBay Environment
OR
Enter This Search Phrase On YouTube.Com To View Our Video Tutorial Playlist
MAX EPOXY RESIN - The Epoxy Experts Video Tutorials
How To Use And Apply Any Epoxy Resin SystemDO NOT USE UNLESS PROCESSED TO REVERT ANY CRYSTALLIZED RESIN BACK TO A LIQUID STATE AND AVOID POOR CURED RESULTS.
Click The Play Button To ViewSTEP 3. DETERMINE THE AMOUNT THE BATCH SIZE NEEDED
Calculate the amount to be mixed, mixing more than what is needed produces waste.
Measure the length x width x thickness of the area to be coated to obtain the cubic volume of the resin needed.
Cut And Paste This Link To Use Our Coating Calculator: http://instacalc.com/35245/embed
Cut And Paste The Link To A New Browser.fffffffff
New eBay Guidelines Does Not Allow Direct Links Outside eBay Environment)
BASIC EPOXY RESIN USAGE AVOIDING EXOTHERMIC RUN AWAY REACTION - YouTube
Video will open in a new window
Using the eBay App? Paste link into a browser window:
How To Mix Epoxy Resin For Food Contact Coating. Avoid Tacky Spots, Minimize Air Bubble When Mixing - YouTube
Video will open in a new window
Using the eBay App? Paste link into a browser window:
STEP 5. APPLICATION DEMONSTRATIONS
Condition the ambient temperature to 75°F for best results. Ensure that the work area is dust free and well ventilated. MAX CLR is self-leveling and will continue to flow until it polymerization converts it to a solid phase. It can be applied by using a bristle or high-density foam brush/roller or poured into place. MAX CLR is self-leveling, ensure the surface is level and secure any leaks by using tape to create a temporary patch and prevent leakage.
When sealing wood substrates, the first application causes 'grain-raising' to occur. Apply a thin coat over the bare wood and allow the coating to seal the porosity and prevent bubbles to occur from further outgassing. For most wood materials, 'grain raising' will occur.Allow the MAX CLR to cure for 12 hours. For wood substrates, lightly sand the surface with fine sandpaper (180 grit) to remove the grain raising. Apply the another coat over the previous coat to a smooth surface that will serve as the final top coat.
What Is 'Grain Raising'?
When a liquid coating is applied over wood, fibers will begin to swell, and this will produce 'grain raising' to occur.

Remove dust and debris by wiping with a lint-free rag dampened with alcohol or acetone and allow to dry. Once the surface is prepared, apply the second coat of MAX CLR which will yield a smooth blemish free coating.
ROTO-COATING OF MAX CLR ON WOOD TURNED BOWL
Click Window To Watch Video Demonstration
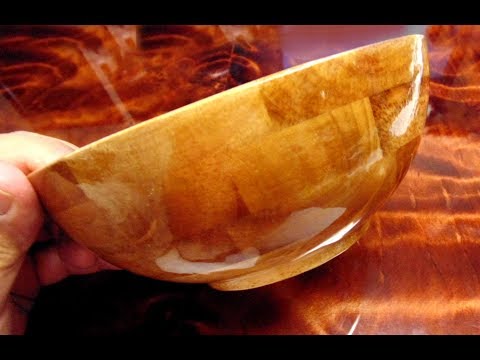
How To Apply MAX CLR A/B On Wood-Turned (Lathed) Bowl - Uniform Epoxy Coating Application Technique - YouTube
Video will open in a new window
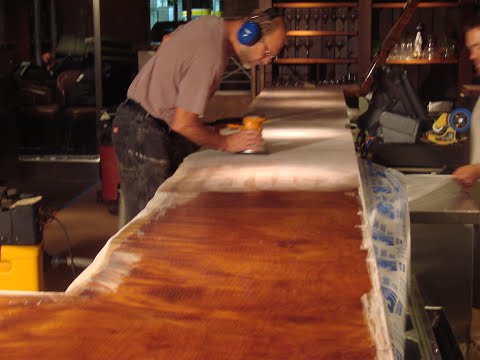
HOW TO APPLY EPOXY RESIN ON TABLE TOPS DEMONSTRATION -With MAX 1618 A/B - YouTube
Video will open in a new window

EPOXY THICK COATING APPLICATION MULTIPLE POURING - DOUBLE POUR MAX 1618 AB - YouTube
Video will open in a new window
How To Remove Air Bubbles From Epoxy Resin Coating. Improve Flow And Leveling Of Epoxy Coating. - YouTube
Video will open in a new window
Always review the published data and information for proper usage, application, and general safety information.
Our expert staff of engineers is available for consultation and application assistance.
Please Check Out Other Available Resin Systems At Our eBay Store
For our complete listing, please Visit our eBay store! DON'T FORGET OUR EPOXY MIXING KIT
Everything You Need To Measure, Mix, Dispense & Apply The Epoxy Resin
Click The Link To Add To Order
https://www.ebay.com/itm/222623932456
Accurate measuring of the mix ratio is equally as important to attain the intended cured properties of the resin system. The container must withstand the tenacity of the chemical and must be free of contamination. Most epoxy curing agent has a degree of corrosivity, as a general practice, protective gloves should be worn when handling chemicals of the same nature.
MIXING KIT CONTENTS 1 Each Digital Scale -Durable, Accurate Up To 2000.0 Grams
4 Each 32-ounce (1 Quart) Clear HDPE Plastic Mix Cups
4 Each 16-ounce (1 Pint) Clear HDPE Plastic Mix Cups
One Size Fits All Powder-Free Latex Gloves
2 Each Graduated Syringes
Wooden Stir Sticks
Foam Brush
IMPORTANT NOTICE
Your purchase constitutes the acceptance of this disclaimer. Please review before purchasing this product.
The user should thoroughly test any proposed use of this product and independently conclude the satisfactory performance in the application. Likewise, if the manner in which this product is used requires government approval or clearance, the user must obtain said approval.
The information contained herein is based on data believed to be accurate at the time of publication. Data and parameters cited have been obtained through published information, PolymerProducts and Polymer Composites Inc. laboratories using materials under controlled conditions. Data of this type should not be used for a specification for fabrication and design. It is the user's responsibility to determine this Composites fitness for use.
There is no warranty of merchantability for fitness of use, nor any other express implied warranty. The user's exclusive remedy and the manufacturer's liability are limited to refund of the purchase price or replacement of the product within the agreed warranty period. PolymerProducts and its direct representative will not be liable for incidental or consequential damages of any kind. Determination of the suitability of any kind of information or product for the use contemplated by the user, the manner of that use and whether there is any infringement of patents is the sole liability of the user.
