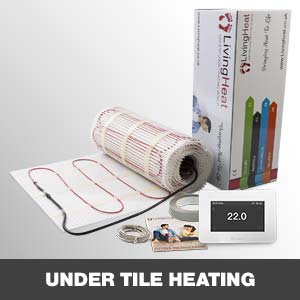
underfloor heating in screed heating cable kit

ideal for use in new-build properties, extensions and as conservatory primary heat source
Electric double insulated Under Floor Heating In Screed Cable Kits. Are designed to be installed under a 50-75mm concrete screed. Living Heat, In Screed heating cables are suitable for use in all rooms and under virtually all floor coverings as the Primary Heat Source and is also Ideal for Heating Conservatories.
You may also require
When you buy this kit you receive
- This high-quality ETFE advanced insulation system is made with the highest quality Fluoropolymers and does not contain any PVC coatings whatsoever
- Our systems are only 2mm in thickness making our cables one of the thinnest on the market today
- The advantage of our ultra-thin cable means that they can be tiled straight over if needed
- Our heating systems are constructed using multi-strand wires making them extremely tough
Included
| PRODUCT COMES WITH |
|---|
| Floor probe (When Ordered with thermostat) |
| Fixing Tape |
| Fitting Instructions |
THINGS TO KNOW ABOUT THIS PRODUCT
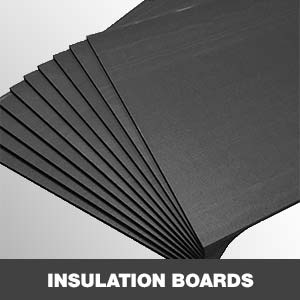
It is not recommended to install underfloor heating over an un-insulated subfloor, areas without the addition of a minimum 10mm+ insulation layer otherwise you may experience slower warm-up times. This is especially true under new concrete screeds, (please do not hesitate to contact us for advice on insulation or see our eBay store for suitable insulation).
Our kits are easy to lay and there is no specialist labour or tools required. The only qualified person required is an electrician, who is only required to make the final connection to the mains power. The cables are simply clipped onto the supplied fixing strips, or taped down at the desired spacing and screeded over in the normal way.
Please Note: with larger areas multiple cables may be sent to make up the square meterage of your area.
Underfloor heating in screed cable has been specifically designed to be used under new screed floors. This gives the advantage that almost any floor covering can be installed over the underfloor heating once the screed has dried. The second advantage is that if the floor covering, ever has to be changed or repaired it will not affect the heating system as it is protected under the screed layer. All our systems are capable of being used as the primary heat source, No other heating is required. A minimum of 70% floor coverage is recommended (@ 170w/m2 or above for use as a primary heat source when using in screed heating cables. In some instances a larger area or wattage may be required please contact us if you are unsure and we will be happy to assist
| In screed Kits come with |
|---|
| Heating Cable |
| Programmable air and floor thermostat |
| Floor Probe included with Thermostat |
| High adhesion fixing tape |
| Acrylic floor primer |
| Primer applicator |
| 15 Year Warranty |
| Full fitting instructions |
| Technical Free Phone Help Line |
| FREE next working day delivery service |
HEATING SYSTEM
- Easy and quick to lay
- Life Time warranty
- Pre-spaced fixing strip/bars provide for added accuracy
- Ultra thin & durable heating element (Only 2mm deep)
- Acrylic floor primer
TECHNICAL INFORMATION
- 3m Long cold / connection tails
- Double insulated and earthed elements
- Output Rating as per above table
- Operating Voltage 230/240V 50Hz
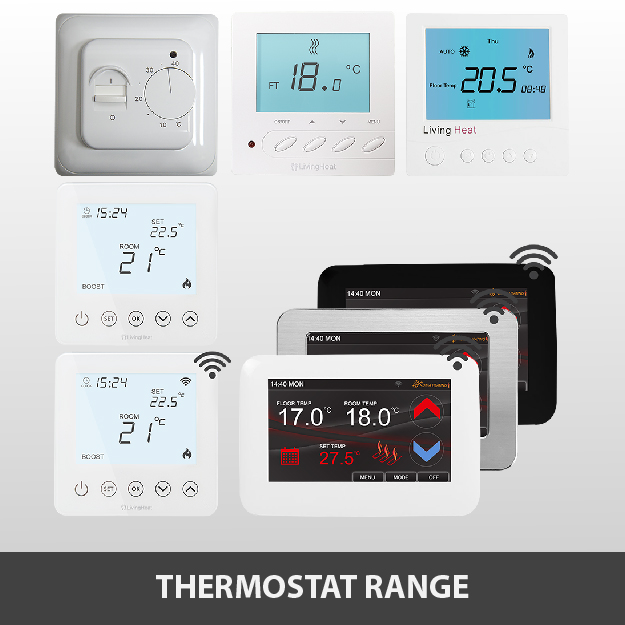
Our range of thermostats fit into a standard 1 gang back box. And can carry a maximum load of 16amps. After this threshold is passed a simple contact or relay switch must be installed.
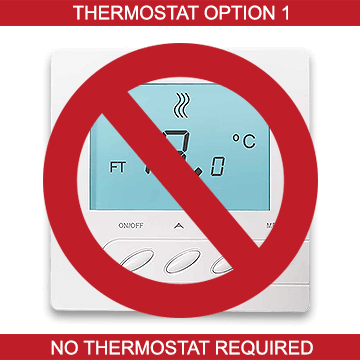
No Thermostat
We would not recommend Underfloor heating without a thermostat and floor probe to control your underfloor heating system.
Option 1
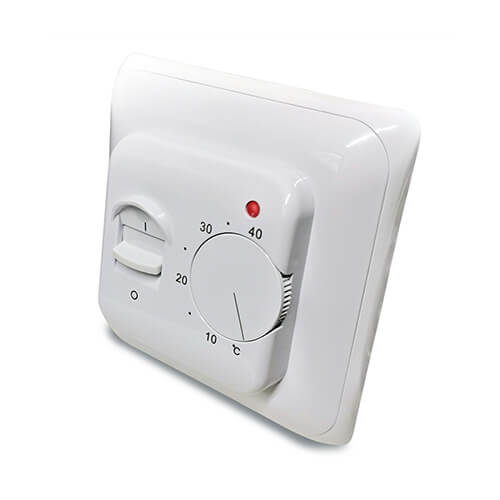
M1 Manual Thermostat
- On/Off Switch
- Temperature Turn Dial
- Fits standard 1G electrical wall box
- 1 Year manufacturer's warranty
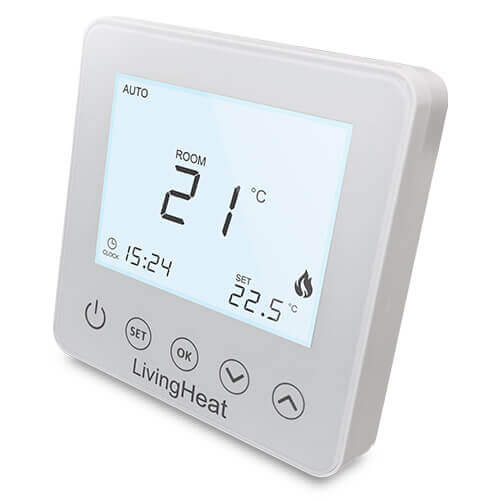
Option 2

M5 Manual Thermostat
- 2.6" LCD Screen
- Air and Floor temperature sensors
- Blue LED backlight for easy viewing
- Fits standard 1G electrical wall box
- 1 Year manufacturer's warranty
Option 3
T5 Touchscreen Thermostat
- Touch Control LCD Screen
- Fits standard 1G electrical wall box
- Low profile design
- 1 Year manufacturer's warranty
Option 4
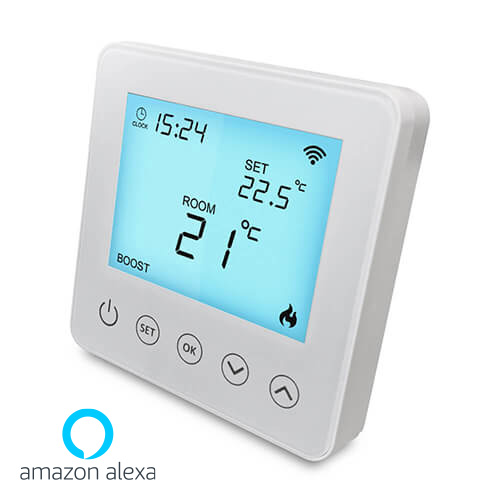
Wi5 Wi-Fi Thermostat
- Touch Buttons
- Alexa & Google Enabled
- Full Wi-Fi Phone Control
- Low brightness backlit for nighttime bedroom use
- Auto / Manual
- 6 Events per day
- Frost protection
- Temperature Override
- Fits standard 1G electrical wall box
- 1 Year manufacturer's warranty
Option 5
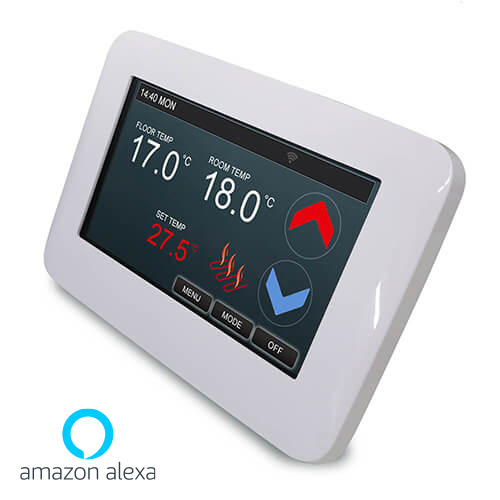
CT1000 Wi-FI Colour Touchscreen White Thermostat
- Full WiFi Connectivity
- Easy to use APP
- Full 4.3" Colour Touch Screen
- Colour touch screen
- 6 Timed Events x 7 day programmable cycle
- Adjustable comfort Mode, Economy Mode, Party Mode, Holiday Mode and program Mode control
- Manual override facility
- Air and Floor temperature sensors
- Fits standard 1G electrical wall box
- 1 Year manufacturer's warranty
Option 6
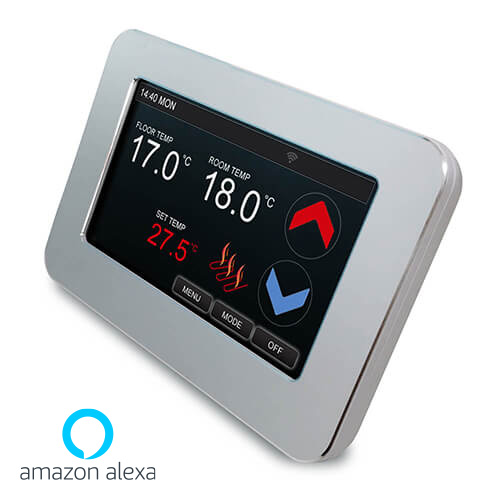
CT1000 Wi-FI Colour Touchscreen Silver Thermostat
- Full WiFi Connectivity
- Easy to use APP
- Full 4.3" Colour Touch Screen
- Colour touch screen
- 6 Timed Events x 7 day programmable cycle
- Adjustable comfort Mode, Economy Mode, Party Mode, Holiday Mode and program Mode control
- Manual override facility
- Air and Floor temperature sensors
- Fits standard 1G electrical wall box
- 1 Year manufacturer's warranty
Option 7
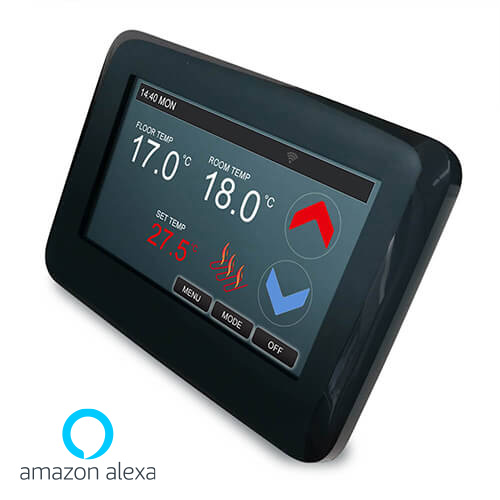
CT1000 Wi-FI Colour Touchscreen Black Thermostat
- Full WiFi Connectivity
- Easy to use APP
- Full 4.3" Colour Touch Screen
- Colour touch screen
- 6 Timed Events x 7 day programmable cycle
- Adjustable comfort Mode, Economy Mode, Party Mode, Holiday Mode and program Mode control
- Manual override facility
- Air and Floor temperature sensors
- Fits standard 1G electrical wall box
- 1 Year manufacturer's warranty
Option 8
INSTALLATION & FITTING INSTRUCTIONS
To work out what size kit you require please follow the next 3 steps
1. Measure the total floor area that you wish to be heated. (Less any immovable objects such as bath or kitchen units that you do not want the heating to be fitted under).
2. Take off a 10 cm border around the floor area to be heated as the heating elements should not be run up tight against any walls.
3. This measurement should then be rounded down to the nearest 0.5m, (ie 5.27m2 floor size would be rounded down to a 5m2 kit size). The measurement can be rounded down to the nearest 1m on larger room areas.
FITTING GUIDE
1. Make sure the floor area is level, clean and free of any dust and debris. If laying stone over the surface, the floor should be made ready to receive the flooring before the heating or insulation boards are laid (if required).
1A. If using the fixing bars, Cut and fix the bars 10cm in from the edge of the room, parallel to each other. Only two edges of the room require the bars to be fitted as the wire will run back and forth between these bars. The bars should be fitted to maximize the length of cable down each run. Once fitted the cable can be run back and forth between the bars working its way along the fixing points at the desired intervals to achieve the desired wattage per sqm. Additional bars/tape can be used on long cable runs to maintain equal spacing between runs.
1B. If using only tape, In very awkward areas like round rooms, it may not be possible to fix the fixing bars with ease. To fit the cable in this situation the floor must be first marked out and then the cable taped in place over the pre-marked floor area. To mark the floor the installer should first work out what wattage per sqm is required and thus what length or wattage cable is required. The floor should then be marked to show the desired spacing between cable runs to achieve the desired wattage per sqm over the floor area. The cable can then be taped at the start and end of each run to hold the wire in place so the tiling process can be completed. Once again on long cable runs additional tape can be used to maintain a consistent space between runs.
2. Start by rolling the cable away from where the power source, will be located leaving the cold connection tail ready to be wired in. Then run the mat from this point along the longest straight wall.
3. At the end of this wall, the cable should be turned around to allow it to be run back in the desired direction. See diagrams below.
Living Heat Under Floor Heating In Screed Kits
