
Dear customer:
Thank you for visit our store,we are proffessional "Business & Industrie" seller for 10 years,our main products included:Sensors,modules devolpment board, LED displays, other IC procuts an so on,any question about DIY robot,Arduino,or Raspberry Pi will be welcome to discuss with us,we will try our best to supply the most advanced product and price,(if we sale more,the cost of made one product will be reduce and we will change or price to make you save more.
Hope you enjoying yourself here!
We appreciate your business!
We will arrange shipping for you within 24 Hours after payment cleared except the holidays.
We only ship to the confirmed address provided by PayPal. Before you pay, please make sure your address in PayPal matches the address you would like us to ship to. If not, please let us know before we sent you the package, or we will not be responsible for any loss. hope you could understand.
-We ship items to Worldwide. Thank you!
-we will ship out the order in 1-2 business days after payment cleared .Since it is international shipping ,delivery time is about 15--28 business days to arrive to most countries.
We accept PayPal payment ONLY.
* We believe our items are so outstanding. We are convinced you will be happy with your Purchase.
* If you do not satisfy with our items. Please simply return to us within 30 Days in original condition. Just pay for the returned postage. Then we can issue full refund to you after the returned item arrived at our warehouse.
* Please include your eBay ID and item number with any email requests.
* When you satisfied with our product and services please leave us positive feedback.
* If you have got the package, please confirm "Delivery on time" For us.
* If a problem occurs, contact us immediately with any email request.
* Just contact us using the " Ask the seller a question" link on eBay.
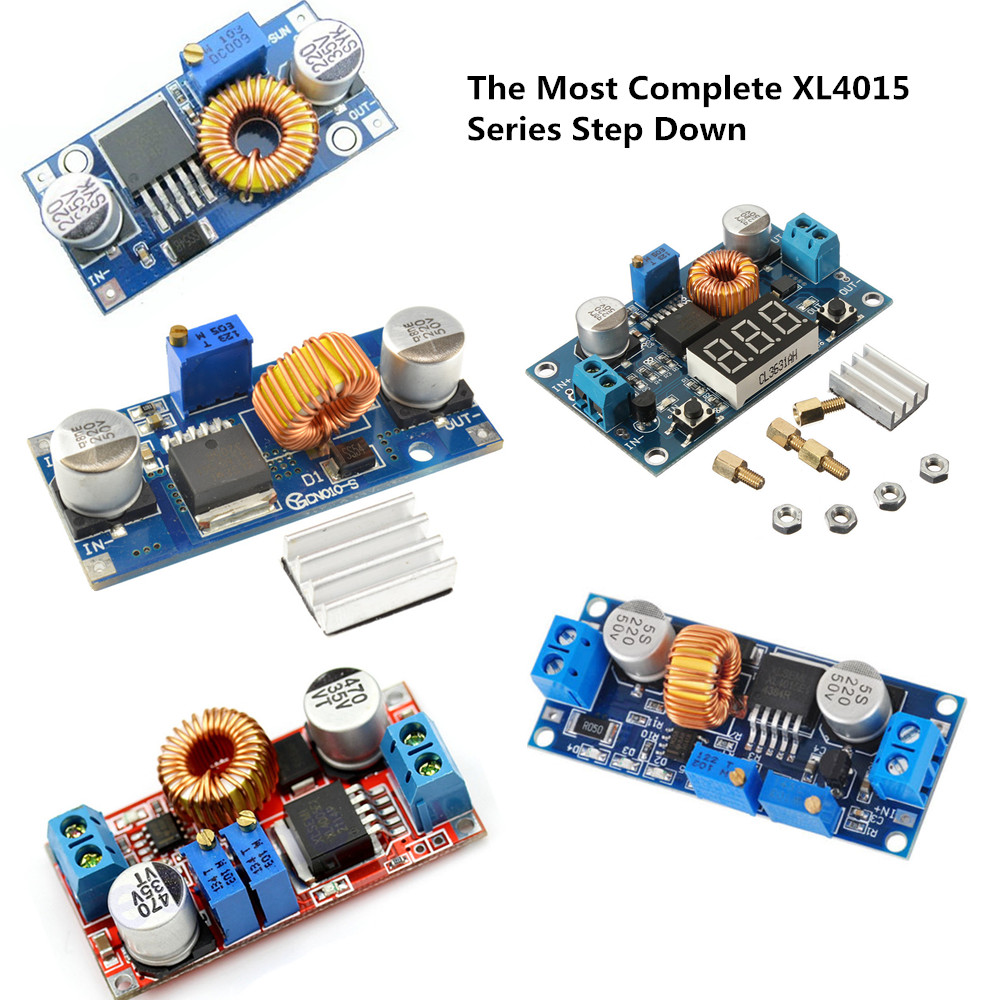


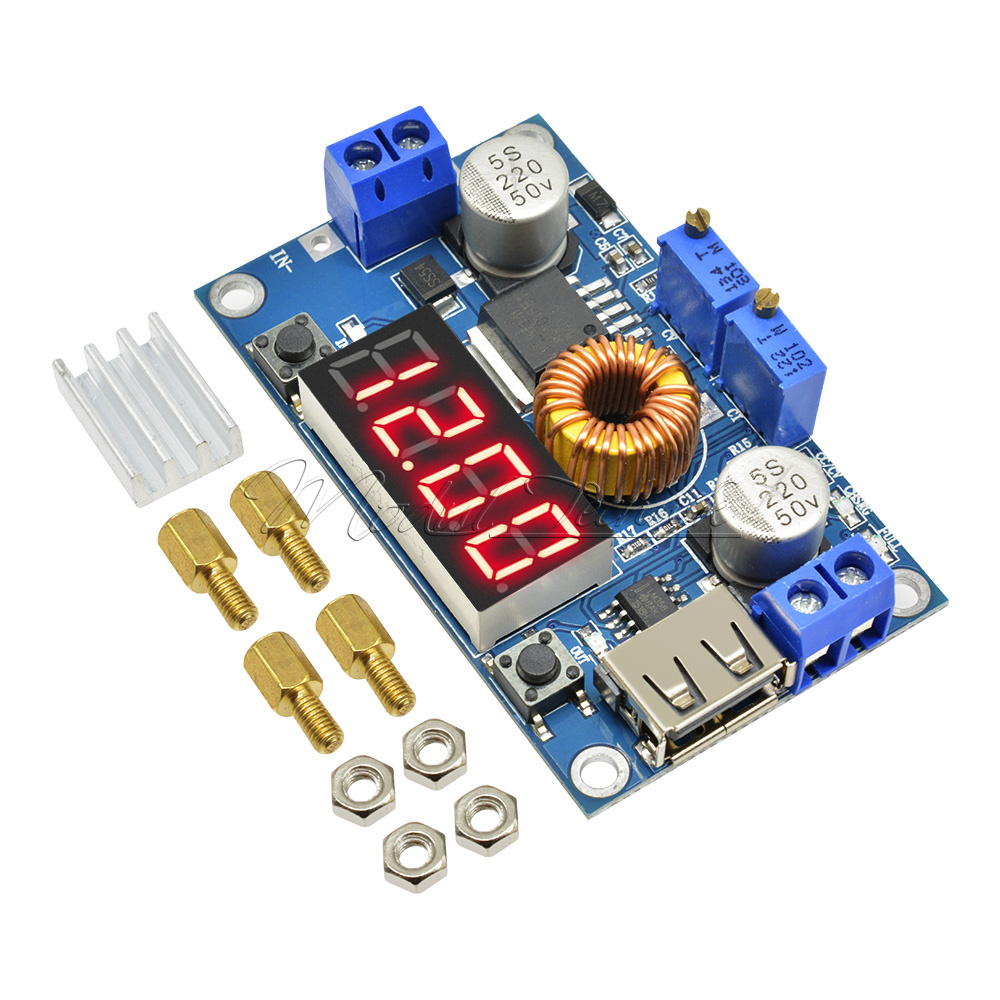
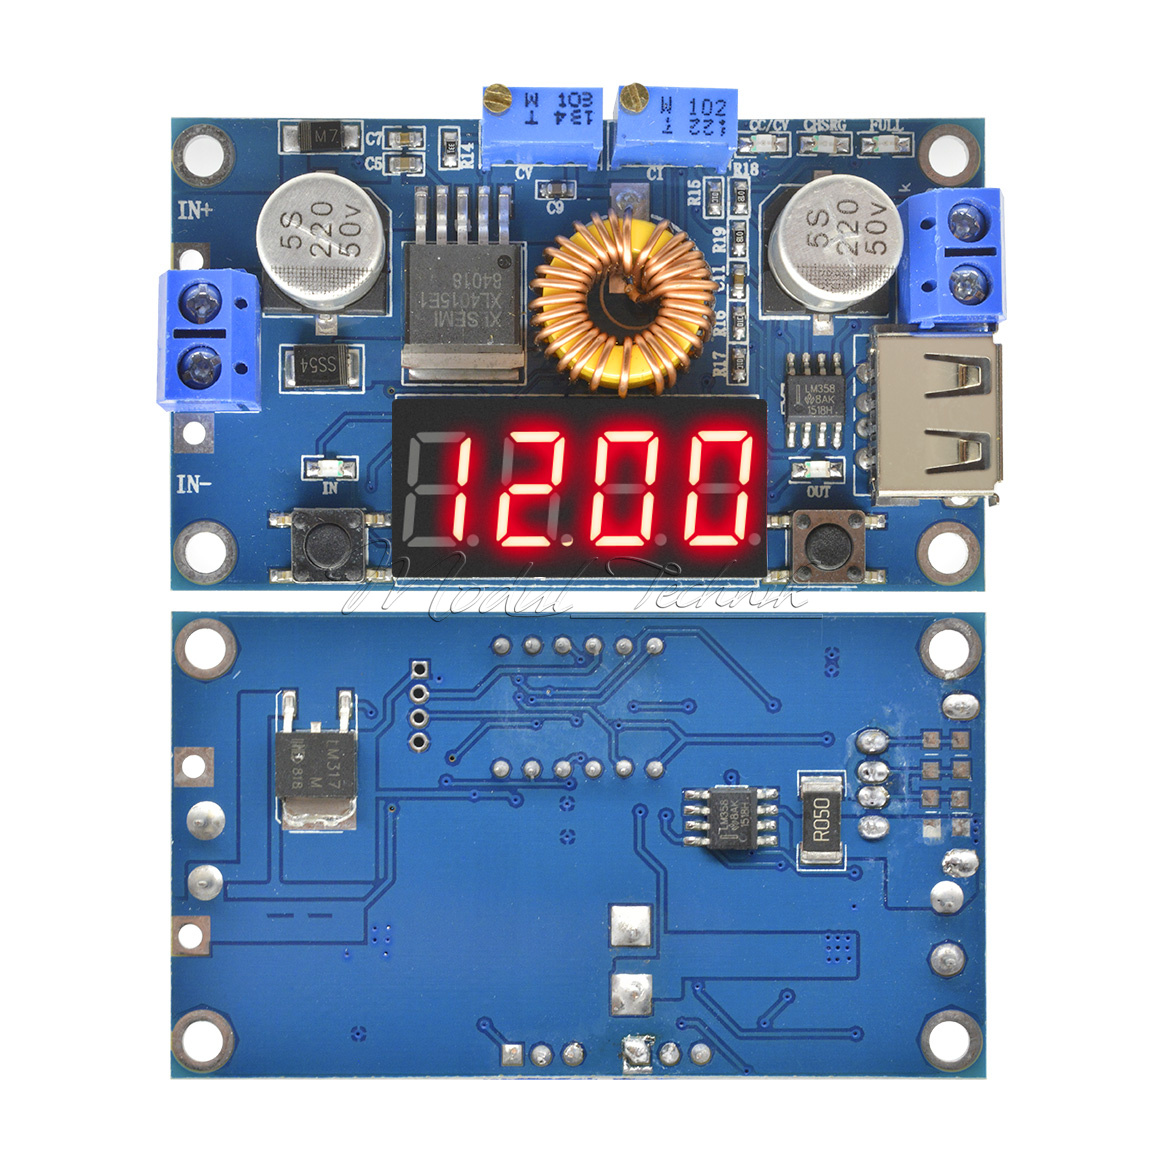


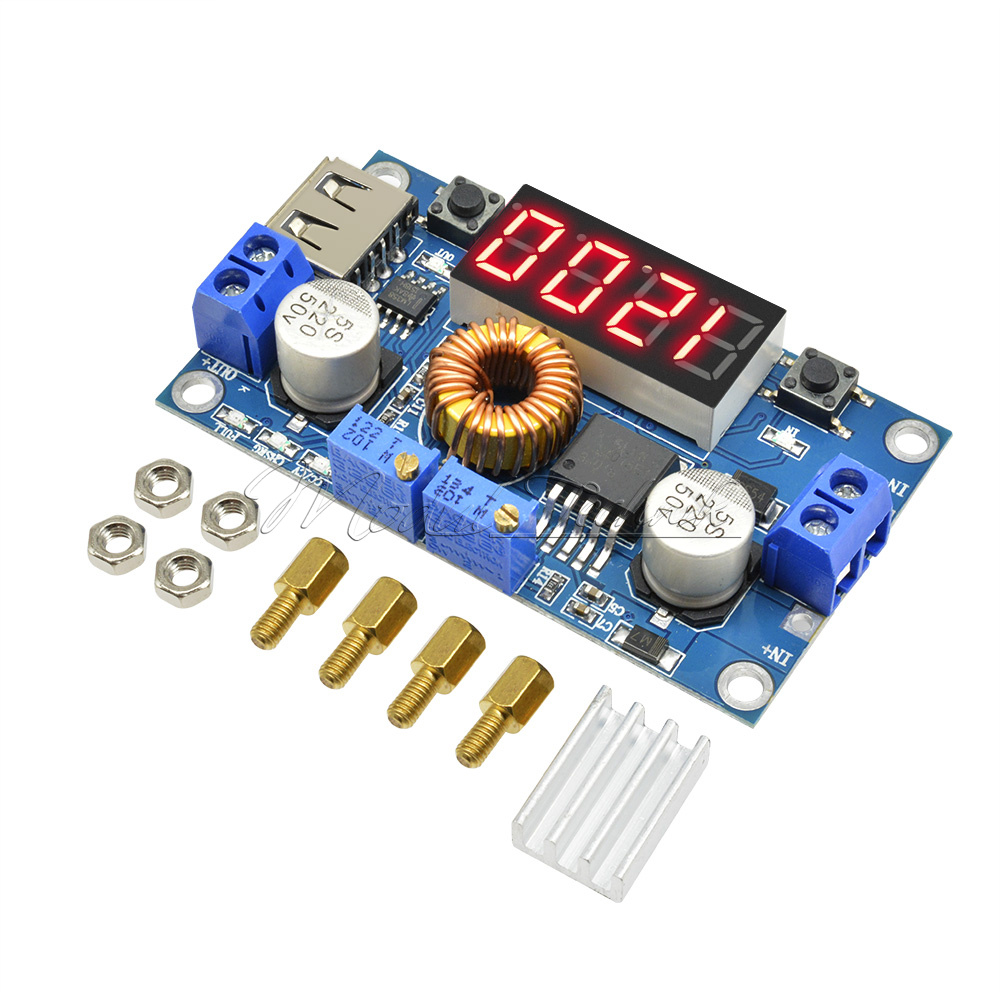
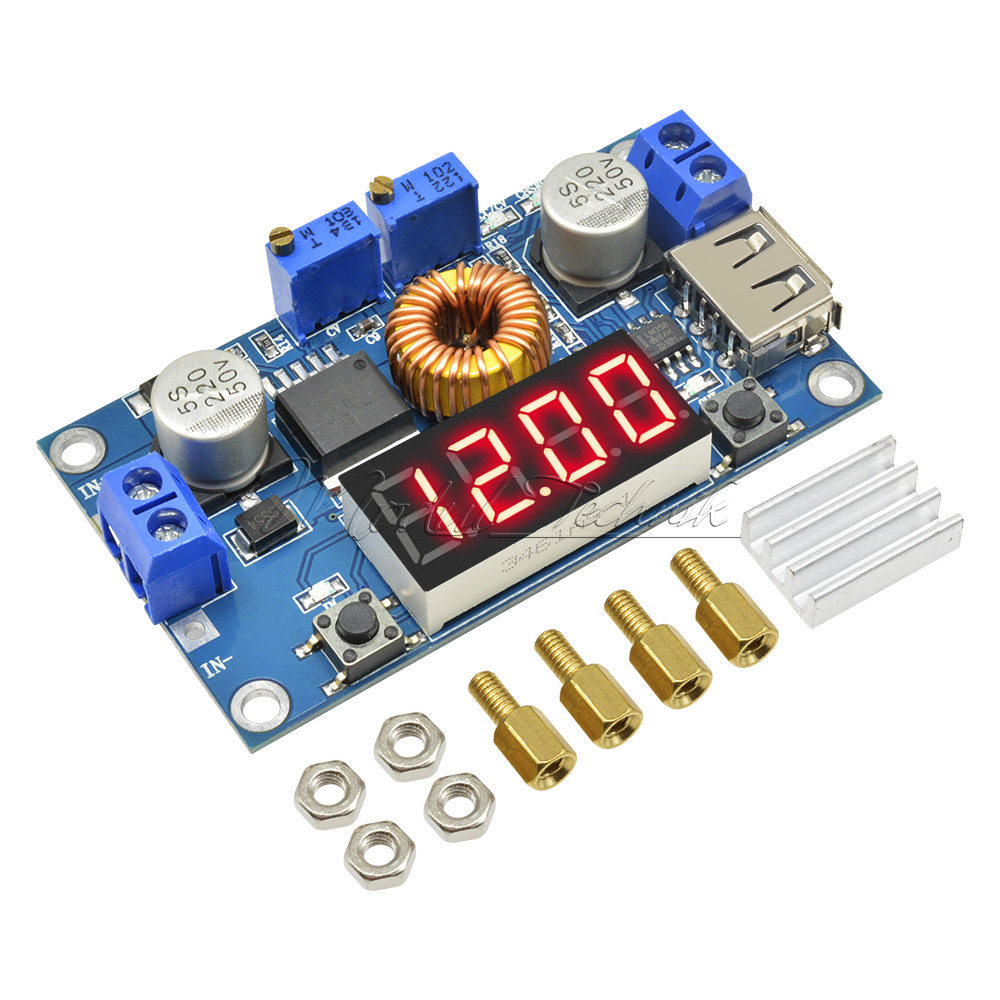
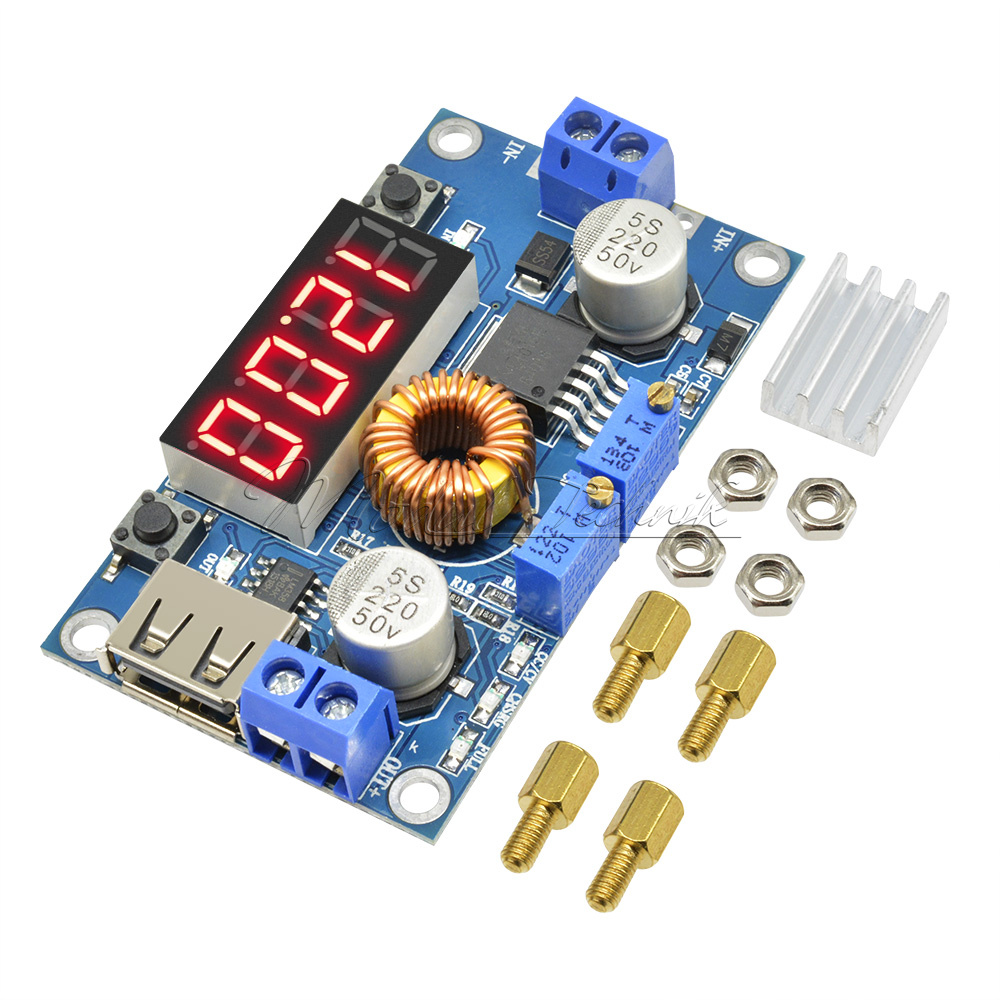
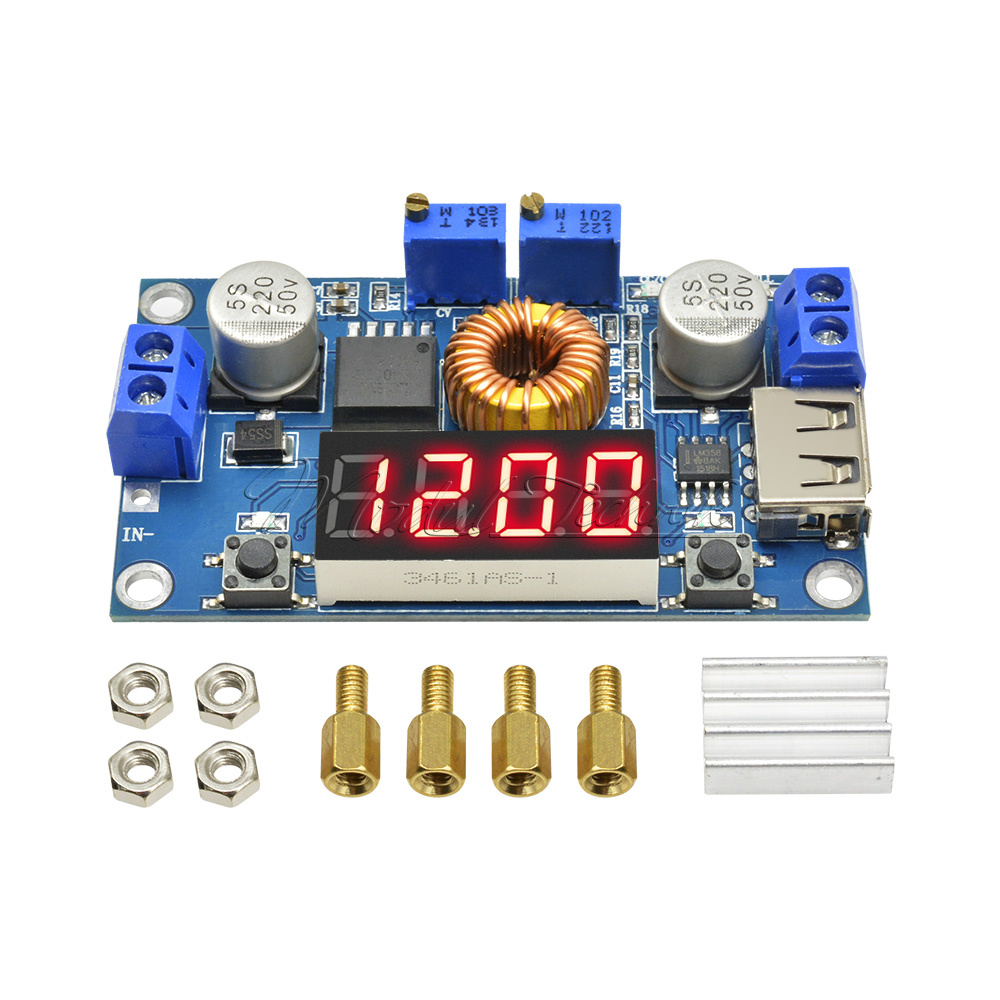
5A DC-DC LED Schaltregler Charger Power Step Down Module mit USB Port Voltmeter
Contains the voltmeter, ammeter, power meter, USB interface for charging the digital products.
Note:
1.When you use the product, the module inputs and outputs to be isolated from ground.2.USB output voltage
is consistent with the module, not a fixed 5V output. When charging for digital equipment, make sure USB
output voltage is 5V.3.Some customers report:“The module can not adjust the output voltage is always
equal to the input voltage.”When you encounter this problem, please counterclockwise rotation of the voltage potentiometer”10 laps or more, then use the module you can adjust the output voltage. Because the
factory default output voltage of about 20V.
Specifications:
1.Input voltage range:5-36VDC
2.Output voltage range:1.25-32VDC adjustable
3.Output current: 0-5A
4.Output power: 75W
5.High efficiency up to 96%
6.Built in thermal shutdown function
7.Built in current limit function
8.Built in output short protection function
9.Input reverse polarity protection: None (if required, high current diode in series with the input).
10.L x W x H =68.2×38.8×15mm11.Weight: 39g
Application
1.Use as a step-down modules with overcurrent protectionUsage:
(1) Adjust the right button so that“OUT”LED lighted, Digital meter shows the value of output voltage ,
adjust the“voltage potentiometer”so that the output voltage reaches the value you want.
(2) Adjust the right button so that Digital meter shows the value of output current;Wire shorted output
terminal, then adjust the“current potentiometer”so that the output current reaches a predetermined
overcurrent protection value. (For example, the Digital meter displays the current value of 4A, then you
can use the module to a maximum current of 4A)
(3) Connected to the load.
2.Use as a battery chargerUsage:
(1) Make sure you need to charge the battery float voltage and charging current; (if lithium parameters 3.7V/2200mAh, then the float voltage is 4.2V, the maximum charging current 1C, ie 2200mA)
(3)Adjust the right button so that Digital meter shows the value of output current;Wire shorted output terminal, then adjust the“current potentiometer”so that the output current reaches a predetermined Charging current value.(4)Charge turn lamp current factory default is 0.1 times the charging current; (Battery during charging current is gradually reduced, if the charge current setting is 1A, then when the charge current is less than 0.1A, blue lights turned off, the green light is on, which means that the battery is fully charged)(5)connected to the battery charge.(1,2,3,4 steps as: Output is unloaded, do not connect the battery)
3.Use as a LED constant current driver moduleUsage:
(1)Adjust the“voltage potentiometer”so that the output voltage reaches the value you want.
(2)Adjust the right button so that Digital meter shows the value of output current;Wire shorted output terminal, then adjust the“current potentiometer”so that the output current reaches a predetermined LED operating current.
(1) Output voltage calibration steps
Step 2, press the right button (normal speed), the voltage value is adding up a unit; Press the left button, minus a unit; Due to a unit is less than 0.1V, the minimum voltage display to 0.1V, so you need to continuously press 1-5 times to see the voltmeterchange 0.1V, how many times voltmeter change 0.1V by pressing the key, depending on the current displayvoltage,the higher the voltage, the fewer the number of press.
Step 3, press the right button for more than 2 seconds, release, to exit the output voltage calibration mode. All parameters set to automatically power down to save.
(2) Input voltage calibration steps
Step 1, adjust the right button so that“IN”LED lighted, Digital meter shows the value of input voltage; press the right button for more than 2 seconds, release, Digital meter and“IN”LED flashes in synchronization so that you enter the input voltage calibration mode.
Steps 2 and 3, consistent with the output voltage calibration method.
Step 1, adjust the right button so that Digital meter shows the value of output Current. Press the right button for more than 2 seconds, release, Digital meter flashes in synchronization so that you enter the output current calibration mode.
Step 2,Connected to the load, ammeter in series, adjust the right and left button to change the display of digital meter, so that is consistent with the ammeter display .
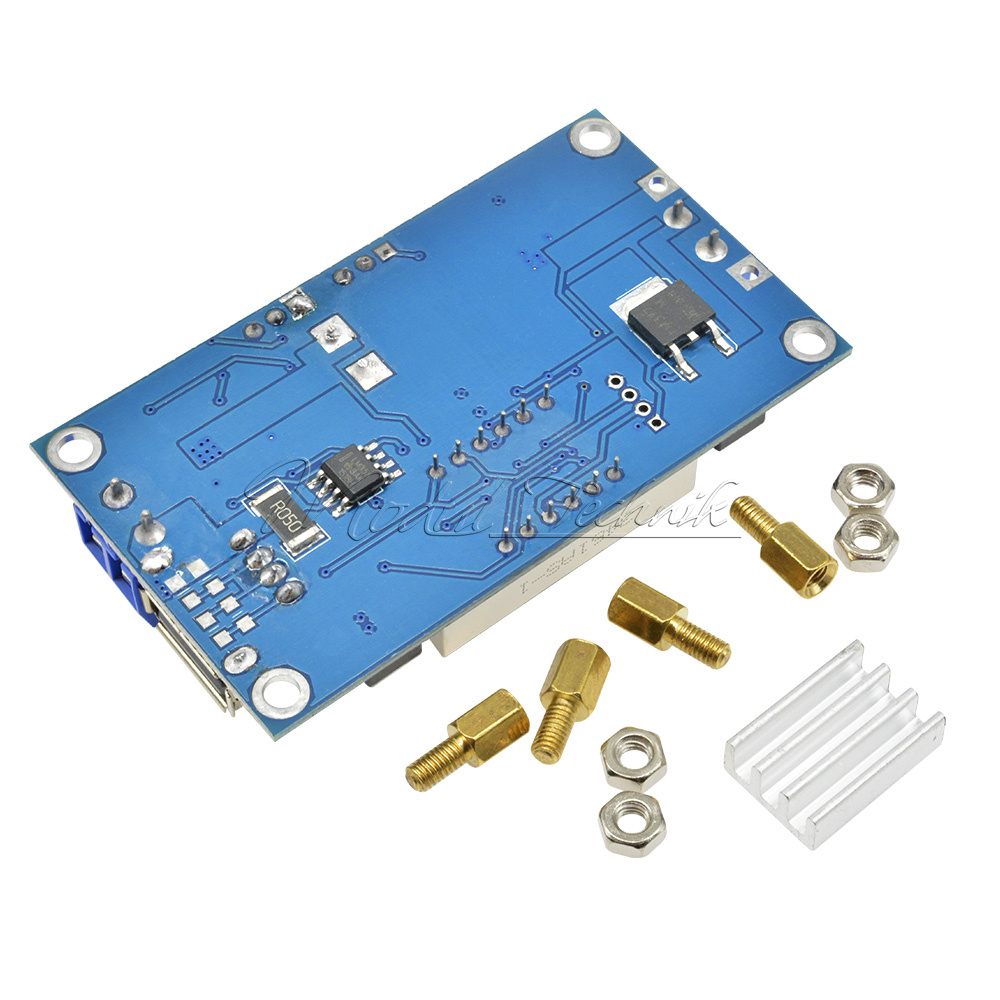
Package Included:
1 x 5A CC CV LED Drive charger Power Step-down Module LED Driver W/ USB Volt
Am 19.10.2022 hat der Verkäufer die folgenden Angaben hinzugefügt: