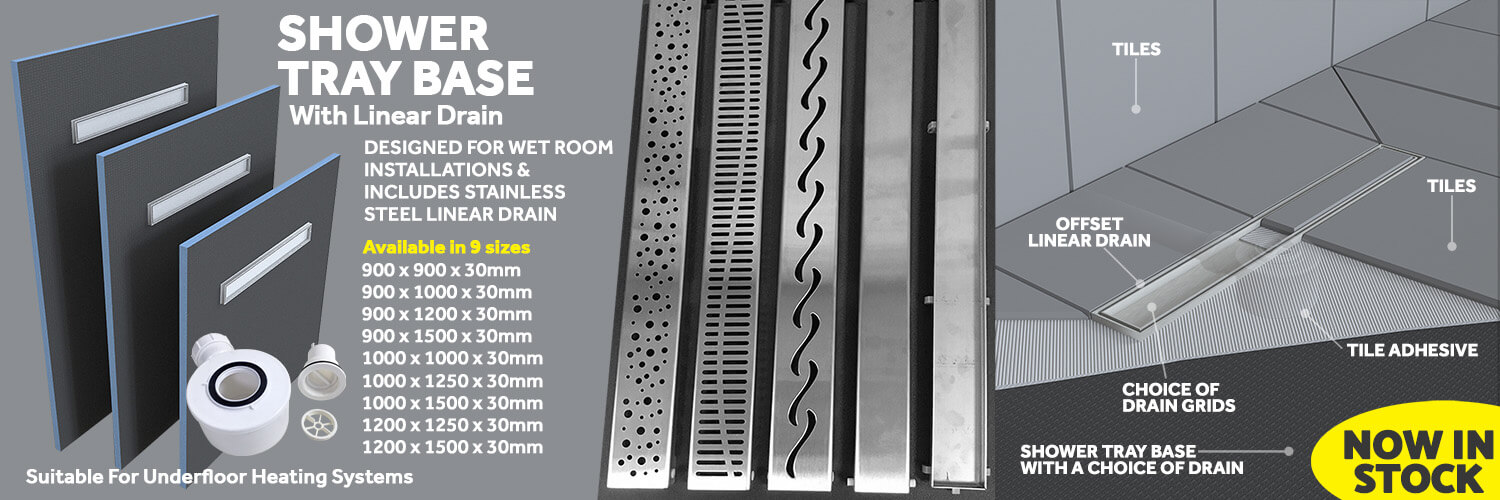
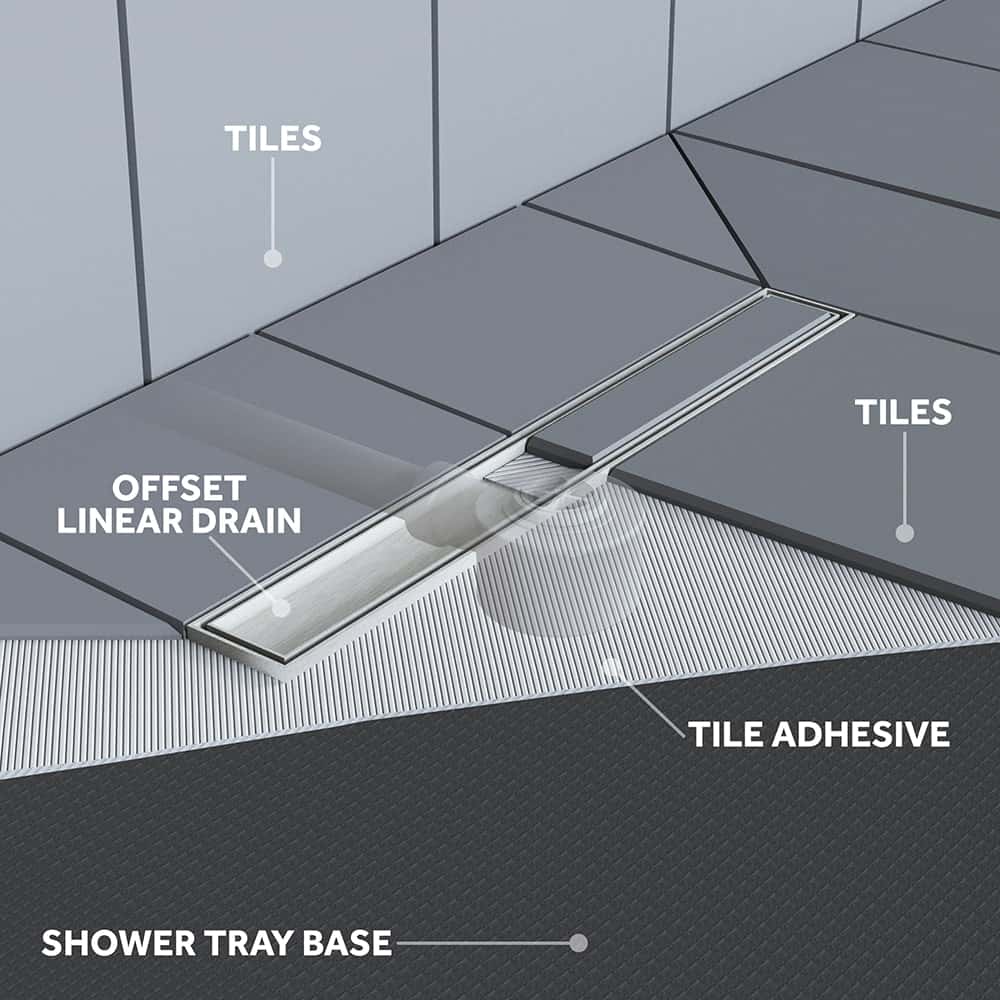
Our Living Heat wet room bathroom level access walk-in shower tray kits come complete with a fast-flow drain, full fitting instructions, and pre-formed falls for easy tiling and water drainage. Designed for use with under-tile heating systems, these trays are highly insulated and can accommodate seats or wheelchairs once tiled.
Easily install a level, unobstructed shower tray base with pre-installed falls that direct water towards the drain. Each tray includes a pre-installed stainless steel linear drain with a fast-flow trap and your choice of five elegant stainless steel grate insert options. We stand behind our product with a lifetime manufacturer warranty and technical support helpline. Available in five sizes, or easily customise the size by cutting it down or adding tile backer boards to extend the area.
PRODUCT COMES WITH
Stainless Steel Linear Drain/Grate
Waste Kit
You may also require
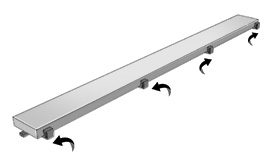
FAST-FLOW DRAIN KIT INCLUDED
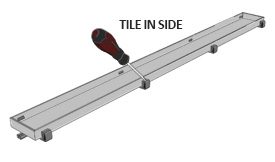
Shower Drain Option 6 - Reversable.
The drain cover is reversable with both tile-in option and a plain stainless steel surface option.
STEP 1 Side A = Tile in side ready to be tiled into.
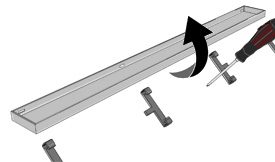
STEP 3 If not tiling then pop off clips and flip cover over.
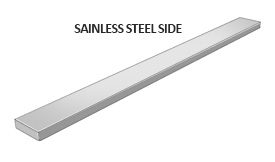
STEP 3 Side B = flat stainless steel side.
STEP 4 Replace clips on revers to leave stainless side up.
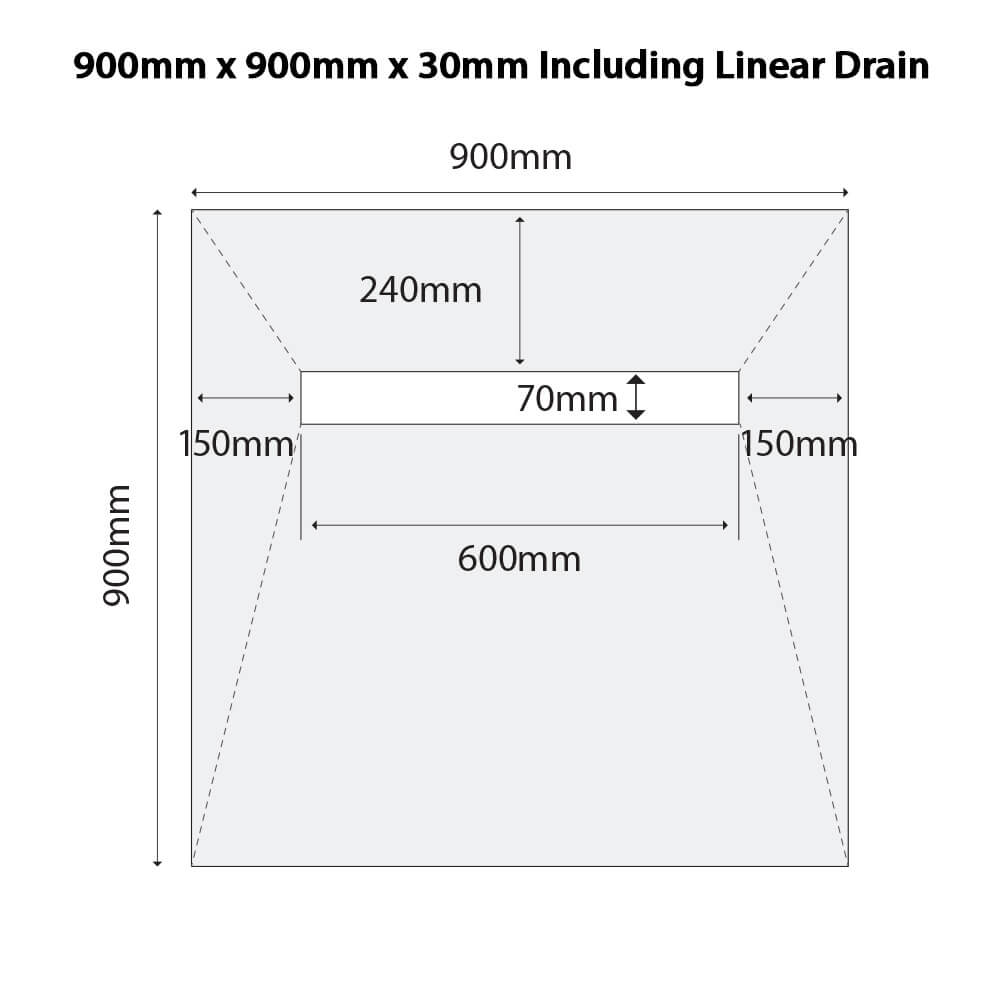
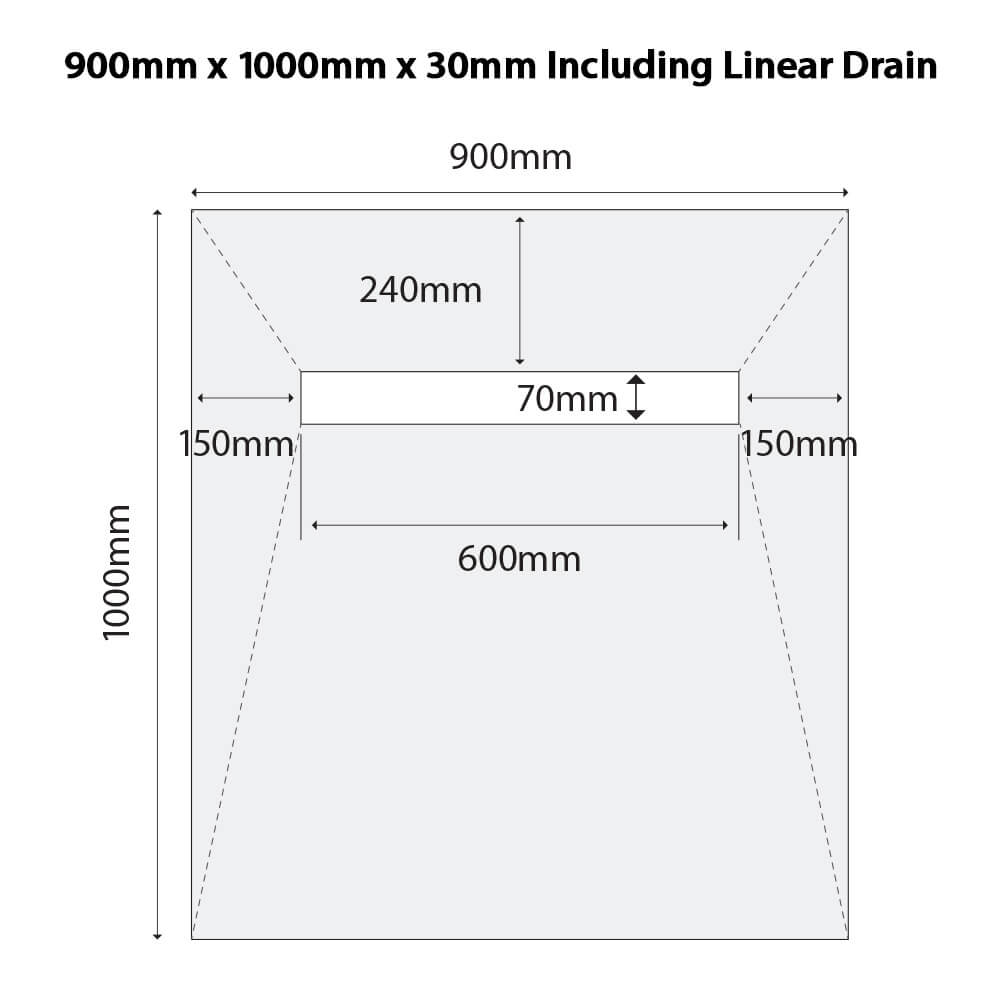
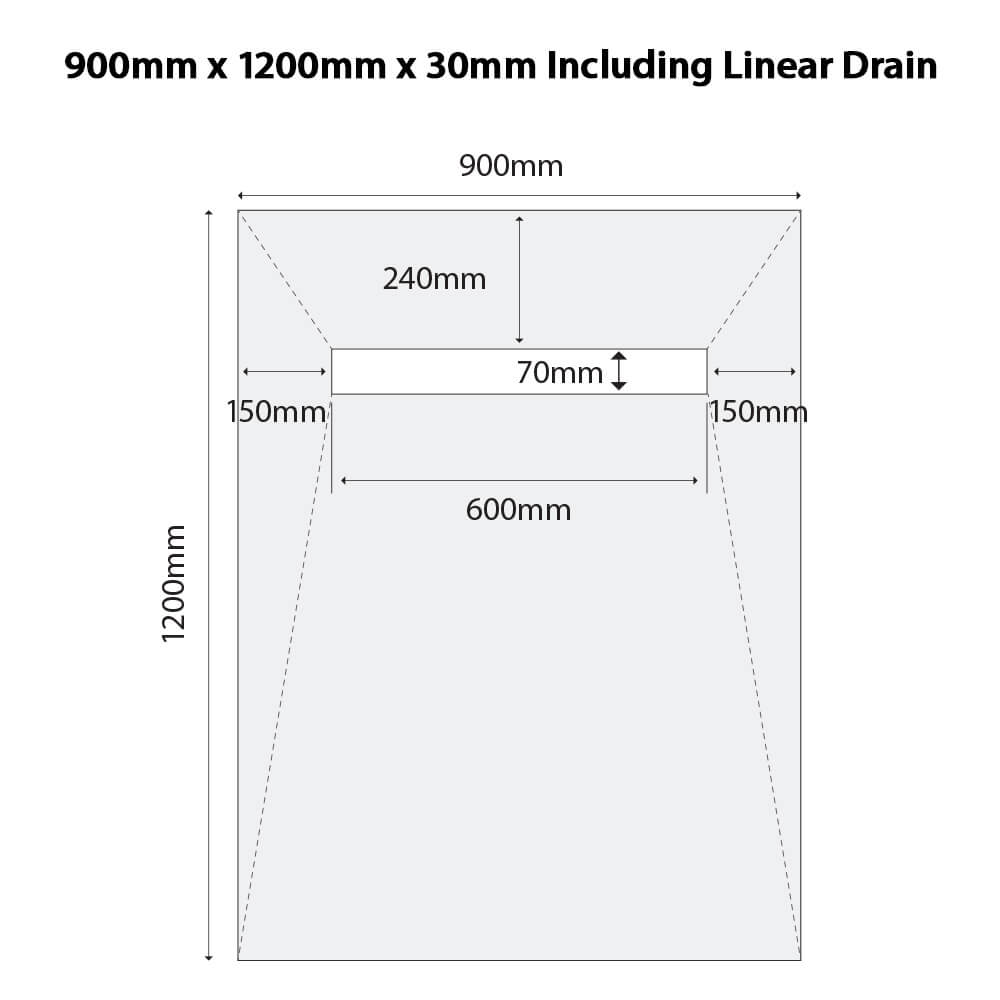
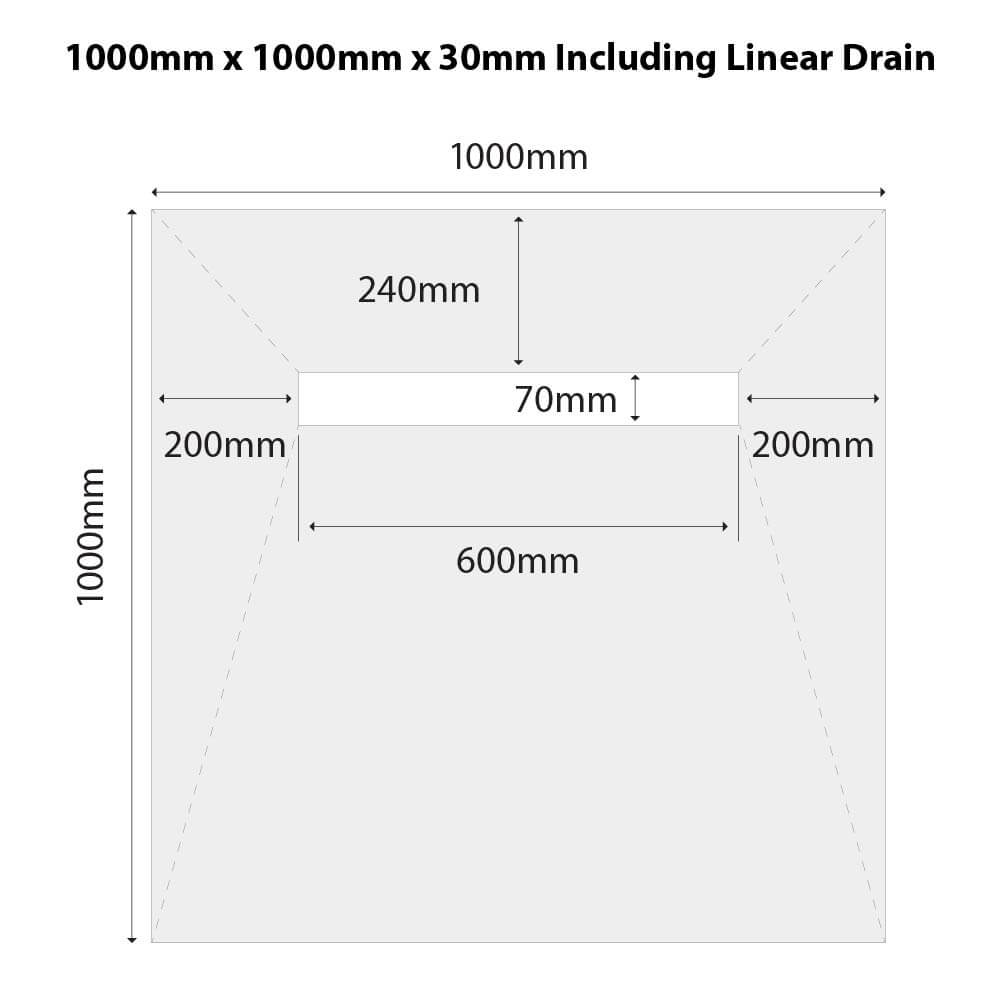
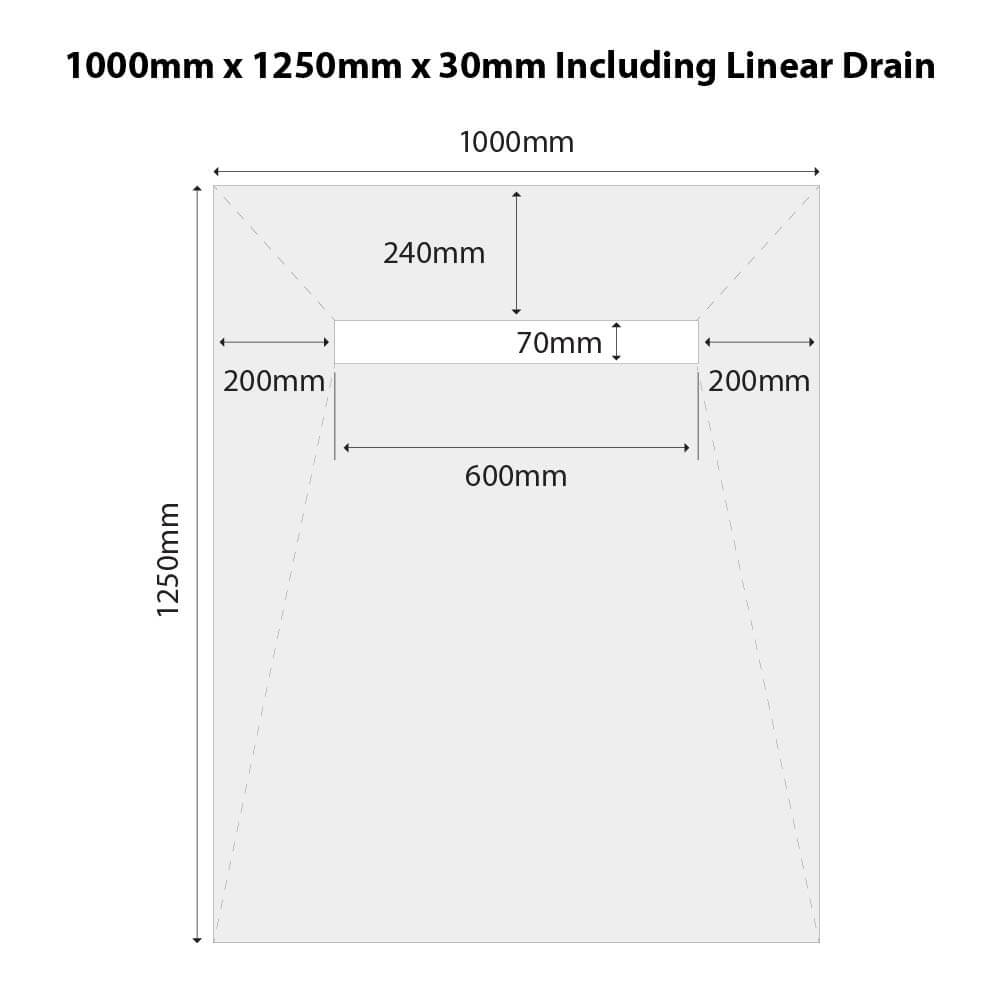
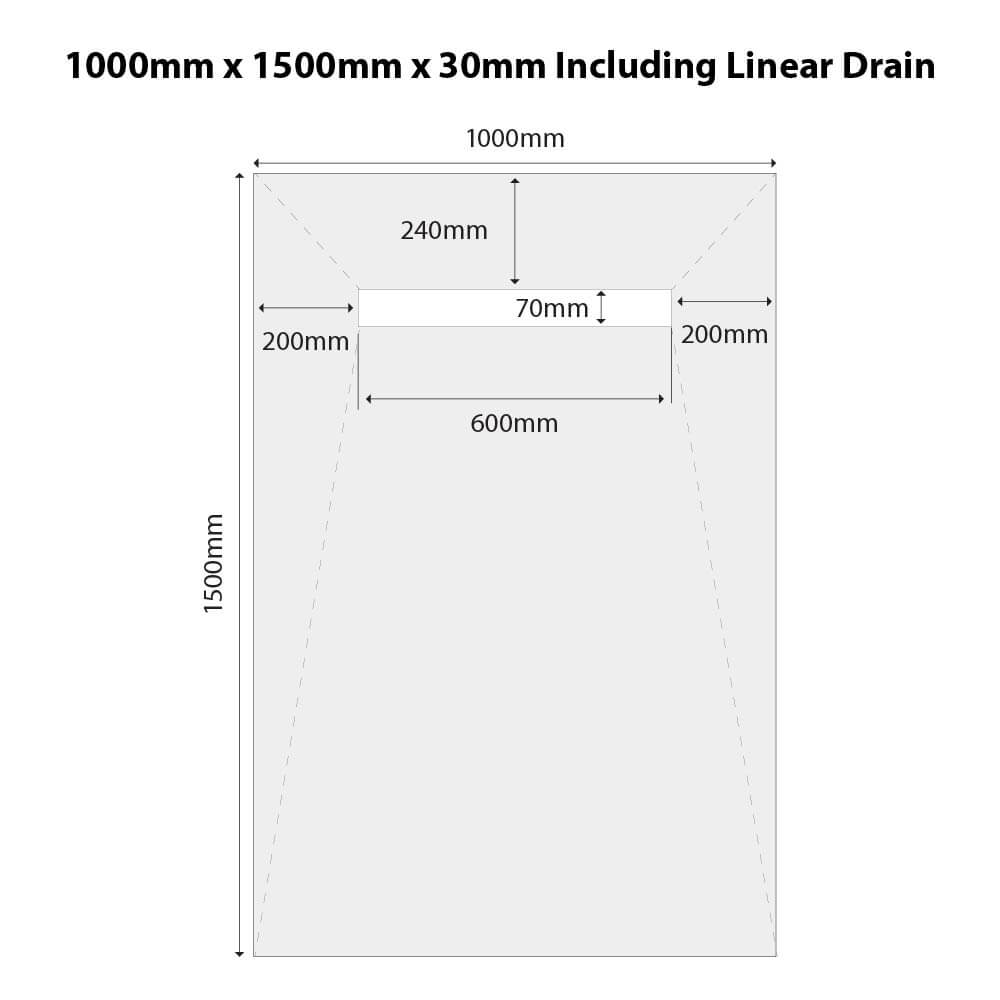
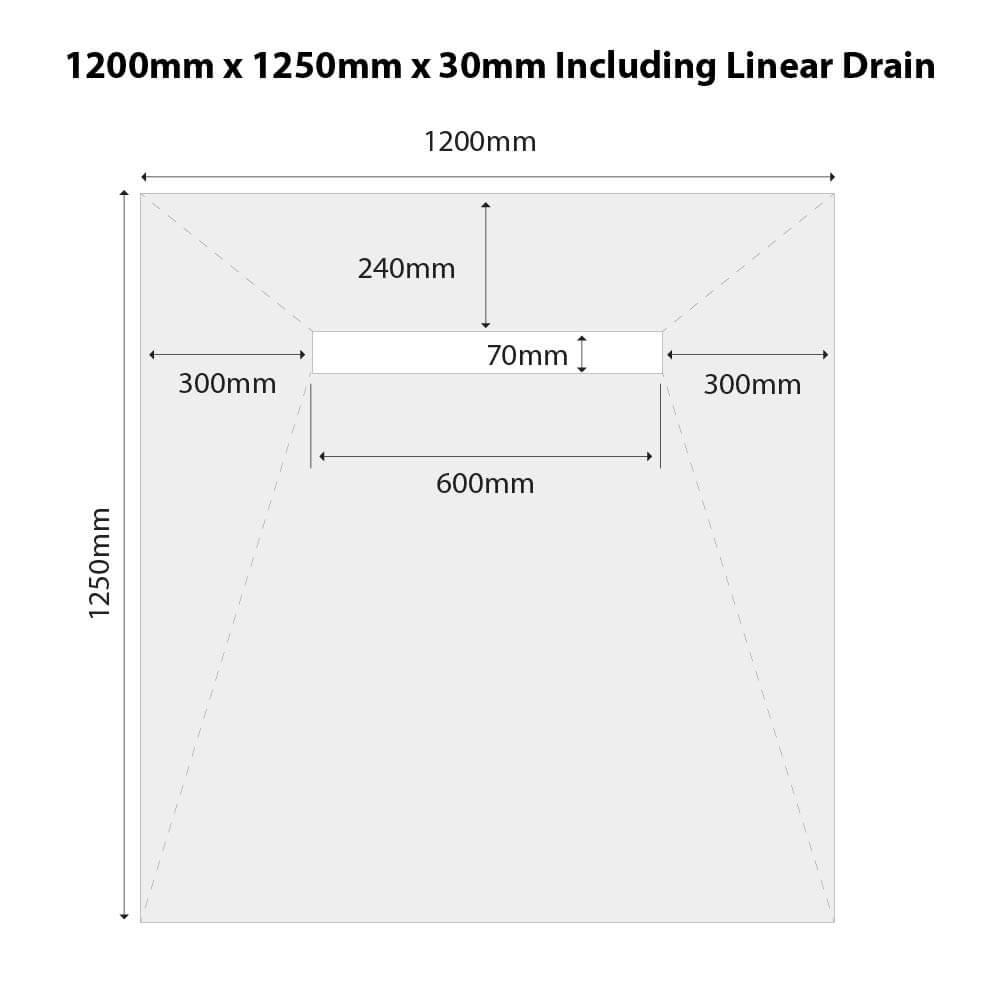
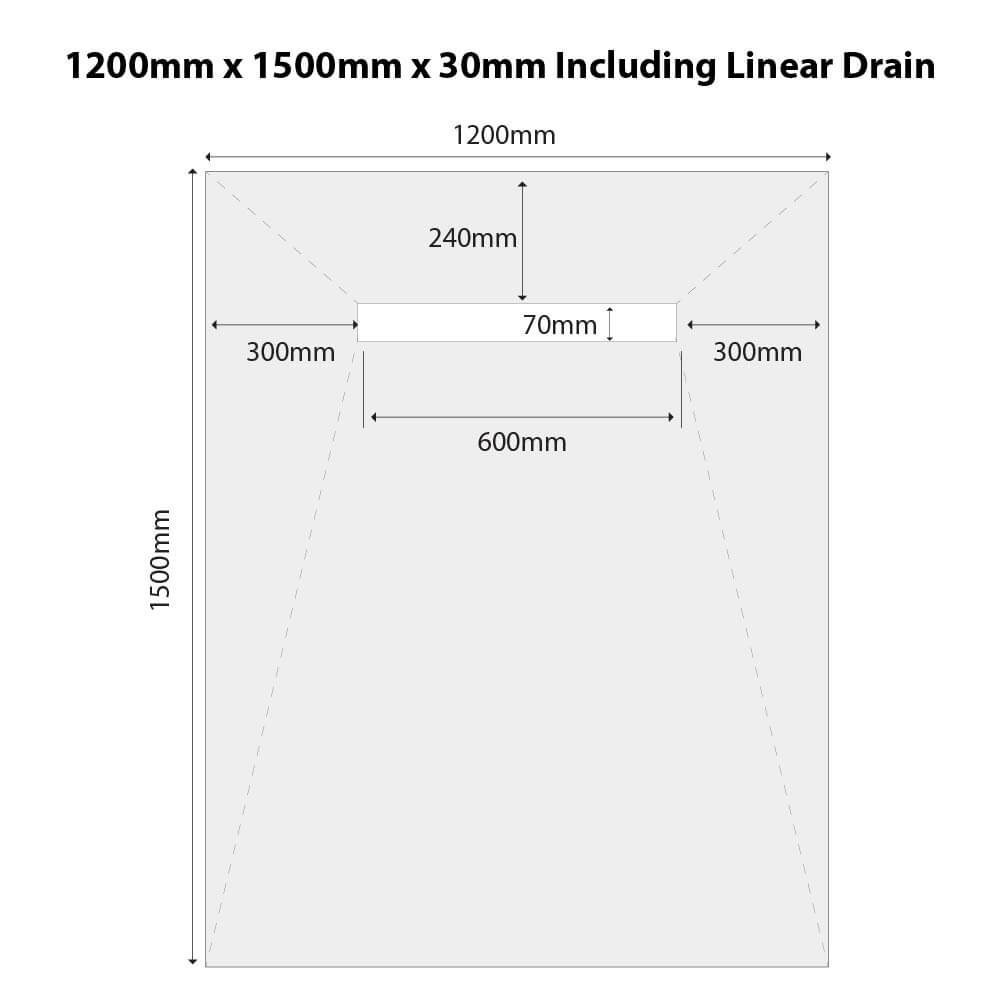
Dimensions of Linear Drain Shower Tray Options
Information
Shower Tray - Available in multiple sizes - 900 x 900mm, 900 x 1000mm, 900 x 1200mm, 900 x 1500mm, 1000 x 1000mm, 1000mm x 1250mm and 1000 x 1500mm
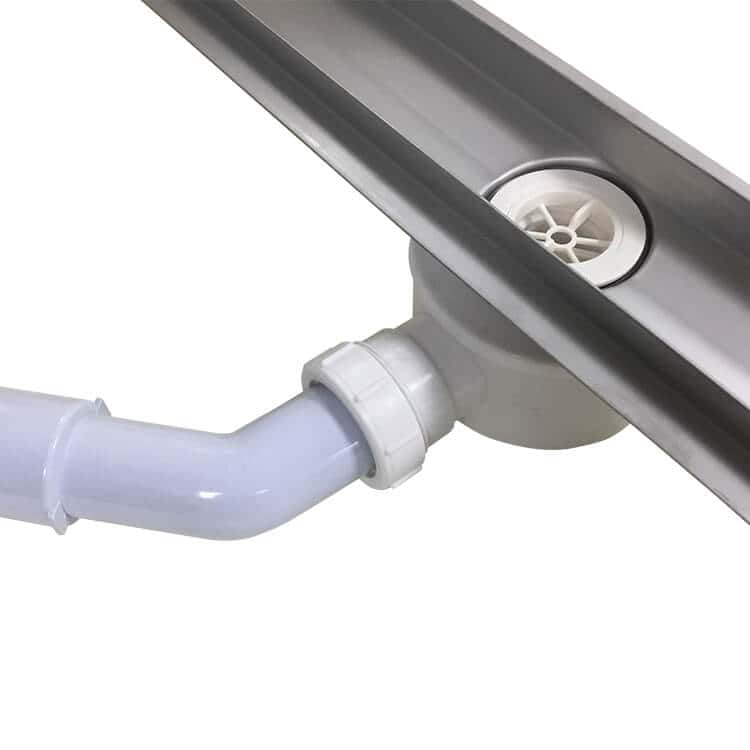
Fast Flow Drain
Stainless Steel Grate
Full fitting instructions
Technical Free Phone Help Line
FREE next working day delivery service
PLEASE NOTE
* The natural fall of the tray must always be maintained to effectively guide water toward the drain. The tiles must however finish flush with or higher than the grate cover.
* During the tiling / grouting process the drain and grate should be covered to make sure adhesive, grout and other debris does not enter the drain.
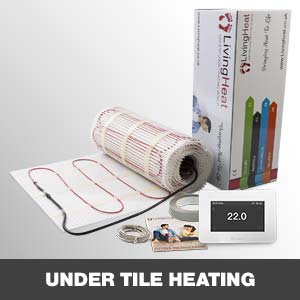
* Living Heat Under floor heating is suitable for use directly over the showerlay trays but the must not obstruct the drain.
* All Living Heat trays can be cut down in size if required but no cut edge must come within 150mm of the drain.
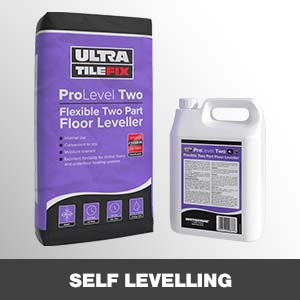
* The tray must be fully bedded on a suitable good quality flexible tile adhesive. Particular care should be taken to ensure all drain edges and outer edges of the tray are fully bedded to maximize support and minimize movement.
ROOM TANKING
If using Living Heat cementitious tile backer boards with our wet room show lay trays, please follow the following instructions to create a tanked wet-room area ready for tiles to be fitted directly over.
1a: Fix 6mm, 10mm, 20mm, 30mm tile backer boards down to a sound level floor using a good quality flexible cement based tile adhesive or screws and board washers at maximum 40cm centres, (minimum 12 washers per board). All joints should be butted up tight together and boards staggered where possible.
2a: When lining walls or ceilings 10mm, 20mm or 30mm boards can be used and fitted using screws and washers. Fixings must be at maximum 400mm centres, (minimum 12 per board). All boards should be tightly butted together.
3a: All joints should be taped with Living Heat self adhesive waterproof tape. Corner joins should first be filled with a waterproof sealant prior to pre made waterproof corners being fitted or other tape being laid over. When taping start with all lower joints working away from the drain position. Any vertical joints should be done last and extended down over any lower tape / joints already completed.
SHOWER TRAY FITTING INSTRUCTIONS - OFFSET LINEAR DRAIN
IMPORTANT INFORMATION
When fitting Living Heat showerlay shower trays it is important to follow the correct procedure to achieve the best results. Below we have included a instructional guide to achieve best results when fitting Living Heat showerlay trays. If you have any further questions please feel free to contact Living Heat Technical.
1
1: The floor surface (wood or concrete) must be solid, level and ready to accept a standard 1-part flexible tile adhesive (used to hold the tray in place). Lay the tray in place and mark the tray position clearly onto the floor with a marker pen.
2
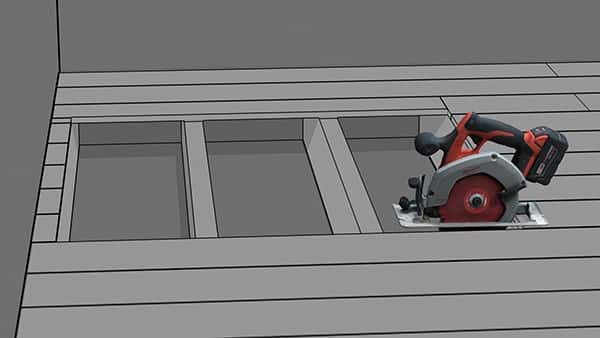
2: Use a saw to remove the marked out section of the floor into which the shower tray will fit. Be sure to remove any old nails or screws from the timbers. CAUTION: Use safety goggles when using power tools!
3
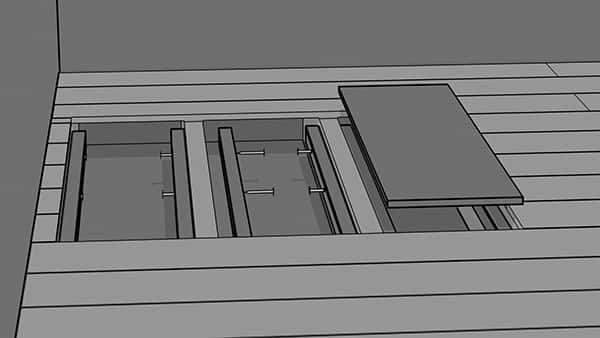
3: Install suitable batons to sides of timber joists. Position the batons below the top of the joists to allow 18mm ply to sit flush with the top of the joists. Screw the batons and ply into position.
4
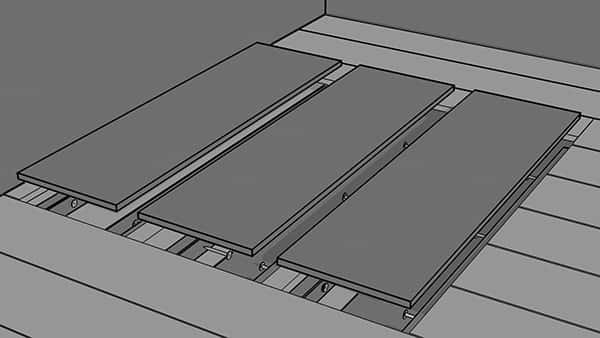
4: Please take some time to ensure the plywood sections and batons are fitted well and level.
5
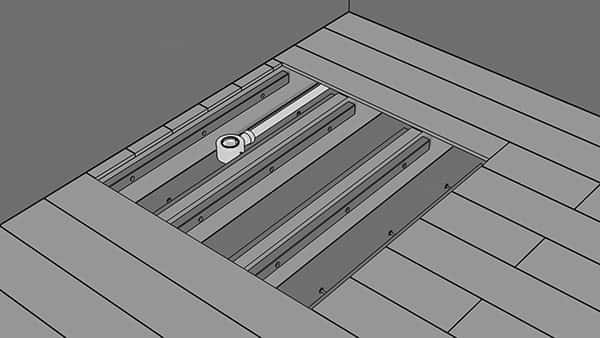
5: With the batons and plywood sections fitted. Lay the shower tray on top of the plywood. And using a marker pen, draw around the position of the drain hole. Cut a hole for the drain in the plywood underneath.
6
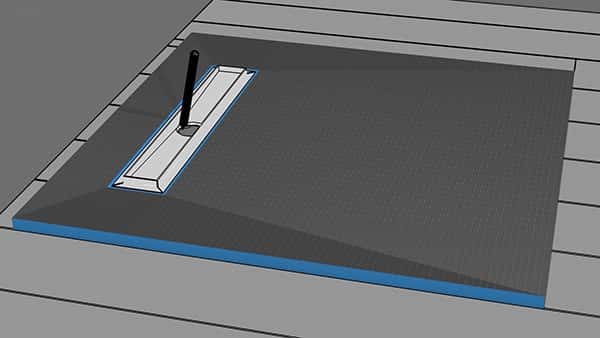
6: Fit the drain and solvent weld the waste pipe to align with the shower tray and the hole in the centre plywood. Ensure the waste pipe has some fall off to ensure water drains from the drain bowl.
7
7: With the batons, and plywood sheets fitted and with drain hole done, it is time for one final check before applying a 1-part flexible tile adhesive ready to lay the shower tray in place.
8
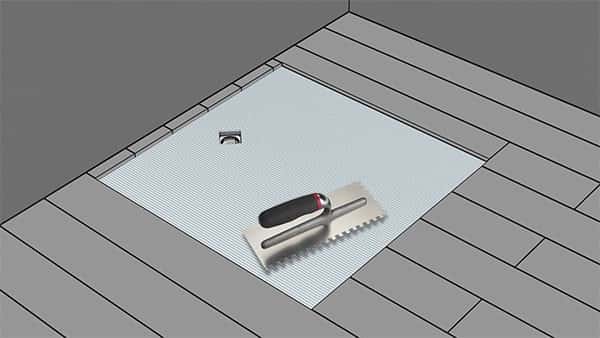
8: Using a flexible 1-part tile adhesive and suitable trowel, lay a good, even coat of adhesive to the top of the prepared plywood floor area. Be careful NOT to allow any adhesive to enter the drain bowl.
9
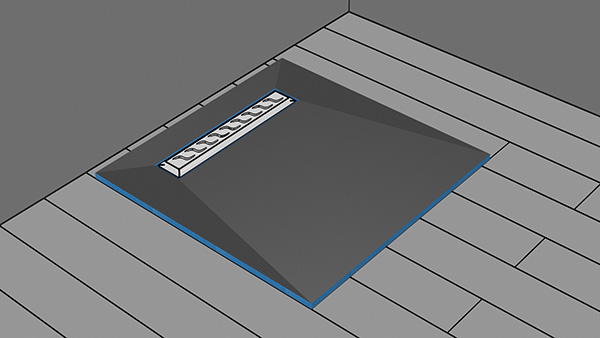
9: After laying a bed of flexible tile adhesive, carefully lower the shower tray into position. Press the shower tray into position evenly. Be careful NOT to allow any adhesive to enter the drain bowl.
10
10: Use a spirit level to ensure the shower tray is nice and level in all directions. The natural fall of the tray must always be followed to guide water toward the drain.
11
11: Allow some time for the tile adhesive and sealant to set. The shower tray is now ready for tiling. You can use Living Heat Tile Backer boards to cover the remaining floor area, ready for tiling.
IMPORTANT: To make sure you receive the correct sizes if you are unsure of what you require. Please do not hesitate to contact us. If possible, please provide us with a sketch or measurements of the floor area you would like covered. And we will advise you on which product would best suit your requirements.