
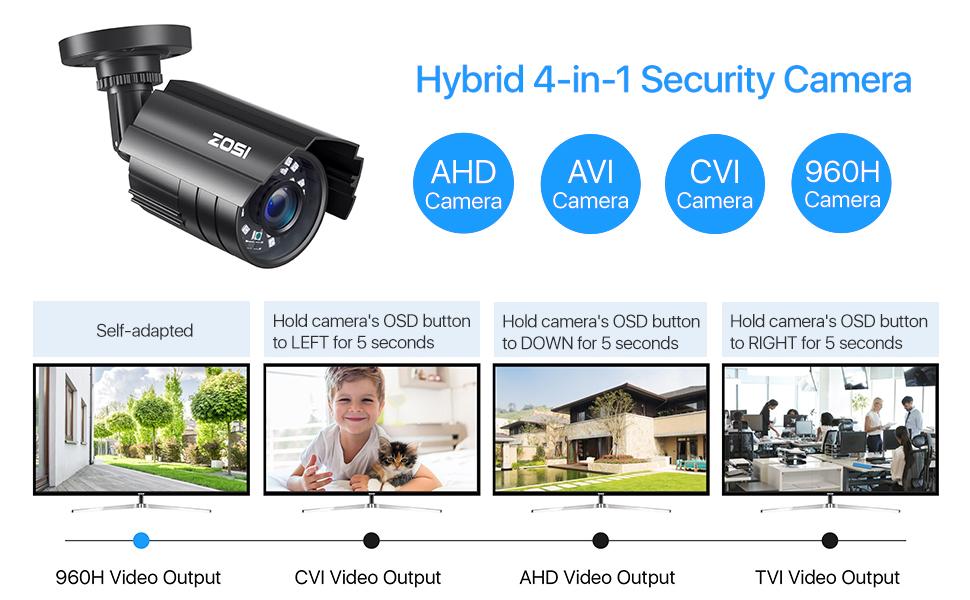
This 1080p full HD camera has a built-in OSD menu that can change the 4 different video outputs:HD-TVI, AHD, CVI, and CVBS(960H), and adjust the video settings.
Operation Mode:
Switch from AHD: Press Leftward for 5 Seconds
Switch from TVI: Press Rightward for 5 Seconds
Switch from CVBS: Press Upward for 5 Seconds
Switch from CVI: Press Downward for 5 Seconds
Noted: Default Video Mode is Analog 960H Mode
Troubleshooting
Q: Video Loss appears where the image from my camera should be displaying on my DVR?
A: 1.Check the extension cable (power and video) is securely connected to the camera.
2.Check the video output from the camera is securely connected to a video input channel on the DVR.
3.Check the power from the camera is securely connected to a power supply.
4. The camera mode do not match your DVR.there is 2 ways to setup . (1) Press OSD Joystick “DOWN” 5 seconds,if still no picture come, try to press “LEFT” “RIGHT””UP” for 5 second, till the signal matching your DVR. (2) Make sure the signal of your DVR, Use OSD Joystick to change the mode of the camera according to your DVRs video Mode.