1Piece × JVS to USB Controller Adapter for TTX2 TTX3 Sega Naomi1 Naomi2 New
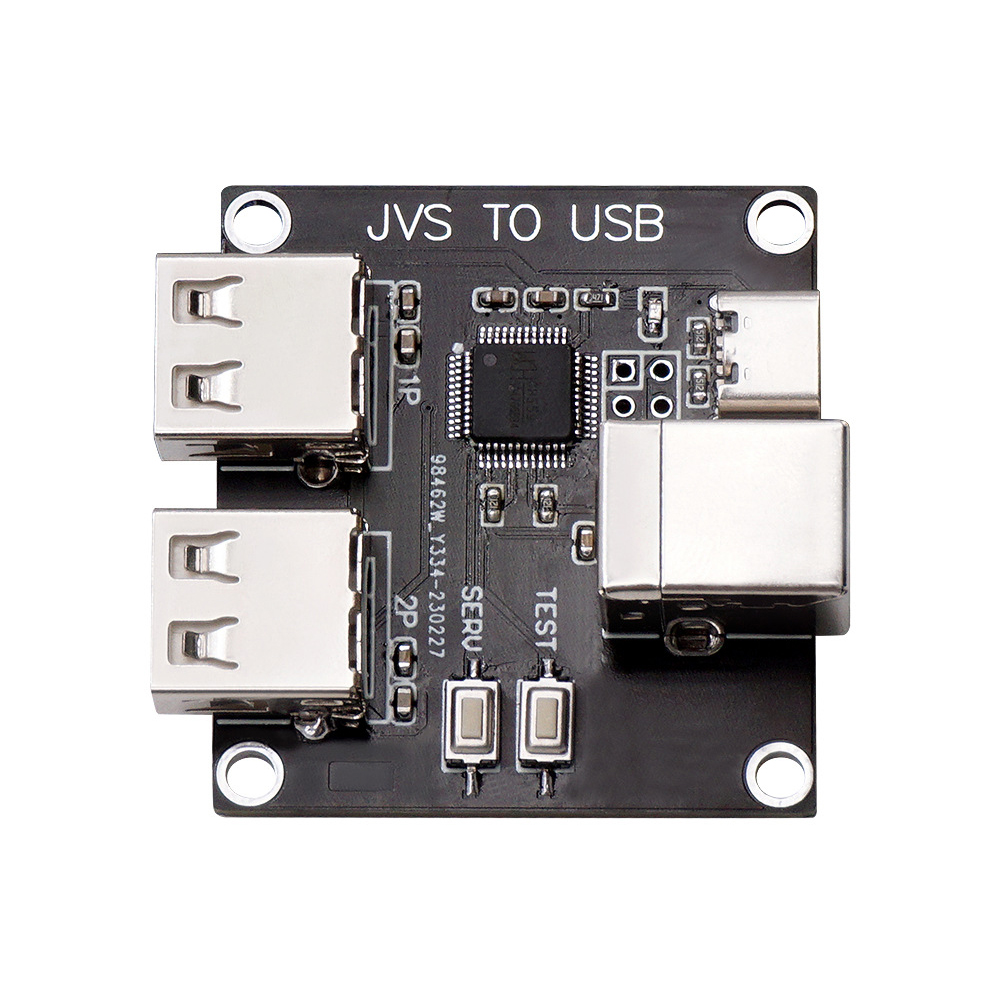
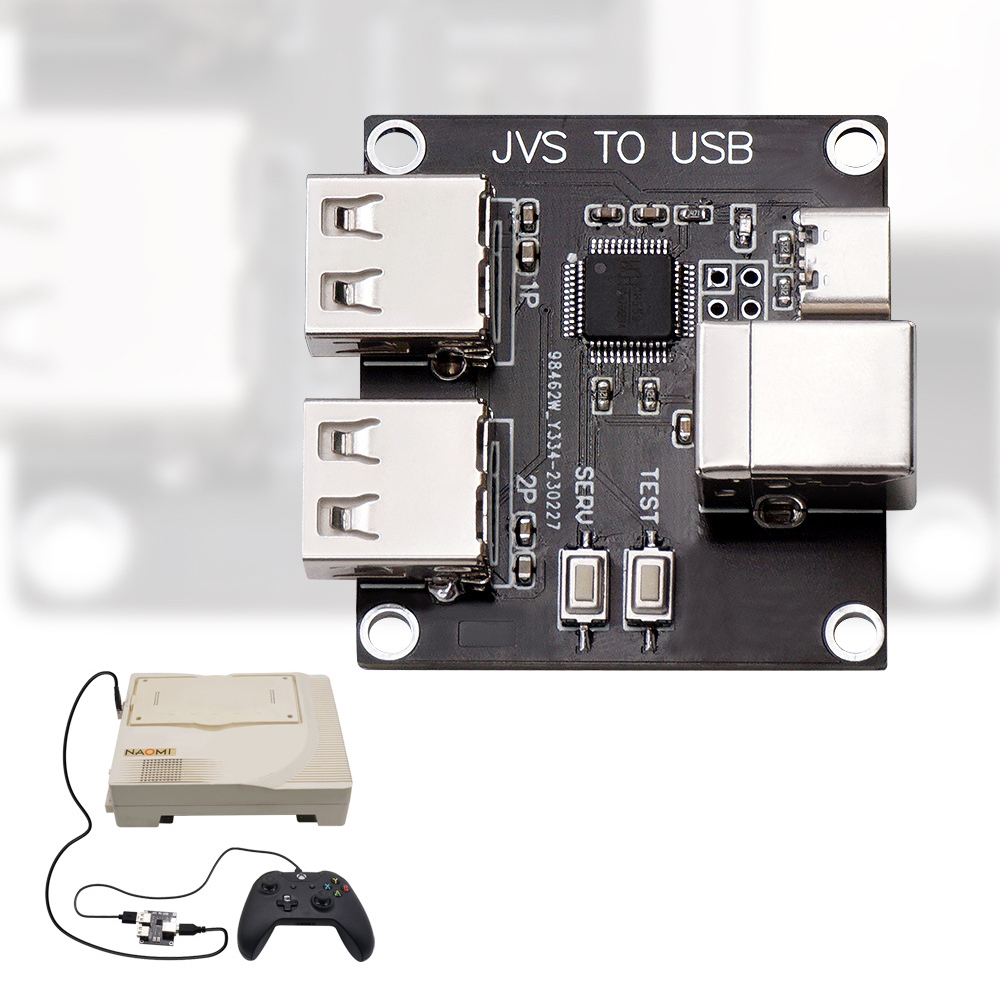
JVS to USB Controller Adapter for TTX2 TTX3 Sega Naomi1 Naomi2
Product Description:
Compatible with Xbox 360 / Xbox One seriesPS3/switch controllers.
Custom Button Layout, Map at most 12 physical buttons to arbitrary logical buttons for JVS.
Rapid-fire, Enable rapid-fire mode per each physical button.
Persistent Configurations, store and restore at most 10 configuration sets of button layout, rapid-fire settings, and it’s speed
Firmware Updates, For bug fixes, or to improve compatibility, firmware updates are available.
Twin stick Mode, When a controller is connected to the 1P USB port, pushing the button switches operation mode between the normal mode and the twin stick mode.
Mahjong Mode, When a USB keyboard supporting boot mode, though almost all keyboards will support it, is connected, IONA switches to mahjong mode.
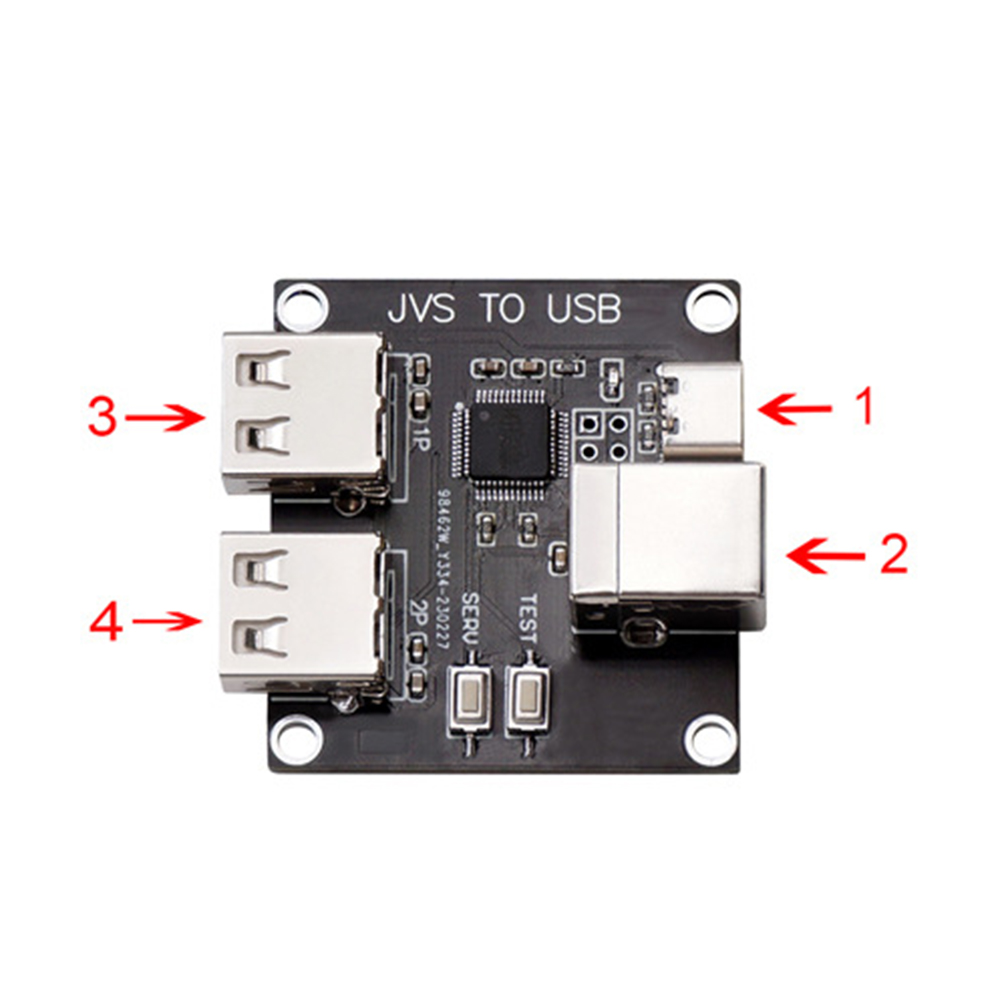
USE Guide:
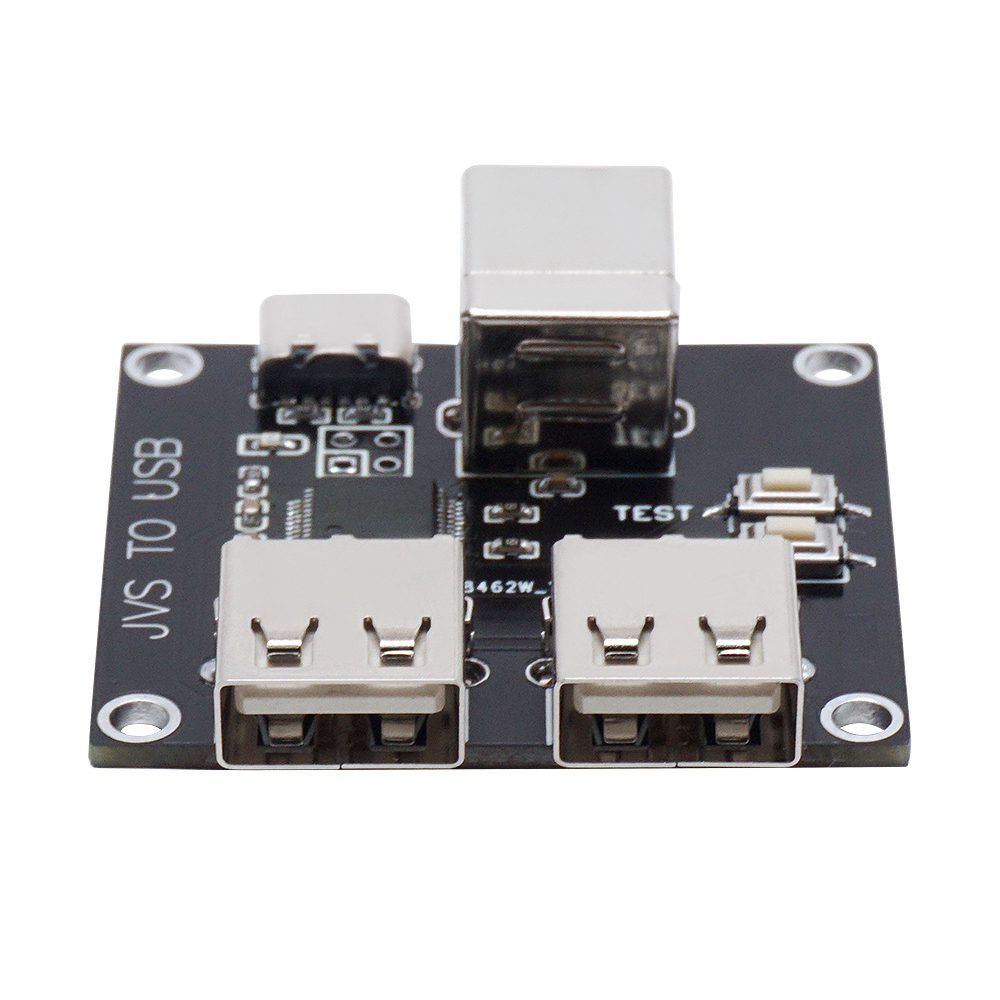
1. Connect USB Type C port for power supply. It doesn’t need data connection as it’s just expected to suupply 5V power for IONA.
USB charger will be available. Of course, PC USB port can support the required power.
PC-based JVS system board could have a port for this use, e.g. exA-Arcadia has hidden USB ports.
But if you want to use a device that requires much power, supplying via USB Bus from PC may not be enough and IONA gets to be unstable.
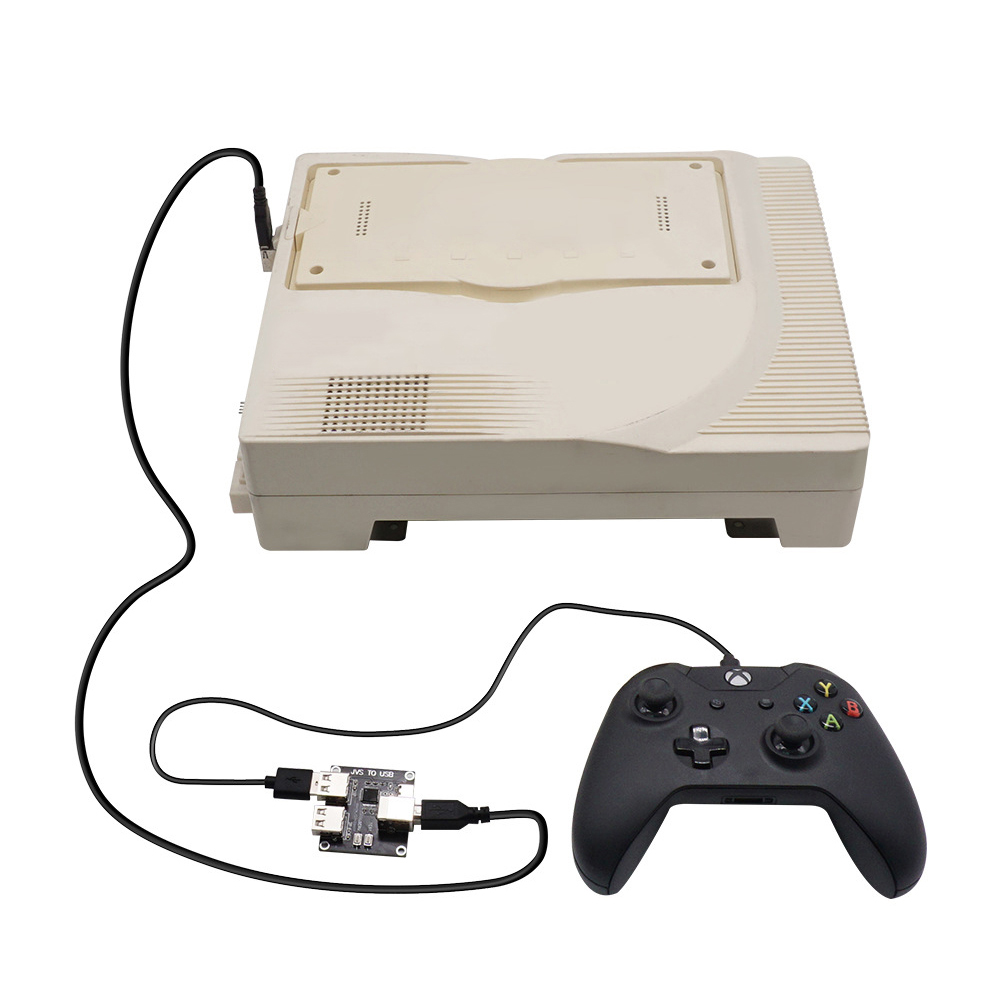
2. Connect JVS port to the JVS system board. You can use a general USB cable.
3. Connect USB gamepads at any time. You can connect and disconnect even during the JVS bus is active.
When power is supplied, LED starts blinking. Once an address is assigned via JVS bus, LED gets on. It will start blinking again if IONA receives reset signal via JVS bus.
Settings
Operation Mode
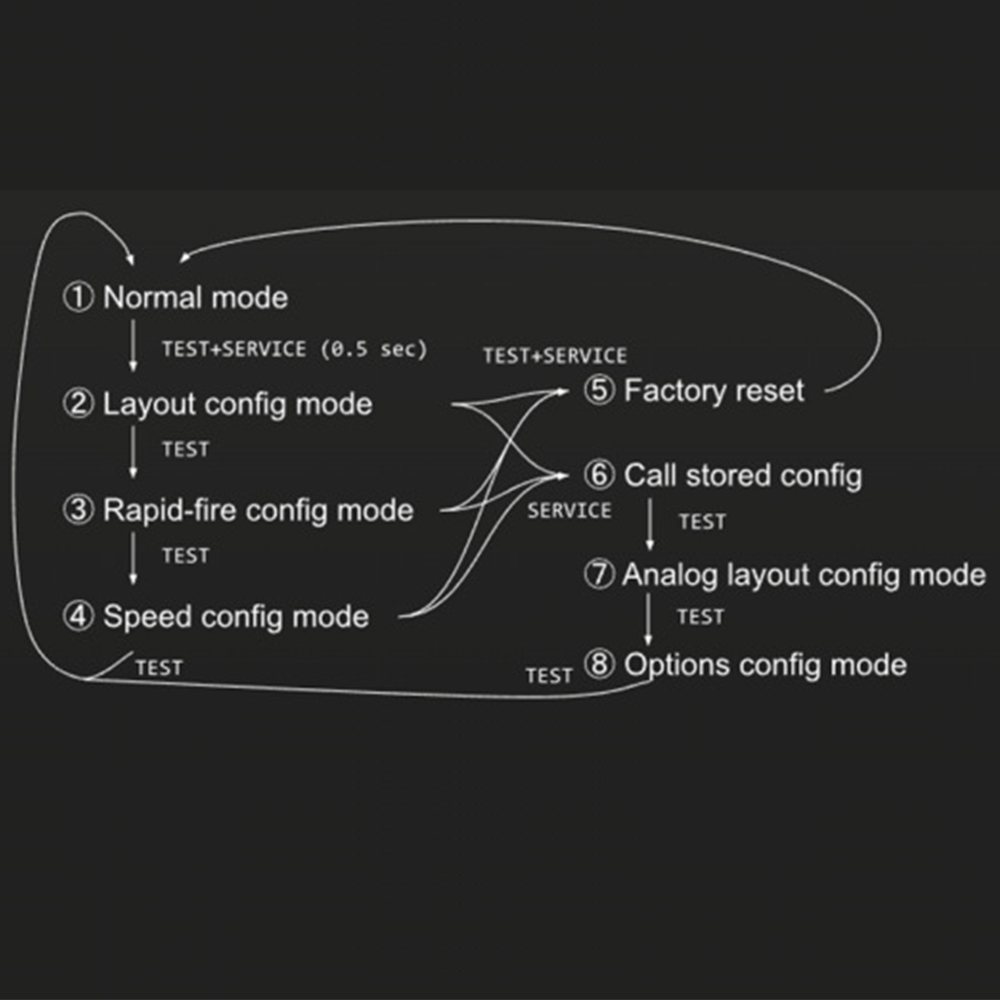
On boot, IONA runs in the normal mode. Operation modes are transited by pressing the TEST and SERVICE buttons on the IONA board.
① Normal mode (LED - blink or on, depending on JVS bus state)
Works as a JVS I/O controller with chosen settings.
② Layout config mode (LED - fast blink)
On pushing TEST and SERVICE together, it enters the layout config mode. You need to press both for at least 0.5 and at most 5 seconds together. You don’t need to push them exactly together, e.g. keeping TEST down and clicking SERVICE will work.
In the button layout mode, you will choose physical buttons in the following order, coin, start, button1 to 10. If you push multiple buttons together, you can assign multiple physical buttons to one button. You don’t need to push them at the exact time as well.
When you press a button, IONA starts recording all pressed buttons until all buttons are released, then assign them all to the target button. You continue this sequence until all 12 buttons are mapped. If you leave this mode before setting it all, the remaining buttons remain to have no assignment. If you configure no button, IONA doesn’t update the layout at all and moves to the next mode.
③ Rapid-fire config mode (LED - blink)
You can press multiple physical buttons for which rapid-fire is enabled. Similarly, timing should not be exact. You can try multiple times until exiting from this mode.
④ Speed config mode (LED - slow blink)
You can choose rapid-fire speed by buttons 1 - 6. Button 1 - 6 do not mean the physical buttons, but buttons mapped in the custom layout. Each button 1 - 6 is mapped to 30/20/15/12/10/8.5 fps. You can try any time until exiting from the mode. If you push multiple buttons, faster speed is taken. If release timing differs, the latter one is taken.
The chosen settings above will be stored persistently.
⑤ Factory reset (LED - flash)
You can reset all settings and restore default settings by pressing TEST and SERVICE together outside the normal mode. LED flashes, then go back to the normal mode automatically.
⑥ Call store config (LED-off)
You can enter the mode to call stored config by pushing the SERVICE button outside the normal mode. Pressing buttons 1 - 10 in the custom layout recall the configuration set 1 - 10. The initial set for the factory setting is 1. You can recall another config again until exiting the mode by pressing SERVICE again. It returns to the normal mode if the firmware is older than 1.40 by pressing SERVICE. Otherwise, ver 1.40 and later, pressing TEST moves to the analog layout config mode.
⑦ Analog layout config mode (LED - fast blink)
You can choose 6 inputs for analog signal reports. Analog input values are remembered as base values when you enter this mode. You can move an analog stick or a trigger that is recognized as analog input. You may want to move it right, down, or push for normal polarity. If you want to revise it, you can move it toward the opposite side. Once you stop moving the stick or the trigger and make it return to the original position, the input is recorded. You need to repeat the same steps for analog input 1 to 6, 6 times. You can quit this mode by pressing TEST, and the following assignments are just skipped and previous settings are used.
⑧ Options config mode (LED - blink)
You can quit the settings mode by pressing TEST, but options will be set via the P1 buttons on quitting the mode as below. The button number is logical one based on.
Product Description:
Compatible with Xbox 360 / Xbox One seriesPS3/switch controllers.
Custom Button Layout, Map at most 12 physical buttons to arbitrary logical buttons for JVS.
Rapid-fire, Enable rapid-fire mode per each physical button.
Persistent Configurations, store and restore at most 10 configuration sets of button layout, rapid-fire settings, and it’s speed
Firmware Updates, For bug fixes, or to improve compatibility, firmware updates are available.
Twin stick Mode, When a controller is connected to the 1P USB port, pushing the button switches operation mode between the normal mode and the twin stick mode.
Mahjong Mode, When a USB keyboard supporting boot mode, though almost all keyboards will support it, is connected, IONA switches to mahjong mode.
USE Guide:
1. Connect USB Type C port for power supply. It doesn’t need data connection as it’s just expected to suupply 5V power for IONA.
USB charger will be available. Of course, PC USB port can support the required power.
PC-based JVS system board could have a port for this use, e.g. exA-Arcadia has hidden USB ports.
But if you want to use a device that requires much power, supplying via USB Bus from PC may not be enough and IONA gets to be unstable.
2. Connect JVS port to the JVS system board. You can use a general USB cable.
3. Connect USB gamepads at any time. You can connect and disconnect even during the JVS bus is active.
When power is supplied, LED starts blinking. Once an address is assigned via JVS bus, LED gets on. It will start blinking again if IONA receives reset signal via JVS bus.
Settings
Operation Mode
On boot, IONA runs in the normal mode. Operation modes are transited by pressing the TEST and SERVICE buttons on the IONA board.
① Normal mode (LED - blink or on, depending on JVS bus state)
Works as a JVS I/O controller with chosen settings.
② Layout config mode (LED - fast blink)
On pushing TEST and SERVICE together, it enters the layout config mode. You need to press both for at least 0.5 and at most 5 seconds together. You don’t need to push them exactly together, e.g. keeping TEST down and clicking SERVICE will work.
In the button layout mode, you will choose physical buttons in the following order, coin, start, button1 to 10. If you push multiple buttons together, you can assign multiple physical buttons to one button. You don’t need to push them at the exact time as well.
When you press a button, IONA starts recording all pressed buttons until all buttons are released, then assign them all to the target button. You continue this sequence until all 12 buttons are mapped. If you leave this mode before setting it all, the remaining buttons remain to have no assignment. If you configure no button, IONA doesn’t update the layout at all and moves to the next mode.
③ Rapid-fire config mode (LED - blink)
You can press multiple physical buttons for which rapid-fire is enabled. Similarly, timing should not be exact. You can try multiple times until exiting from this mode.
④ Speed config mode (LED - slow blink)
You can choose rapid-fire speed by buttons 1 - 6. Button 1 - 6 do not mean the physical buttons, but buttons mapped in the custom layout. Each button 1 - 6 is mapped to 30/20/15/12/10/8.5 fps. You can try any time until exiting from the mode. If you push multiple buttons, faster speed is taken. If release timing differs, the latter one is taken.
The chosen settings above will be stored persistently.
⑤ Factory reset (LED - flash)
You can reset all settings and restore default settings by pressing TEST and SERVICE together outside the normal mode. LED flashes, then go back to the normal mode automatically.
⑥ Call store config (LED-off)
You can enter the mode to call stored config by pushing the SERVICE button outside the normal mode. Pressing buttons 1 - 10 in the custom layout recall the configuration set 1 - 10. The initial set for the factory setting is 1. You can recall another config again until exiting the mode by pressing SERVICE again. It returns to the normal mode if the firmware is older than 1.40 by pressing SERVICE. Otherwise, ver 1.40 and later, pressing TEST moves to the analog layout config mode.
⑦ Analog layout config mode (LED - fast blink)
You can choose 6 inputs for analog signal reports. Analog input values are remembered as base values when you enter this mode. You can move an analog stick or a trigger that is recognized as analog input. You may want to move it right, down, or push for normal polarity. If you want to revise it, you can move it toward the opposite side. Once you stop moving the stick or the trigger and make it return to the original position, the input is recorded. You need to repeat the same steps for analog input 1 to 6, 6 times. You can quit this mode by pressing TEST, and the following assignments are just skipped and previous settings are used.
⑧ Options config mode (LED - blink)
You can quit the settings mode by pressing TEST, but options will be set via the P1 buttons on quitting the mode as below. The button number is logical one based on.