3X Collar Receiver
3X Metal Probes
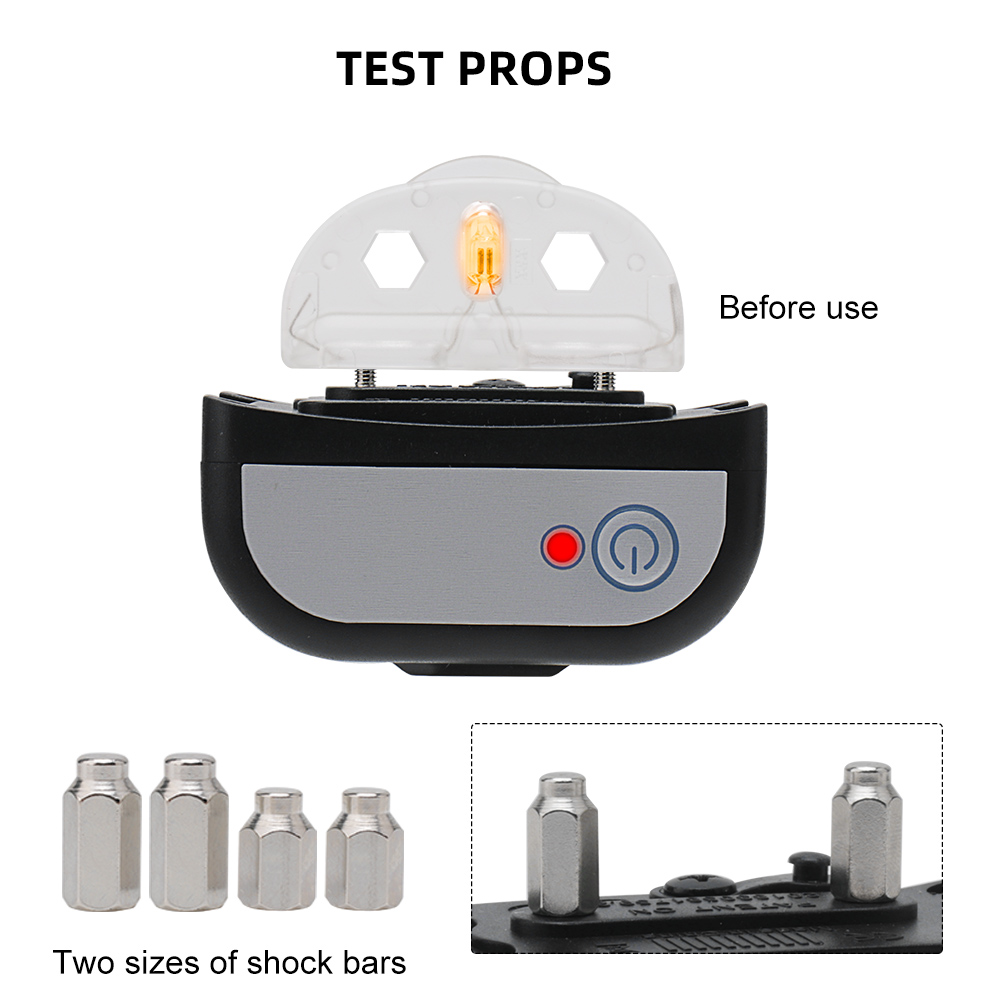
1X Test Light Tool
4X Screws
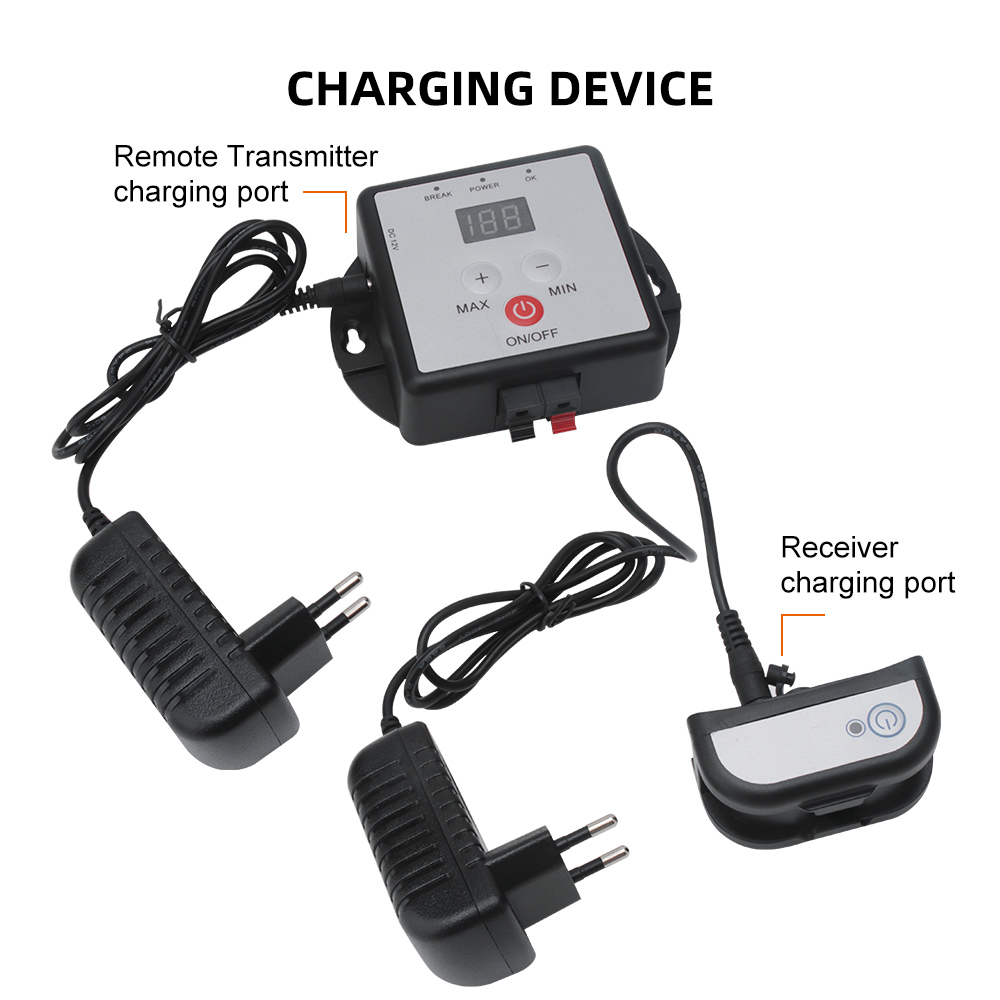
1X Charger
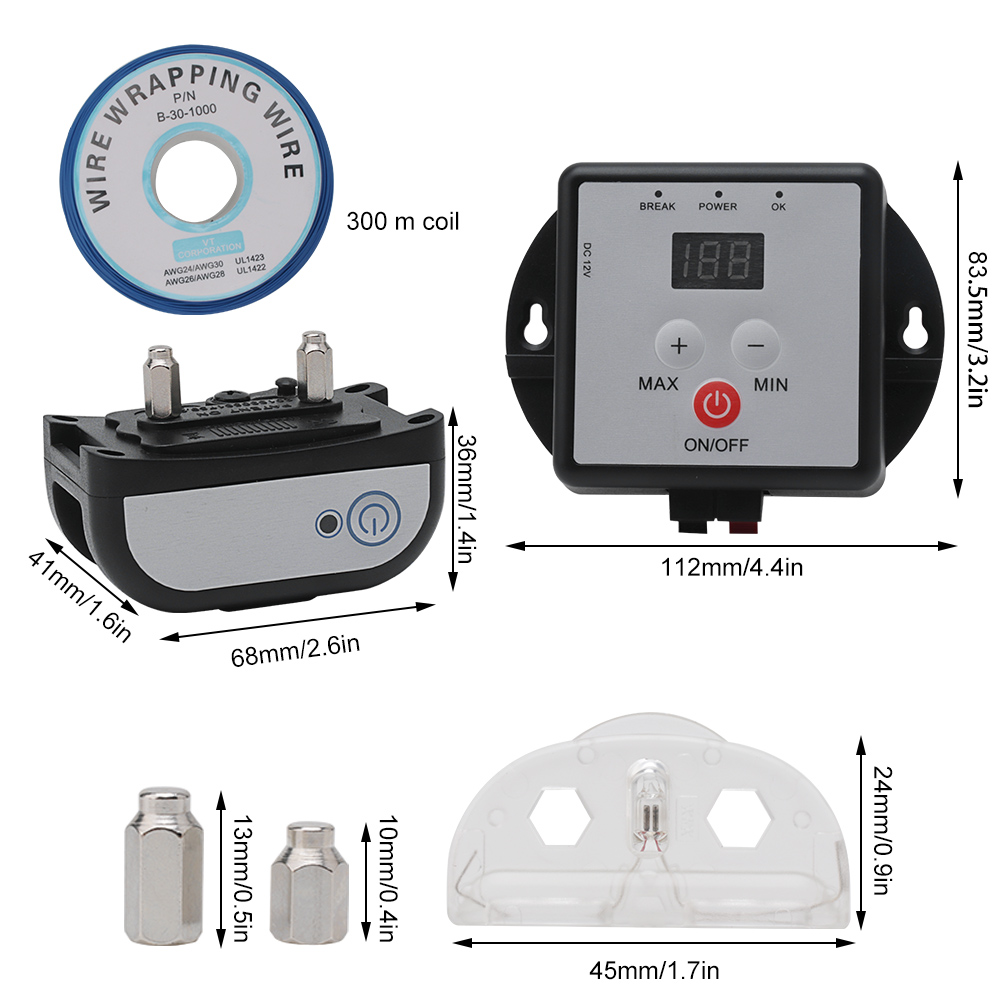
1X 300-meter Wire
20X Boundary Flags
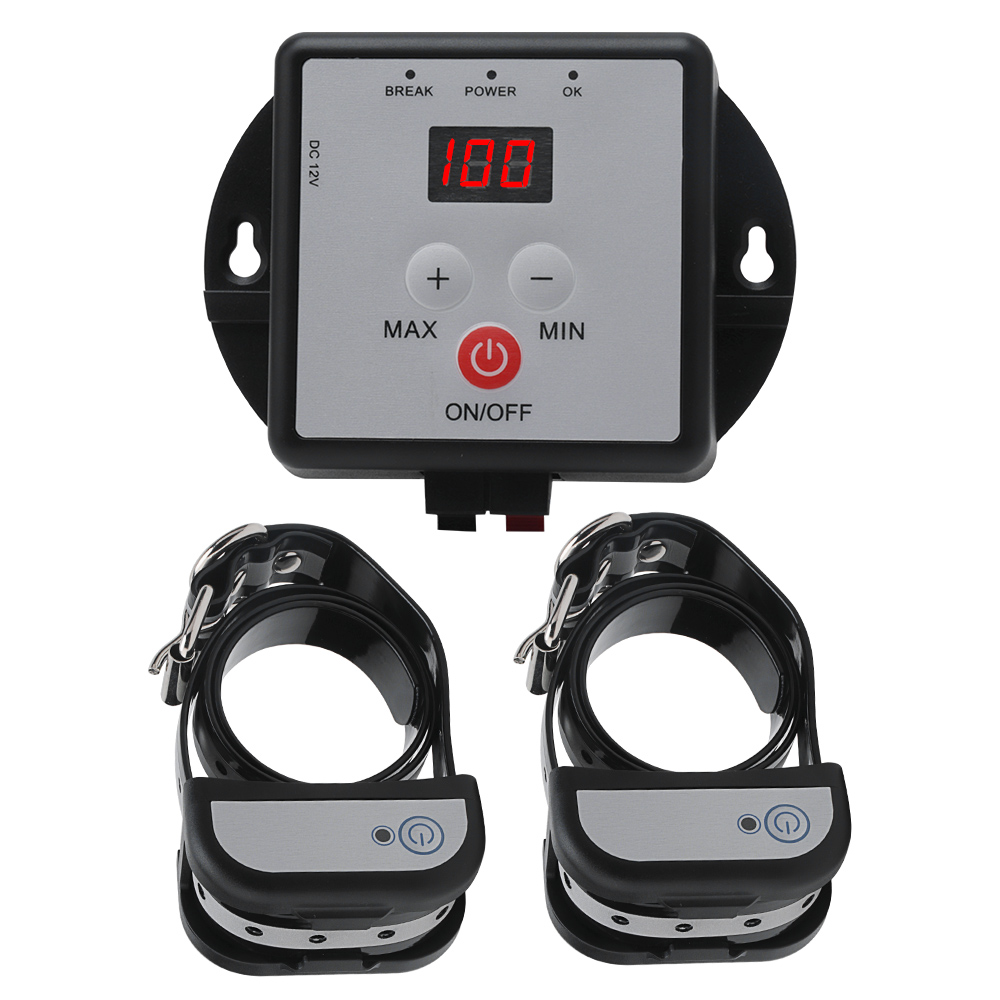
1X Transmitter
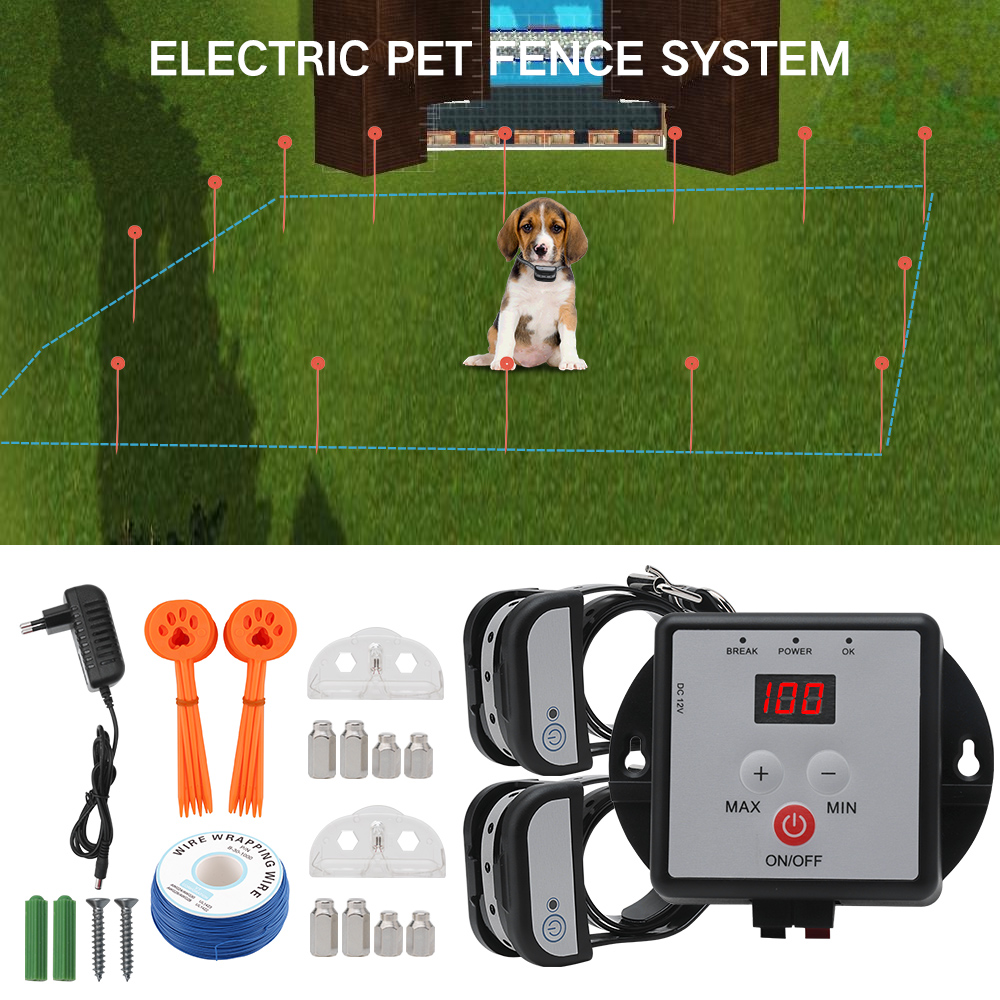
2X Collar Receiver
2X Metal Probes
1X Test Light Tool
4X Screws
1X Charger
1X 300-meter Wire
20X Boundary Flags
1X Transmitter
1X Collar Receiver
2X Metal Probes
1X Test Light Tool
4X Screws
1X Charger
1X 300-meter Wire
20X Boundary Flags
Weak current prompt: When the receiver's power is lower than 3 volts, the receiver red indicator will flash, indicating charging.
When bringing a new dog to the household, it’s key that it knows its limits.
Pet fence system offers the easiest and quickest way to train your dog to the ways of your home with a large selection of electronic collars. Our e-collars combine sophisticated technology with durability so your new pet can still enjoy the fun rough and tumble playtime with your family .
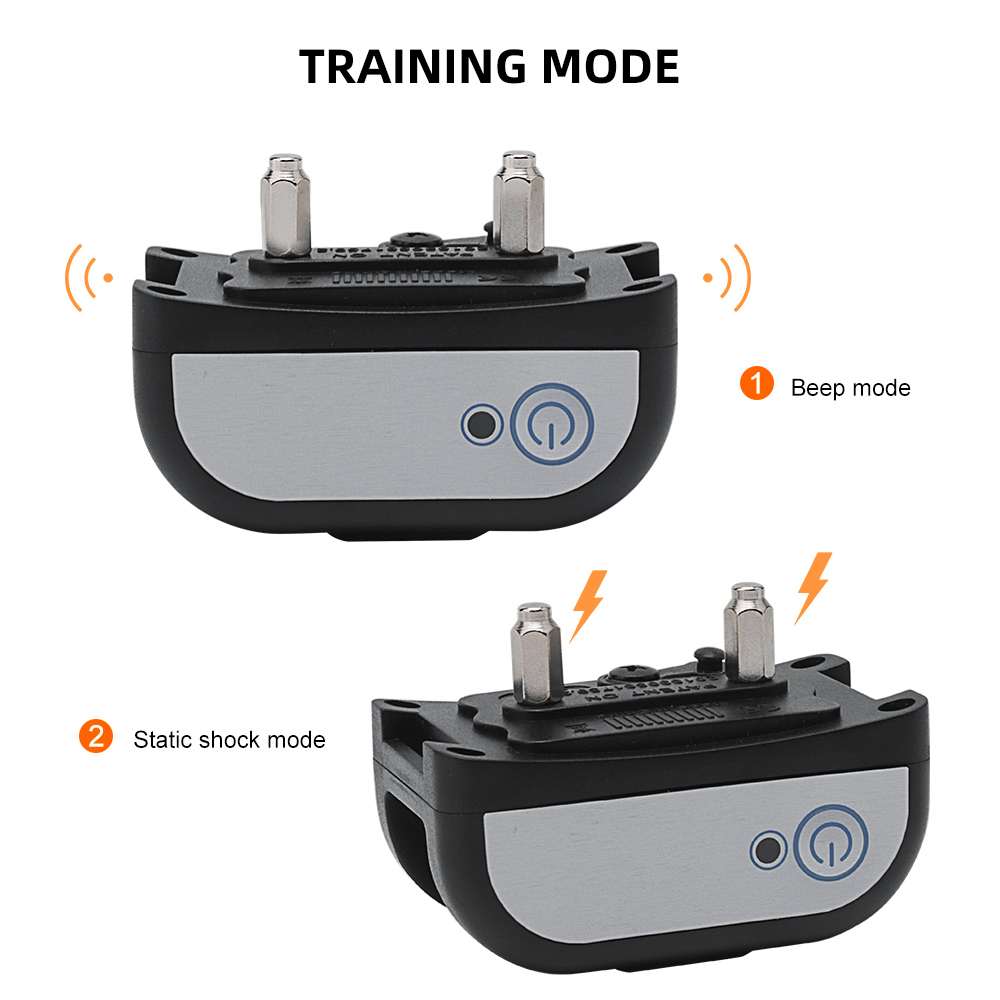
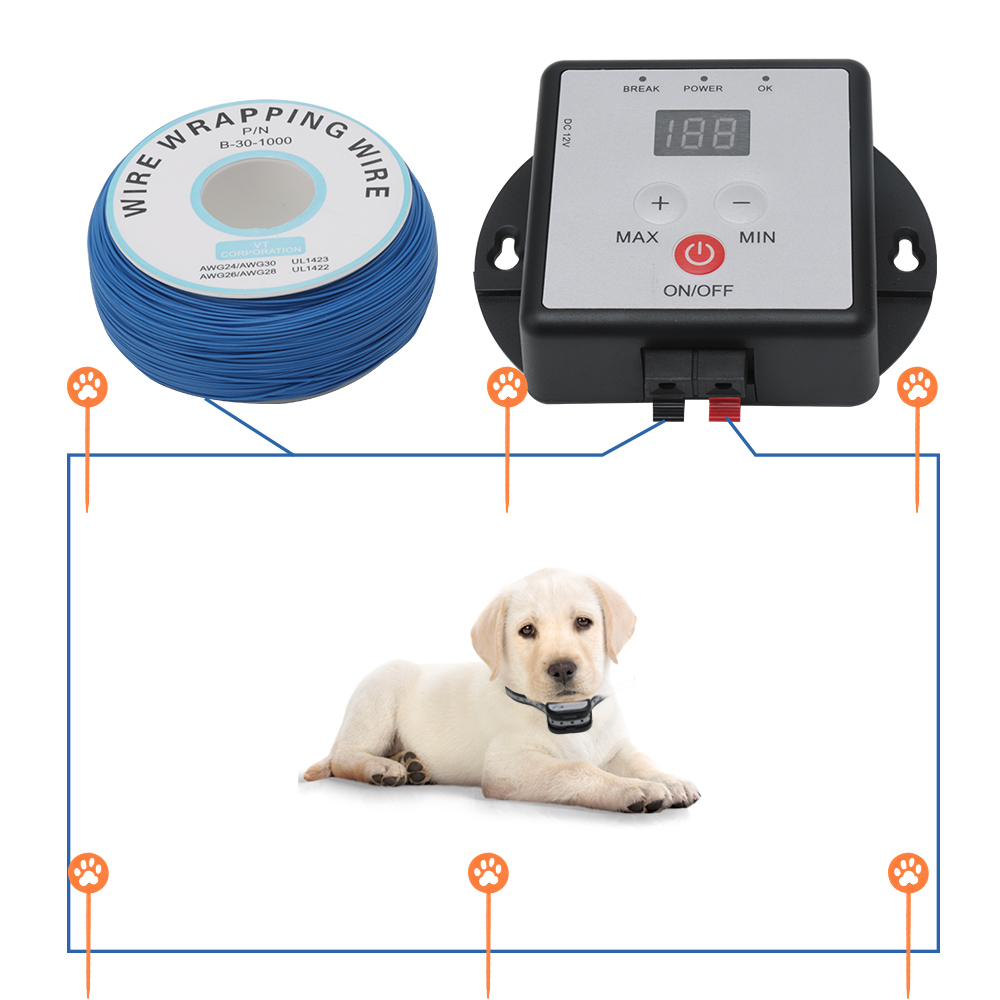
The harmless radio signal was issued by transmitter and go through the wire to be boundary of the “yard”. When your dog approaches the boundary beyond setting range, the receiver collar in dog neck will start up with a warning beep at first, If your dog keep running to the boundary, the receiver will issue static shock with gradually stronger intensity until your dog returns back to the safe area ,within the boundary you set up.
1. Proportional static shock
The closer your dog gets to the boundary, the more intense the shock will be;
2. Progressive Warning Tone
A warning tone will be issued twice and then a shock stimulus if your dog continues to move closer to the boundary
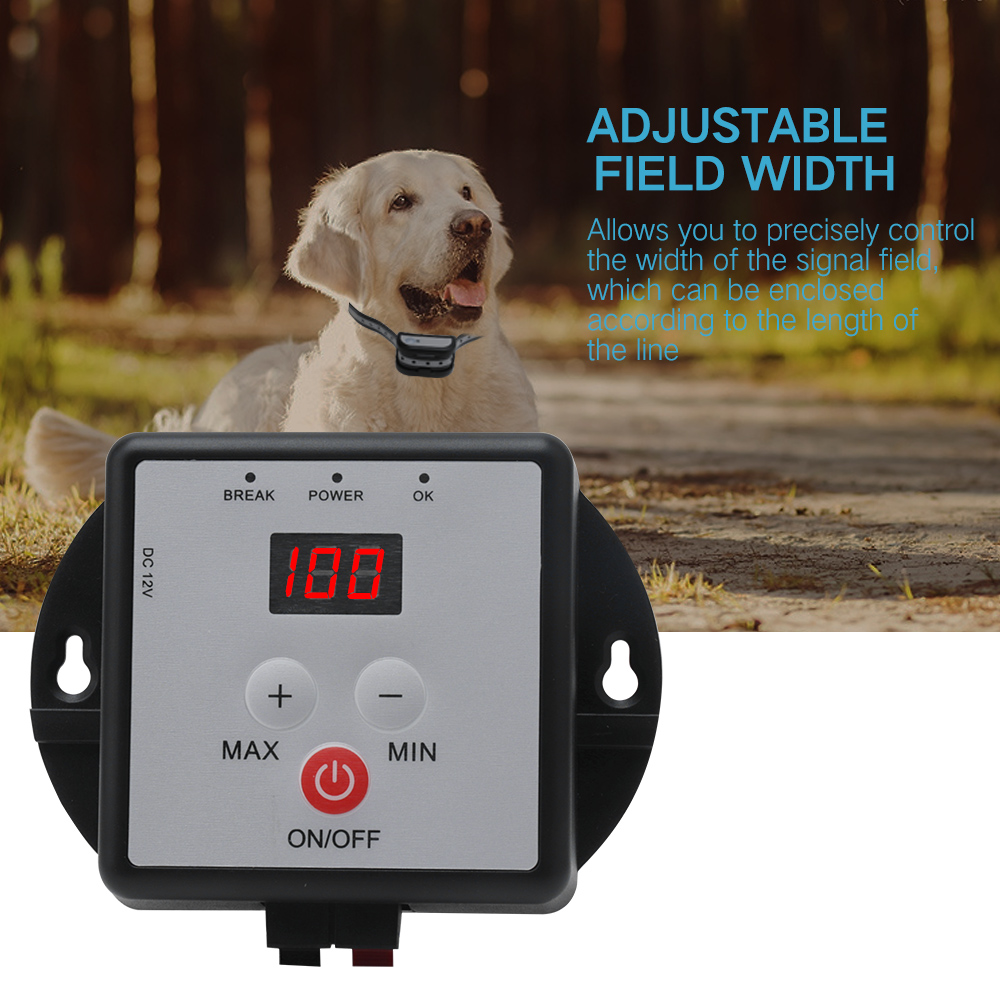
3. Variable Field Width Control
Allows you to precisely control the width of the signal field
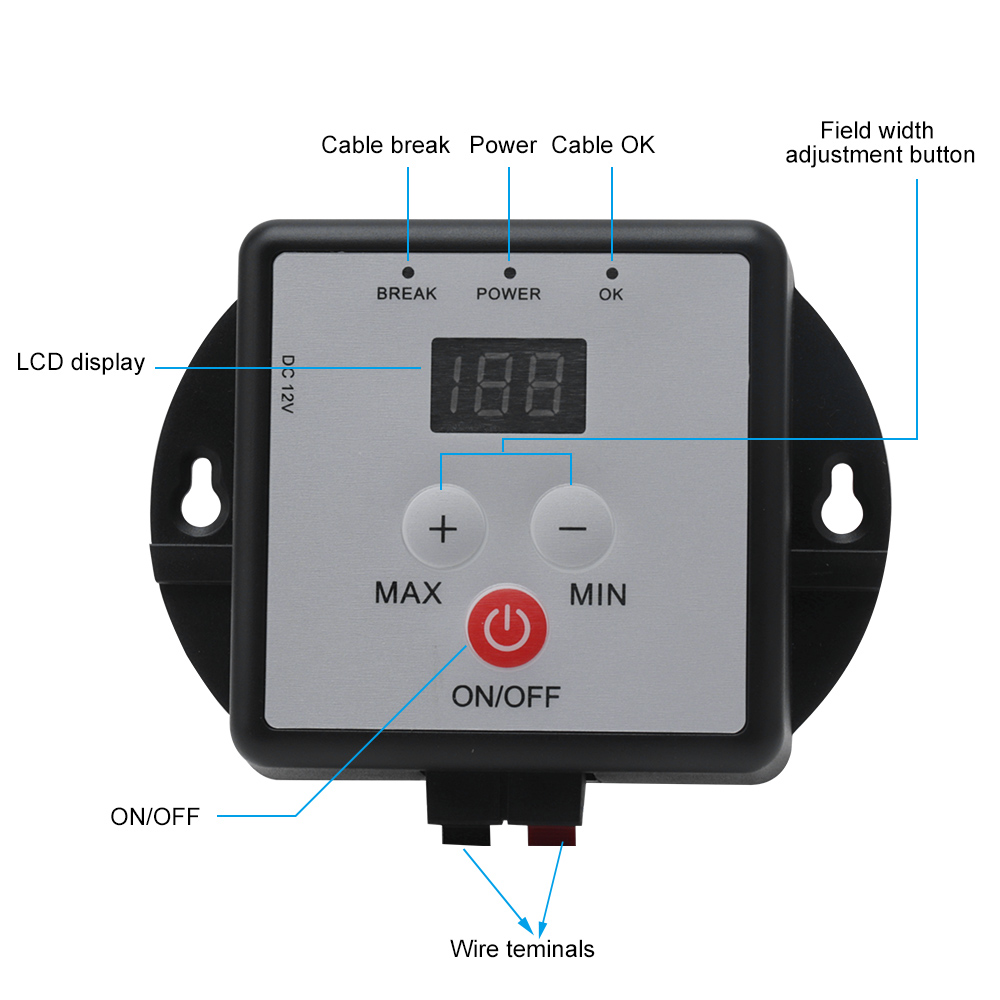
4. Audible and Visual Wire Break Indicators
Once the buried wire was broke, a loud sonic alarm will issue with a flashing light
5. Speed Detect anti-run through
The faster your dog is moving, and the higher level of intensity is issued
6. Multiple Collar Operation
Add as many collars as you like to contain as many animals you have
There is no limit to the number of collars it can control
7. Up to 2500/5000 square meters range(over 1.24 acre)
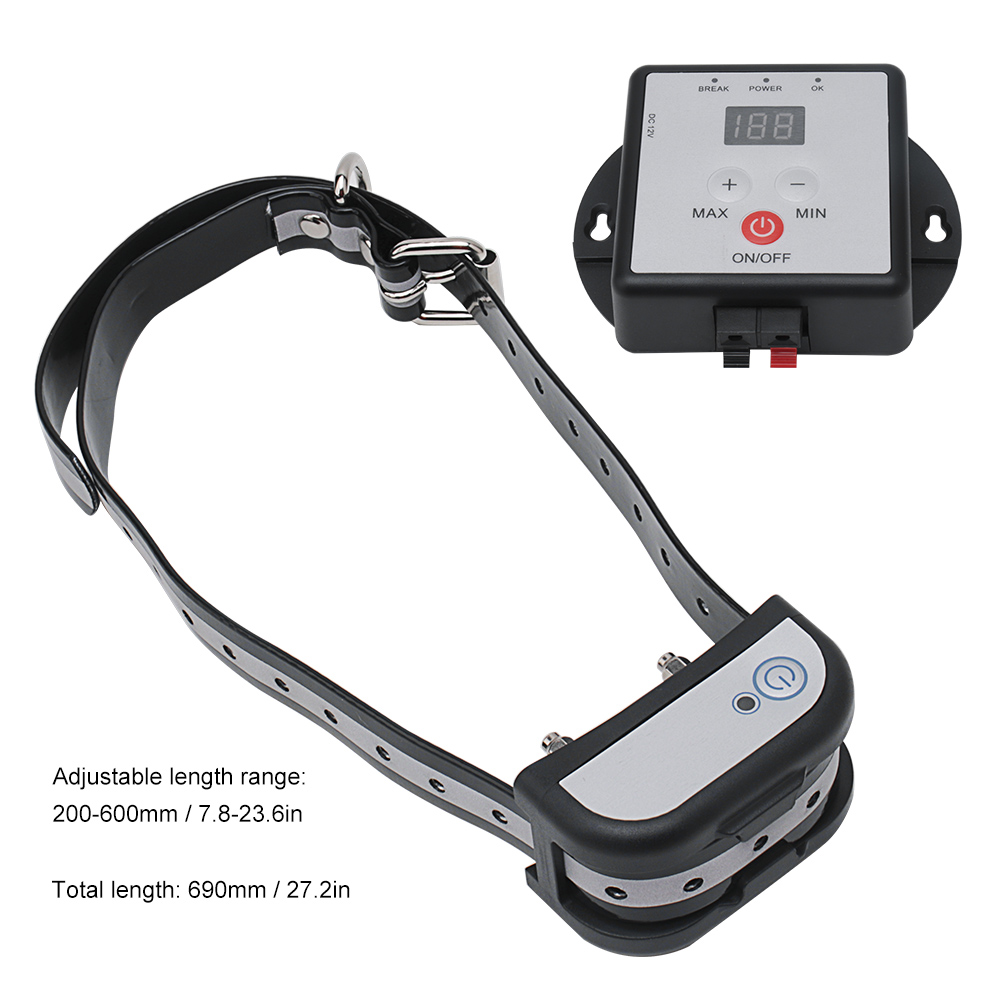
8. Reflective Strap Fluorescent TPU, Increase night safety
To make sure the fence system can be running smoothly, you should
design a diagram of the fence area at first. Then mount the transmitter
nearby the AC outlet, set the boundary with wire and flags, place the
receiver collar into neck of your dogs
Please install the system as below steps
Step 1: Mount the transmitter
To make transmitter work properly, you should ensure there is a 110/220
VAC outlet nearby before mounting it. Place the transmitter at a wall or
tree and fixed it with screws
Step 2: Install the boundary flags and Connect the wire
Connect one terminal of the wire to transmitter firstly, mount the boundary
flags one by one according to the boundary layout, and make sure the
wire go through the hole of flags meanwhile. Until all the flags has been
mounted properly along the boundary and come back to the transmitter
Please keep the excess wire around the bobbin and connect the terminal
of wire to transmitter
Notice: the packed. wire length of Is 200/300 meters. you can add an
extra wire to expand the boundary
Step 3: Set parameters for transmitter
The signal field is the distance from the wire to the place Where the collar
receiver first activates. Pushing ONOFF button to turn on/off the
transmitter power
The control range means the shortest distance between boundary wire
and the collar receiver. The value of power level is bigger and the control
range is bigger. Press ON/OFF button to turn on the transmitter, The "+"/ "-"
button on the transmitter can adjust the transmitter signal intensity, not
the correction intensity. Push the"+"button increase the control range and
"-"button for decreasing it
Set up the power level of transmitter signal properly following below table
Fence test function
Press the "+/-" button on the transmitter to set the control range
Comparison table, such as: 10: Distance 0.5 meters will work, the greater the number of offline, the farther the offline distance, the offline distance of 100 files is about 6 meters.
Slowly approaching the boundary line, the product will issue a “bi-bi” warning tone, then place the LED test light on the two contact points of the receiver. The LED lights up to indicate that there is a shock.
Note: Do not put the collar on the dog before the electric shock. After the product is tested, it is worn.
|
Transmitter Signal Level |
Remote Control Distance |
|
10 |
0.5M |
|
20 |
1.0M |
|
30 |
1.5M |
|
40 |
2.0M |
|
50 |
3.0M |
|
60 |
4.0M |
|
70 |
4.5M |
|
80 |
5.0M |
|
90 |
5.5M |
|
100 |
6.0M |
Firstly, two metal contact probes are assembled on the receiver screw column. The length of the two can be selected according to the length of the pet hair. There are 4 silicone rubber sleeves, which are placed on the electric shock column to prevent the metal from contacting the dog's skin and protecting the pet. Don't bring too tight, the gap between the belts can slide one finger as well.