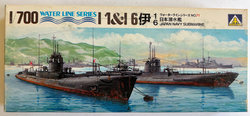
AOSHIMA
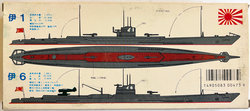
1/700-scale WATER LINE SERIES WW2 JAPANESE NAVY SUBMARINES I-1 & I-6
------------------------------
Additional Information from
Internet Encyclopedia
I-1 was a J1 type submarine of
the Imperial Japanese Navy. She was a large cruiser submarine displacing 2,135
tons and was the lead unit of the four submarines of her class. Commissioned in
1926, she served in the Second Sino-Japanese War and World War II. During the
latter conflict she operated in support of the attack on Pearl Harbor,
conducted anti-shipping patrols in the Indian Ocean, and took part in the
Aleutian Islands campaign and the Guadalcanal campaign. In January 1943, during
the Japanese evacuation of Guadalcanal, Operation Ke, the Royal New Zealand
Navy minesweeper corvettes HMNZS Kiwi and HMNZS Moa intercepted her, and she
was wrecked at Kamimbo Bay on the coast of Guadalcanal after the ensuing
surface battle.
Construction and commissioning
Built by Kawasaki at Kobe,
Japan, I-2 was laid down on 12 March 1923 with the name Submarine Cruiser No.
74.[5] She was launched on 15 October 1924.[5] Renamed I-1 on 1 November 1924,
she was completed in late February 1926 and underwent sea trials—in which
several German ship constructors participated—in the Seto Inland Sea off Awaji
Island.[5] The Imperial Japanese Navy accepted her for service and commissioned
her on 10 March 1926
Service history
Early service
On the day of her commissioning,
I-1 was attached to the Yokosuka Naval District.[5] On 1 August 1926, she and
her sister ship I-2 were assigned to Submarine Division 7 in Submarine Squadron
2 in the 2nd Fleet, a component of the Combined Fleet.[5] On 1 July 1927, the
division was reassigned to the Yokosuka Defense Division in the Yokosuka Naval
District, and on 15 September 1927, when Submarine Division 7 began another
tour with Submarine Squadron 2 in the 2nd Fleet,[6] I-1 was removed from the
division and reassigned directly to the Yokosuka Naval District. She returned
to the division on 10 September 1928 during its assignment to Submarine
Squadron 2. At 10:35 on 28 November 1928, as Submarine Division 7 returned to
Yokosuka, Japan, in heavy seas and limited visibility, I-1 ran aground off
Yokosuka.[5] She suffered minor damage.[5] No flooding occurred, but she was
drydocked at Yokosuka to have her hull inspected.[5] On 5 November 1929, I-1
was decommissioned and placed in reserve,[5] and on 30 November 1929 Submarine
Division 7 again was assigned to the Yokosuka Defense Division in the Yokosuka
Naval District.
While in reserve, I-1 underwent
modernization, in which her German-made diesel engines and entire battery
installation were replaced.[5] On 1 August 1930, Submarine Division 7 began an
assignment to Submarine Squadron 1 in the 1st Fleet, a component of the
Combined Fleet, and, with her modernization work completed, I-1 was
recommissioned on 15 November 1930[5] and rejoined the division.
On 1 October 1931, Submarine
Division 7 was reassigned to the Yokosuka Defense Division in the Yokosuka
Naval District, but it began another tour of duty in Submarine Squadron 1 in
the 1st Fleet on 1 December 1931. It completed this assignment on 1 October
1932 and again was assigned to the Yokosuka Defense Division in the Yokosuka
Naval District, then returned to Submarine Squadron 1 in the 1st Fleet for a
third time on either 15 November 1933 or 15 November 1934,[5] according to
different sources.
While I-1 was out of commission,
her American-made sonar was replaced by a sonar system manufactured in Japan
and her conning tower was streamlined.[5] Submarine Division 7 returned to duty
with Submarine Squadron 1 in the 1st Fleet on 20 January 1936 and, after her
reconstruction was complete, I-1 was recommissioned on 15 February 1936[5] and
rejoined the division. On 27 March 1937, I-1 departed Sasebo in company with
I-2, I-3, I-4, I-5, and I-6 for training in the vicinity of Qingdao, China. The six submarines concluded the training cruise with their arrival at Ariake
Bay on 6 April 1937.
Second Sino-Japanese War
On 7 July 1937 the first day of
the Marco Polo Bridge Incident took place, beginning the Second Sino-Japanese
War.[12] In September 1937, Submarine Squadron 1 was reassigned to the 3rd
Fleet,[13] which in turn was subordinated to the China Area Fleet for service
in Chinese waters.[13] The squadron, consisting of I-1, I-2, I-3, I-4, I-5, and
I-6,[13] deployed to a base at Hong Kong with the submarine tenders Chōgei and
Taigei in September 1937.[13] From Hong Kong, the submarines began operations
in support of a Japanese blockade of China and patrols of China′s central and
southern coast.[13] From 20 or 21[5] (according to different sources) to 23
August 1937, all six submarines of Submarine Squadron 1 operated in the East
China Sea as distant cover for an operation in which the battleships Nagato,
Mutsu, Haruna, and Kirishima and the light cruiser Isuzu ferried troops from
Tadotsu, Japan, to Shanghai, China.
Submarine Squadron 1 was based
at Hong Kong until the autumn of 1938.[13] In an effort to reduce international
tensions over the conflict in China, Japan withdrew its submarines from Chinese
waters in December 1938.
1938–1941
On 10 November 1941, the
commander of the 6th Fleet, Vice Admiral Mitsumi Shimizu, gathered the
commanding officers of the fleet′s submarines together for a meeting aboard his
flagship, the light cruiser Katori, anchored in Saeki Bay.[5] His chief of staff
briefed them on the upcoming attack on Pearl Harbor, which would bring Japan
and the United States into World War II.[5] As the Imperial Japanese Navy began
to deploy for the upcoming conflict in the Pacific, the rest of Submarine
Squadron 1 got underway from Yokosuka on 16 November 1941, bound for the
Hawaiian Islands.[12] At the time, I-1 was undergoing repairs—during which a
very low frequency receiver was installed aboard her—at Yokosuka, so her
departure was delayed, but on 23 November 1941 she too left Yokosuka. After an
overnight stop in Tateyama Bight, she got underway for Hawaii, proceeding at
flank speed to catch up with her squadron mates and remaining on the surface
until within 600 nautical miles (1,100 km; 690 mi) of Oahu.
First war patrol
At 07:30 on 7 December 1941, I-1
sighted an Aichi E13A1 (Allied reporting name "Jake") floatplane
returning to the heavy cruiser Tone after a reconnaissance flight over Lahaina
Roads off Maui.[5] In the following days, she was attacked repeatedly by
aircraft; although she suffered no damage, she began to keep her negative
buoyancy tank flooded when surfaced so that she could dive more quickly.[5]
While on the surface at 05:30 on 10 December 1941 she sighted a United States
Navy aircraft carrier—probably USS Enterprise (CV-6)—24 nautical miles (44 km;
28 mi) north-northeast of Kahala Point on Kauai but was forced to submerge and
was unable to transmit a sighting report for almost 12 hours.[5] She often is
credited with a bombardment of Kahului, Maui, on 15 December 1941, although it
actually was the submarine I-75 that shelled Kahului that day.
I-1 attacked a transport south
of the Kauai Channel on 7 January 1942, but scored no hits.[5] On 9 January
1942, she was ordered to divert from her patrol and search for the United
States Navy aircraft carrier USS Lexington (CV-2), which the submarine I-18 had
sighted northeast of Johnston Island.[5] but she did not find Lexington. She
arrived at Kwajalein in company with I-2 and I-3 on 22 January 1942.[5] The
three submarines departed Kwajalein on 24 January 1942 bound for Yokosuka,
which I-1 reached on 1 February 1942.
Second war patrol
While I-1 was at Yokosuka,
Submarine Squadron 2—consisting of I-1, I-2, I-3, I-4, I-5, I-6, and I-7—was
assigned to the Dutch East Indies Invasion Force in the Southeast Area Force on
8 February 1942.[5] I-1 departed Yokosuka on 13 February 1942 bound for Palau,
which she reached on 16 February.[5] After refueling from the oiler Fujisan
Maru, she got back underway for the Netherlands East Indies on 17 February 1942
in company with I-2 and I-3.[5] She stopped at Staring Bay on the Southeast
Peninsula of Celebes just southeast of Kendari, then put back to sea at 17:00
on 23 February 1942 to begin her second war patrol, bound for the Timor Sea[5]
and Indian Ocean. Shortly after she left Staring Bay, her starboard diesel
engine′s crankshaft broke down, but she pushed on, conducting most of her
patrol on only one shaft.
On 9 March 1942, I-1 captured a
canoe carrying five Australian Army personnel trying to reach Australia from
Dutch Timor.[5] On 11 March 1942, she reached Staring Bay, where she moored
alongside the submarine tender Santos Maru.[5] She transferred her prisoners to
a hospital ship.[5] On 15 March 1942 she got underway for Yokosuka, which she
reached on 27 March 1942.
March–June
After arriving at Yokosuka, I-1
was drydocked for repairs to her starboard diesel engine[5] and its crankshaft.
She also underwent an overhaul in which shipyard workers replaced the 7.7-mm
machine gun on her bridge with a 13.2-mm Type 93 machine gun and her Zeiss
3-meter (10 ft) rangefinder with a Japanese Type 97 rangefinder, removed some
of the armor protecting her torpedo storage compartment, and installed an
automatic trim system.[5] On 10 April 1942, she was reassigned along with I-2
and I-3 to the Advance Force.[5] On 18 April 1942, 16 United States Army Air
Forces B-25 Mitchell bombers launched by the aircraft carrier USS Hornet (CV-8)
struck targets on Honshu in the Doolittle Raid.[5] One B-25 targeted Yokosuka,
and the members of I-1's crew on deck saw it damage the drydocked aircraft
carrier Ryūhō, which was undergoing conversion from the submarine tender
Taigei.
On 7 June 1942, I-1 took part in
experiments in Tokyo Bay with a kite balloon intended for use by merchant
ships.[5] She made several mock attack runs against a ship carrying a prototype
of the balloon.
Fourth war patrol
While I-1 was at Yokosuka, the
Aleutian Islands campaign began on 3–4 June 1942 with a Japanese air raid on
Dutch Harbor, Alaska, followed quickly by the unopposed Japanese occupation in
the Aleutian Islands of Attu on 5 June and Kiska on 7 June 1942. On 10 June
1942, I-1, I-2, I-3, I-4, I-5, I-6, and I-7 were reassigned to the Northern
Force for duty in the Aleutians, and on 11 June 1942 I-1 set out for Aleutian
waters in company with I-2, I-3, I-4, and I-7 to begin her fourth war
patrol.[5] On 20 June 1942, I-1, I-2, and I-3 joined the "K" patrol
line in the North Pacific Ocean between 48°N 178°W and 50°N 178°W.[5] In
mid-July 1942, an unidentified American warship—possibly the United States
Coast Guard cutter USCGC Onondaga (WPG-79)—attacked I-1 in the North Pacific
Ocean south of Adak Island and pursued her for 19 hours before I-1 finally
dived to 260 feet (79 m) and escaped.[5] On 20 July 1942, I-1 was reassigned to
the Advance Force and received orders that day to return to Yokosuka, which she
reached on 1 August 1942.
Guadalcanal campaign, 1942
During I-1's stay at Yokosuka,
the Guadalcanal campaign began on 7 August 1942 with U.S. amphibious landings
on Guadalcanal, Tulagi, Florida Island, Gavutu, and Tanambogo in the
southeastern Solomon Islands.[5] On 20 August 1942, Submarine Squadron 2 was
disbanded.[5] In late August 1942, I-2 underwent work at Yokosuka Navy Yard in
which her after 140-millimeter (5.5 in) deck gun was removed and a mounting for
a waterproofed 46-foot (14 m) Daihatsu-class landing craft was installed abaft
her conning tower, which improved her ability to transport supplies to Japanese
forces ashore in the Solomon Islands.[5] With the work completed in early
September 1942, she began exercises with the Maizuru 4th Special Naval Landing
Force (SNLF), which had been designated as "Special Landing Unit" for
a raid the Japanese planned on Espiritu Santo in the New Hebrides.[5] I-1 was
to land the SNLF personnel for the raid.
I-1 got underway on 1 October
1942 to carry supplies to a detachment of the Sasebo 5th SNLF on Goodenough
Island, carrying a Daihatsu, the Daihatsu's three-man crew, and a cargo of food
and ammunition.[5] At 22:40 on 3 October 1942 she surfaced off Kilia Mission on
the southwestern tip of Goodenough Island and the Daihatsu took her cargo to
shore.[5] She embarked 71 wounded SLNF personnel and the cremated remains of 13
others, recovered the Daihatsu, and returned to Rabaul, which she reached at
13:30 on 6 October 1942.[5] She set out again with another koad of food and
ammunition on 11 October 1942.[5] She surfaced off Kilia Mission at 18:30 on 13
October and launched her Daihatsu. Allied intelligence had warned of her
arrival, and a Royal Australian Air Force Lockheed Hudson Mark IIIA patrol
bomber of No. 32 Squadron attacked the landing area, dropping flares and bombs,
and I-1 submerged and departed, leaving her Daihatsu behind.[5] She reached
Rabaul on 18 October 1942.
On 17 October 1942, I-1 was
reassigned to the Advance Force, and on 22 October 1942 she left Rabaul to join
a submarine patrol group operating south of San Cristobal in advance of the
upcoming Battle of the Santa Cruz Islands,[5] fought from 25 to 27 October. On
28 October 1942, she received orders to search for downed Japanese air crews in
the vicinity of the Stewart Islands.[5] She began to search the waters around
the islands on 29 October, but soon had to abort her search when her starboard
crankshaft failed again.[5] A U.S. Navy PBY-5 Catalina of Patrol Squadron 11
(VP-11) reported attacking a submarine on 29 October 1942 at 13°15′S 162°45′E,
and its target most likely was I-1.[5] I-1 proceeded to Truk.[5] She departed
Truk at 17:00 on 13 November 1942 bound for Yokosuka, which she reached at
16:30 on 20 November 1942.
November 1942–January 1943
On 3 January 1943, I-1 put to
sea from Yokosuka bound for Truk, which she reached at 18:00 on 10 January
1943.[5] After arriving, she unloaded all but two of her torpedoes[5] and
received her Daihatsu. At 06:30 on 12 January 1943 she put to sea to conduct
Daihatsu launch tests, but was back at her anchorage at 08:30 to repair the air
induction valve for her diesel engines.[5] She conducted more launch tests on
14 January, and on 15 January she got underway at 13:00 for nighttime launch
tests, returning to port by 20:00.
Guadalcanal campaign, 1943
At 19:00 on 16 January 1943, I-1
left Truk for Rabaul, where she arrived at 07:30 on 20 January 1943.[5] She
took aboard a cargo of rubber containers loaded with two days of food
rations—rice, bean paste, curry, ham, and sausages—for 3,000 men.[5] At 16:00
on 24 January 1943, she departed Rabaul bound for Guadalcanal, where she was to
deliver her cargo at Kamimbo Bay on the island's northwest coast.
On 26 January 1943, the
commander of Allied naval forces in the Solomon Islands informed all Allied
ships in the Guadalcanal–Tulagi area of the possibility of Japanese supply
submarines arriving at Kamimbo Bay on the evenings of 26, 27, and 29 January 1943.[5]
The Royal New Zealand Navy minesweeper corvettes HMNZS Kiwi and HMNZS Moa
received orders to conduct an antisubmarine patrol in the Kamimbo Bay area.[5]
For its part, the Japanese 6th Fleet warned Submarine Division 7 that Allied
motor torpedo boats were operating in the vicinity of Kamimbo Bay and advised
them to unload supplies only after dark.
Loss
I-1 surfaced off Kamimbo Bay in
a heavy rain squall at 20:30 on 29 January 1943 and headed towards shore,
trimmed with her decks awash.[5][14] At 20:35,[14] Kiwi, which was patrolling
with Moa off Kamimbo Bay, detected I-1, first with her listening gear and then
with asdic, at a range of 3,000 yards (2,700 m).[5][14][15] Moa attempted to
confirm the contact, but could not.[5][14] Kiwi closed the range.[5][14] When
one of I-1's lookouts sighted Kiwi and Moa—misidentifying them as torpedo
boats—I-1 turned to port and submerged, diving to 100 feet (30 m), and rigging
for silent running.[5][14] Kiwi saw I-1 submerging and moved in to attack,
dropping 12 depth charges in two patterns of six.[5][14] The depth charges
detonated close to I-1, knocking several of her men off their feet, and I-1
sprang a leak in her aft provision room.
At 21:20, Kiwi turned toward I-1
at full speed at a distance of 400 yards (370 m). I-1's gunners were unable to
hit Kiwi, which was partially shielded by I-1's conning tower, and Kiwi rammed
her on her port side abaft her conning tower.[5][14] As Kiwi backed off, she
came into the unobstructed field of fire of I-1's deck gun, and I-1's gunners
claimed hits that set Kiwi on fire, although in fact no fire broke out aboard
Kiwi.[5][14] Believing they were in combat with torpedo boats, I-1's lookouts
also reported seeing three torpedoes pass close aboard,[5][14] although the two
New Zealand corvettes had no torpedo armament.
At 23:15, I-1 ran hard aground
on Fish Reef off the coast of Guadalcanal, 330 yards (300 m) north of Kamimbo
Bay. The entire after half of her hull flooded, and she developed a heavy list
to starboard. Sixty-six men abandoned ship, and not long afterward I-1 sank at
09°13′S 159°40′E. She came to rest with 15 feet (4.6 m) of her bow projecting
from the water at a 45-degree angle.
I-1 suffered 27 killed or
missing in the battle with Kiwi and Moa.[5][14] Sixty-eight men survived,
including two men who went overboard during the battle and swam to Guadalcanal
separately from the other survivors.[5][14] The only fatality on the New Zealand
side was Kiwi's searchlight operator, who remained at his post despite
suffering a mortal gunshot wound during Kiwi's second ramming attempt and died
two days later.[5][15] Between them, the two corvettes expended fifty-eight
4-inch (102 mm) rounds, claiming 17 hits and seven probable hits, as well as an
estimated 1,259 rounds of Oerlikon ammunition and 3,500 rounds from small arms.
Salvage and demolition attempts
Moa patrolled off I-1's wreck
until dawn on 30 January 1943, when she closed to inspect it.[5][15] She found
two survivors at the wreck, capturing one and killing the other with
machine-gun fire.[5][15] She also retrieved nautical charts and what she believed
was a code book, although it more likely was I-1's logbook.[5] Japanese
artillery ashore opened fire on Moa, forcing her to leave the area.
Sixty-three of I-1's survivors
were evacuated from Guadalcanal on 1 February 1943.[5] When they reached Rabaul
and were debriefed, the Japanese concluded that code materials aboard her wreck
were in danger of compromise.[5] Meanwhile, I-1's torpedo officer, two of her
junior officers, and 11 men from Japanese destroyers reached the wreck in a
Daihatsu after 19:00 on 2 February 1943.[5] They attached two depth charges and
four smaller demolition charges to the wreck and set them off in an attempt to
destroy it by detonating torpedoes still aboard I-1.[5] Although the torpedoes
did not explode and the wreck was not destroyed, the depth charges caused
enough damage to prevent salvage of I-1.[5] Evacuated from Guadalcanal on 7
February 1943—the day the Guadalcanal campaign ended with the completion of
Operation Ke, the Japanese evacuation of all forces from the island—the three
officers subsequently reported their failure to destroy the wreck after they
arrived at Rabaul.[5]
On 10 February 1943, the
Japanese made another attempt to destroy I-1's wreck, when nine Buin-based
Aichi D3A1 (Allied reporting name "Val") dive bombers from
Bougainville escorted by 28 Mitsubishi A6M Zero (Allied reporting name
"Zeke") fighters attacked it.[5] Most of the dive bombers failed to
find the wreck, but one scored a hit on it near the conning tower with a
250-kilogram (551 lb) bomb.[5] On 11 February 1943, I-2 departed Shortland
Island with I-1's torpedo officer aboard, tasked with finding and destroying
I-1's wreck.
The crew of the U.S. Navy PT
boat PT-65 and embarked intelligence personnel inspect the wreck of I-1 on 11
February 1943.
As the Japanese feared, the
Allies began to investigate I-1's wreck in the hope of recovering intelligence
from it. On 11 February 1943, the day I-2 got underway from Shortland Island,
the U.S. Navy PT boat PT-65 arrived at the wreck carrying United States Army
intelligence officers[5] who assessed the potential of the wreck to yield
useful information. The submarine rescue vessel USS Ortolan (ASR-5) inspected
the wreck of I-1 on 13 February 1943, and her divers recovered five code books
and other important communications documents.[5] That evening, I-2 penetrated
Kamimbo Bay to a distance of only 1,100 yards (1,010 m) from shore but failed
to find I-1's wreck.[5][12] On 15 February 1943—the day the Imperial Japanese
Navy decided to consider all code materials aboard I-1 compromised and revised
and upgraded its codes[5]—she tried again, reaching a point 1.4 nautical miles
(2.6 km; 1.6 mi) from the coast before motor torpedo boats attacked her with
depth charges.[5][12] After an aircraft also attacked her at 11:20, I-2 gave up
and returned to Shortland Island.[12] Ultimately, the U.S. Navy reportedly
salvaged code books, charts, manuals, the ship's log, and other secret
documents, as well as equipment, from the wreck of I-1.
The Japanese struck I-1 from the
Navy list on 1 April 1943.
Postscript
I-1's gun on display at the
Torpedo Bay Navy Museum in Auckland, New Zealand, in June 2012.
In 1968, I-1's main deck gun was
salvaged and brought to Auckland, New Zealand, aboard the frigate HMNZS
Otago[16] for display at the Torpedo Bay Navy Museum.
In 1972, an Australian treasure
hunter in search of valuable metals blew up the bow section of I-1 With live torpedoes still inside, the
explosion destroyed the forward third of the submarine, with the bow section
split open. The after two-thirds of the wreck remained intact. I-1's wreck lies
on an incline with the remains of her bow in 45 feet (14 m) of water and her
stern at a depth of 90 feet (27 m).
I-1's pennant is on display in
the United States at the National Museum of the Pacific War in Fredericksburg,
Texas.
-----------------------------------------------
I-6 was an Imperial Japanese
Navy J2 type submarine commissioned in 1935. She was a large cruiser submarine
that served in the Second Sino-Japanese War and World War II. During the latter
conflict she operated in support of the attack on Pearl Harbor, torpedoed the
aircraft carrier USS Saratoga (CV-3), conducted anti-shipping patrols in the
Indian Ocean and South Pacific Ocean, and took part in the Aleutian Islands
campaign and New Guinea campaign before she was sunk in June 1944.
Design
I-6 was the only Junsen II- (or
"J2"-) type submarine. After the four Junsen I-type submarines (I-1,
I-2, I-3, and I-4), the Japanese had built I-5 as a modified Junsen I,
introducing an aviation capability to the Junsen type with the inclusion of a
hangar that allowed I-5 to carry and operate a floatplane. I-6 represented the
next step in the evolution of this aviation capability, as she had both a
hangar and a catapult for a floatplane. The next and last Junsen-type
submarines, I-7 and I-8, the only Junsen III-type submarines, also each had a
hangar and catapult for a floatplane.
Construction and commissioning
Built by Kawasaki at Kobe,
Japan, I-6 was laid down on 14 October 1932. She was launched on 31 March 1934
and completed and commissioned on 15 May 1935.
Service history
1935–1937
Upon commissioning, I-6 was
attached to the Yokosuka Naval District. On 1 June 1935, she was assigned to
Submarine Division 8 in Submarine Squadron 1 in the 1st Fleet, a component of
the Combined Fleet. She was taking part in maneuvers off Ise Bay at 14:27 on 1
August 1935 when she collided with the destroyer Akatsuki. She suffered damage
to her periscopes and proceeded to Yokosuka, Japan, for repairs. She was
reassigned directly to the Yokosuka Naval District on 15 November 1935. In July
1936, she embarked a Watanabe E9W1 (Allied reporting name "Slim")
reconnaissance seaplane for testing purposes.
Second Sino-Japanese War
On 7 July 1937 the first day of
the Marco Polo Bridge Incident took place, beginning the Second Sino-Japanese
War. In September 1937 Submarine Squadron 1 was reassigned to the 3rd Fleet,[8]
which in turn was subordinated to the China Area Fleet for service in Chinese
waters.[8] The squadron, consisting of I-1, I-2, I-3, I-4, I-5 and I-6,[8]
deployed to a base at Hong Kong with the submarine tenders Chōgei and Taigei in
September 1937.[8] From Hong Kong, the submarines began operations in support
of a Japanese blockade of China and patrols of China's central and southern
coast.[8] From 20 or 21 (sources disagree) to 23 August 1937, all six
submarines of Submarine Squadron 1 operated in the East China Sea as distant
cover for an operation in which the battleships Nagato, Mutsu, Haruna, and
Kirishima and the light cruiser Isuzu ferried troops from Tadotsu, Japan, to
Shanghai, China.
Submarine Squadron 1 was based
at Hong Kong until the autumn of 1938.[8] In an effort to reduce international
tensions over the conflict in China, Japan withdrew its submarines from Chinese
waters in December 1938.
1938–1941
Remaining a unit of Submarine
Division 8, I-6 was placed in Second Reserve in the Yokosuka Naval District on
15 December 1938, then on 1 April 1939 began an assignment at the Torpedo
School in the Yokosuka Naval District at Yokosuka. In mid-1940, her hangar and
catapult were removed, and thereafter she did not operate aircraft. Submarine
Squadron 2, including I-6, was resubordinated to the 6th Fleet on 15 November
1940.
World War II
First war patrol
On 7 December 1941, the
submarines of Submarine Squadron 2 took up patrol stations across a stretch of
the Pacific Ocean from northeast to northwest of Oahu. The submarines had
orders to conduct reconnaissance in the area and attack any ships which sortied
from Pearl Harbor during or after the attack, which occurred that morning.
I-6′s patrol area was between those of I-4 and I-5 and was located off the
northern entrance of Kaiwi Channel between Molokai and Oahu. At 08:40 on 9
December 1941, I-6 sighted the United States Navy aircraft carrier USS
Enterprise (CV-6) — which she misidentified as a Lexington-class aircraft
carrier — and two heavy cruisers north of Molokai steaming northeast at 20
knots (37 km/h; 23 mph). She attempted to attack Enterprise, but was forced to
go deep before she could. Several hours later she managed to transmit a
sighting report, which resulted in the Japanese ordering nine submarines to
attempt to intercept Enterprise, which they assumed was bound for the United
States West Coast. Out of position to participate in the pursuit of Enterprise,
I-6 was ordered to take up a new patrol area south of Oahu in waters between
the Kauai Channel and an area southeast of Pearl Harbor. Later in December, one
of her torpedomen was injured during a routine torpedo inspection; he died
several days later of sepsis on 27 December 1941 and was buried at sea.
On 9 January 1942, the submarine
I-18 reported sighting a Lexington-class aircraft carrier 270 nautical miles
(500 km; 310 mi) northeast of Johnston Island, and the 6th Fleet ordered a
number of submarines including I-1 to form a picket line northeast of Johnston
Island to find the carrier. When I-1 developed engine trouble, I-6 received
orders to replace her in the picket line. During the daylight hours of 10
January 1942, I-6′s lookouts sighted planes from the carrier on five separate
occasions, and her navigator plotted their courses and used the information to
estimate the carrier's position. While on the surface 270 nautical miles (500
km; 310 mi) northeast of Johnston Island at 18:41 on 11 January 1942, she
sighted a U.S. Navy destroyer and submerged. Not long afterwards, the aircraft
USS Saratoga (CV-3) hove into view at 19°N 165°W, steaming southeast at 15
knots (28 km/h; 17 mph) and accompanied by a heavy cruiser and another
destroyer. I-6 fired three Type 89 torpedoes at Saratoga at a range of 4,700
yards (4,300 m), and at 19:15 one of them hit Saratoga amidships on her port
side, killing six firemen and flooding three boiler rooms. Taking on 1,100 tons
of water, Saratoga heeled to starboard and then to port and lost headway. I-6
went to a depth of 330 feet (100 m), and when the escorting destroyers began a
counterattack at 19:58, they could not locate her. Her sound operator reported
hearing two large explosions followed by a number of smaller ones which
suggested that Saratoga had sunk and was breaking up on her way to the bottom,
and after 22:00 I-6 transmitted a report claiming two hits on, and the probable
sinking of, a Lexington-class aircraft carrier. In fact, Saratoga survived, but
the damage I-6 inflicted kept her out of combat for the next six months.
On 12 January 1942, I-6 departed
her patrol area bound for Kwajalein, which she reached on 22 January 1942 with
only 800 liters (180 imp gal; 210 U.S. gal) of fuel left. She got back underway
on 24 January 1942 bound for Yokosuka, which she reached on 2 February 1942.
She was drydocked in early February 1942 and began a refit and overhaul.
Second war patrol
While I-6 was at Yokosuka,
Submarine Squadron 2 — consisting of I-1, I-2, I-3, I-4, I-6, and the squadron
flagship, I-7 — was assigned to the Dutch East Indies Invasion Force in the
Southeast Area Force on 8 February 1942. On 13 February, the staff of Submarine
Division 8 transferred from I-6 to I-4, and I-6 departed Yokosuka on 14
February 1942 bound for the Netherlands East Indies. She arrived at Staring Bay
on the Southeast Peninsula of Celebes just southeast of Kendari on 22 February
1942. At 07:00 on 23 February 1942, she got back underway in company with I-4
and I-5 to begin her second war patrol, bound for a patrol area in the Indian
Ocean west of Sumatra. While I-5 and I-6 were on the surface west of Timor en
route their patrol areas on 25 February 1942, an Imperial Japanese Navy
Mitsubishi C5M (Allied reporting name "Babs") reconnaissance aircraft
escorted by nine Mitsubishi A6M Zero (Allied reporting name "Zeke")
fighters sighted the vessels at 12:30 Japan Standard Time and misidentified
them as Royal Netherlands Navy submarines. The Zeroes made repeated strafing
attacks that forced I-6 to submerge, but she suffered no damage. Her patrol
otherwise was uneventful, and she concluded it with her arrival at Penang in
Japanese-occupied British Malaya on 8 March 1942.
Third war patrol
Orders arrived from the
headquarters of the Combined Fleet for all the submarines of Submarine Squadron
2 except for I-1 to conduct reconnaissance operations along the coast of Ceylon
and western coast of India in preparation for Operation C, the upcoming Indian
Ocean raid by the aircraft carriers of the Combined Fleet's Mobile Force.
Accordingly, I-6 departed Penang on 26 March 1942 to begin her third war
patrol, assigned a patrol area in the Indian Ocean west of Bombay, India, and
north of the Maldive Islands. On 27 March, the German naval staff in Berlin
asked that Japan begin anti-shipping operations against Allied convoys in the
Indian Ocean.
At 16:35 on 31 March 1942, I-6
was in the Indian Ocean off Eight Degree Channel when she sighted an Allied
steamer. She commenced an approach and was about to fire torpedoes when she
identified the ship as a hospital ship — probably the British hospital ship
HMHS Vita on a voyage from Addu Atoll to the Ceylon area — and called off the
attack. On the afternoon of 2 April 1942, I-6 was in the Arabian Sea 300
nautical miles (560 km; 350 mi) southwest of Bombay when she sighted the
British 5,897-ton steamer Clan Ross, which was on her way from Liverpool,
England, to Cochin, India, carrying 3,655 tons of general cargo and 1,027 tons
of explosives. She fired two torpedoes at a range of 1,640 yards (1,500 m),
scoring one hit amidships on Clan Ross′s port side. Clan Ross sank by the stern
at 14:14 at 15°58′N 068°24′E with the loss of 11 crew members killed and three
injured. I-6 surfaced and approached the survivors. I-6′s crew interrogated the
survivors, provided them with fresh water and biscuits, and gave them the
bearing to Bombay, then lined up on I-6′s afterdeck, saluted the survivors, and
wished them "bon voyage" in broken French.
While on the surface at around
16:00 on 7 April 1942, I-6 encountered the British 5,424-ton merchant ship
Bahadur — bound from Bombay to Basra, Iraq, with a cargo of 5,100 tons of
government stores and ammunition — in the Arabian Sea 170 nautical miles (310
km; 200 mi) northwest of Bombay. I-6 submerged and fired torpedoes, but
Bahadur′s crew spotted them and Bahadur made a hard turn to starboard, evaded
the torpedoes, and attempted to open the range at top speed. I-6 fired two
torpedoes from her stern torpedo tubes, but they also missed. She then surfaced
and pursued Bahadur, opening fire with her 127-millimeter (5 in) deck gun at a
range of 6,570 yards (6,010 m). The gun jammed after firing only one round, and
I-6 submerged and gave up the chase. Bahadur suddenly stopped, however, and
lowered her lifeboats. I-6 closed and fired two more torpedoes from a position
on Bahadur′s port beam. Bahadur sank by the stern at 19:20 at 19°44′N 068°28′E.
I-6 surfaced in the Arabian Sea
300 nautical miles (560 km; 350 mi) southwest of Bombay after 08:15 on 10 April
1942 to attack two 150-ton dhows with her deck gun, claiming both of them sunk.
Her patrol ended with her arrival at Seletar, Singapore, on 17 April 1942. She
departed Singapore on 21 April 1942 in company with I-5 to head for Yokosuka,
which she reached on 1 May 1942. She underwent repairs there until 6 June 1942.
Fourth war patrol
While I-6 was at Yokosuka, the
Aleutian Islands campaign began on 3–4 June 1942 with a Japanese air raid on
Dutch Harbor, Alaska, followed quickly by the unopposed Japanese occupation in
the Aleutian Islands of Attu on 5 June and Kiska on 7 June 1942. On 10 June
1942, I-1, I-2, I-3, I-4, I-5, I-6, and I-7 were reassigned to the Northern
Force for duty in the Aleutians, and on either 17 or 20 June 1942 I-6 set out
for Aleutian waters to begin her fourth war patrol. She joined the
"K" patrol line in the Unimak Pass area. On 7 July 1942, she received
orders to move to the Kiska area. When the rest of Submarine Squadron 2 was
ordered to return to Japan on 20 July 1942, she was ordered to remain behind
and operate from Kiska.
On 29 July 1942, an Imperial
Japanese Navy Kawanishi H6K (Allied reporting name "Mavis") flying
boat reported an American seaplane tender at Natan Bay on the coast of Adak
Island. I-6 went to investigate, but found nothing. She was anchored off Kiska
along with the submarines Ro-61, Ro-64, and Ro-68 when the cruisers and
destroyers of U.S. Navy Task Group 8.6 bombarded the island and harbor on 7
August 1942. All four submarines submerged to avoid damage, and some of them
set off in pursuit of the task group after the shelling ceased, but none
succeeded in finding the withdrawing American ships.
On 15 August 1942, I-6 received
orders to return to Japan, and she got underway from Kiska the same day. While
she was at sea, both Submarine Squadron 2 and Submarine Division 8 were
disbanded, and she and I-5 were reassigned to Submarine Division 7. She arrived
at Yokosuka on 23 August 1942 and began an overhaul.
August 1942–February 1943
While I-6 was at Kiska, the
six-month Guadalcanal campaign began on 7 August 1942 with U.S. amphibious
landings on Guadalcanal, Tulagi, Florida Island, Gavutu, and Tanambogo in the
southeastern Solomon Islands. As the campaign wore on, the Japanese decided to
use submarines to supply their forces fighting on Guadalcanal and began fitting
the submarines involved in the supply runs with a mounting on their decks that
allowed each of them to carry a waterproofed Daihatsu-class landing craft for
the discharge of cargo along coastlines in the Solomon Islands. I-6 received a
Daihatsu mounting during her overhaul, but was still in Japan when Operation
Ke, the evacuation of Japanese forces on Guadalcanal, was completed on 7
February 1943, bringing the Guadalcanal campaign to an end.
With her overhaul complete, I-6
departed Yokosuka at 10:00 on 16 February 1943 carrying a Daihatsu. She arrived
at Truk at 10:15 on 23 February 1943, and later that day the commander of
Submarine Squadron 7 came aboard to inspect her. On 26 February 1943 she
debarked her Daihatsu and took on fuel, supplies, and ammunition from Hie Maru.
She departed her anchorage at 08:00 on 28 February 1943, made a test cruise off
Uman Island, and returned at 15:00.
Fifth war patrol
On 2 March 1943, I-6 got
underway from Truk for her fifth war patrol, tasked with laying nine
German-made TMC magnetic mines off Brisbane, Australia, and patrolling in the
South Pacific Ocean off the east coast of Australia. On 4–5 March 1943, she
transited St. George's Channel off New Ireland southbound. On 8 March 1943,
Fleet Radio Unit, Melbourne (FRUMEL), an American-Australian-British signals
intelligence unit headquartered at Melbourne, Australia, decrypted a Japanese
message — probably one transmitted on 2 March — that revealed I-6′s departure.
FRUMEL's reporting prompted
instructions to coastal artillery forces to watch for a Japanese submarine and
the Royal Australian Air Force (RAAF) stepped up its patrol efforts along the
east coast of Australia, using Avro Anson and Bristol Beaufort aircraft.[9] I-6
was forced to remain submerged during daylight hours by the increased RAAF
activity,[10] but she patrolled uneventfully between Fraser Island and
Stradbroke Island from 14 to 16 March 1943. At 12:00 on 17 March 1943 she was
southeast of Sandy Cape at 25°49′S 153°49′E. At 14:30 she sighted the two-ship
Convoy BT-44 — which consisted of the armed Liberty ships Charles C. Jones and
Joseph Holt escorted by the Royal Australian Navy minesweeper-corvette HMAS
Gympie — just north of Point Cartwright.[10] She fired two Type 89 torpedoes at
Charles C. Jones at long range at 15:07, and at 15:11 Charles C. Jones sighted
their wakes passing 20 yards (18 m) astern of her.[10] Charles C. Jones and
Joseph Holt, which both turned to avoid the torpedoes, opened fire to alert
Gympie.[10] An Anson of the RAAF's No. 71 (Reserve) Squadron patrolling
overhead also sighted the wakes and dropped a sea marker at I-6′s presumed
location. Gympie and the Anson then searched for I-6 until 15:30, and the Anson
dropped a depth charge at 15:32, but I-6 escaped unscathed. At 20:22, she
transmitted a situation report which FRUMEL intercepted and partly decrypted,
and as a result two U.S. Navy patrol vessels arrived in the area and searched
for her until sunset on 18 March 1943, but without success.
Unfortunately for the Japanese,
I-6′s commanding officer lacked adequate intelligence on Allied shipping
patterns when I-6 laid her mines, which were planted in an area rarely visited
by Allied ships.[10 They went unnoticed until 24 March 1943, when the Royal
Australian Navy sloop-of-war HMAS Swan visited the area to conduct antiaircraft
gunnery practice, firing at a target towed by an RAAF Lockheed Hudson.[10] As
spent shells and shell fragments fell into the water, Swan observed two large
explosions close aboard which reached 400 feet (122 m) in height and 130 feet
(40 m) across their bases. At least two mines clearly had exploded, and the
size of the explosions suggested that each of them separately may have
represented the detonation of two mines, although Allied forces could not
substantiate this possibility. Gympie arrived in the area and began a
minesweeping effort that after a number of days detonated another mine, but
repeated sweeping found no more by the time minesweeping operations ended in
September 1943.[10] The mines were designed to rest on the seafloor and were
not fixed in place, meaning that they could slide or roll if laid on sloping
surfaces, and the Allies found the mines in a somewhat different location — 8
nautical miles (15 km; 9.2 mi) offshore in waters 30 to 40 meters (98 to 131
ft) deep[10] — than I-6 reported laying them.
New Guinea campaign
While I-6 was on patrol, a
Japanese attempt to carry supplies and reinforcements to New Guinea for their
forces fighting in the New Guinea campaign in a convoy of eight ships escorted
by eight destroyers ended in disaster in the Bismarck Sea when Allied aircraft
sank all eight ships and four of the destroyers in the Battle of the Bismarck
Sea, fought from 2 to 4 March 1943. The Japanese decided to use submarines
instead to carry supplies and troops to New Guinea. Accordingly, on 29 March
1943 I-6 was reassigned to the Southeast Area Fleet for duty running supplies
to Lae on the coast of New Guinea. She got underway from Rabaul for her first
supply run on 3 April 1943, carrying 30 passengers and 77 supply drums
containing 3.3 tons of weapons and ammunition, 22 tons of clothing, and 15.4
tons of food. She arrived at Lae on the coast of New Guinea on 5 April 1943,
where she disembarked her passengers and discharged her cargo onto Daihatsus.
She brought aboard four Imperial Japanese Army soldiers who were taking the
regimental colors of the 41st Infantry Regiment to Rabaul and 25 other
passengers and departed for Rabaul. Shortly after her departure she sighted
Allied motor torpedo boats, but she crash-dived and avoided them and arrived
safely at Rabaul on 7 April 1943.
I-6 next called at Lae on 11
April 1943, unloading 26 passengers and 77 supply drums containing 4.4 tons of
weapons and ammunition, 19 tons of clothing, and food and embarking 42
passengers for Rabaul. On her third supply run, she visited Lae on 17 April
1943, discharging 28 passengers and 77 supply drums containing four tons of
weapons and ammunition and 17 tons of clothing. After embarking 39 passengers,
she got back underway for Rabaul. She sighted Allied motor torpedo boats near
the Tami Islands during the return trip, but submerged and avoided them. While
at Rabaul, she was reassigned on 21 April 1943 to the Northern District Force
in the 5th Fleet to support the supply and reinforcement of the Japanese
garrisons on Attu and Kiska in the Aleutian Islands.
I-6′s seventh run was more
eventful. She arrived at Lae on 13 May 1943, unloaded 10 passengers and supply
drums containing 11.5 tons of weapons, five tons of ammunition, and nine tons
of food. After embarking four passengers, she began her return trip to Rabaul.
Shortly thereafter, the U.S. Navy PT boats PT-150 and PT-152 sighted I-6 making
12 knots (22 km/h; 14 mph) on the surface 5 nautical miles (9.3 km; 5.8 mi) off
Lae at a range of 6,000 yards (5,500 m). Each PT boat fired two torpedoes at
I-6 at long range, but I-6 stopped and the torpedoes missed ahead of her.
PT-150 then closed to 4,000 yards (3,700 m) and fired another torpedo at the
stationary I-6, but the submarine suddenly accelerated and the torpedo missed
astern. The PT boats then ran parallel to I-6′s course and turned toward her to
decrease the range, but she submerged. The PT boats then stopped, and I-6 fired
a torpedo at them, which passed under PT-150′s bow without detonating, bringing
the action to a close. I-6 proceeded with her voyage to Rabaul, but on 14 May
1943 she diverted from it so that she and I-5 could search for the crews of
Mitsubishi G4M (Allied reporting name "Betty") bombers shot down
during a raid on Oro Bay. She rescued two aviators from the water 60 nautical
miles (110 km; 69 mi) off Buna, New Guinea.
On her eighth run, I-6 called at
Lae on 21 May 1943 to deliver 5.1 tons of weapons, 5.4 tons of ammunition, 4.6
tons of food, and 31 passengers. She departed for Rabaul after embarking 40
passengers. On her ninth and final run, she visited Lae on 28 May 1943 and
dropped off 18 tons of food, 4.3 tons of weapons and medicine, two tons of
clothes, a Daihatsu, and 23 passengers. Not scheduled to return to Rabaul, she
did not embark passengers. She instead got back underway bound directly for
Truk. Reassigned along with I-5 to the 6th Fleet while at sea on 31 May 1943,
she stopped at Truk from 1 to 2 June 1943, then proceeded to Yokosuka, which
she reached on 8 June 1943. She underwent repairs there.
Sixth and seventh war patrols
In the Aleutian Islands, the
Japanese garrison on Attu had been annihilated by invading U.S. forces in the
Battle of Attu between 11 and 30 May 1943. On 21 May 1943, with the situation
on Attu deteriorating, the Japanese Imperial General Headquarters decided to
evacuate the isolated garrison on Kiska. The evacuation began by submarine on
26 May 1943. Submarine Division 7 was reassigned to the 5th Fleet on 1 July
1943, and on either 1 or 2 July I-6 set out from Yokosuka on her sixth war
patrol, bound for Paramushiro in the Kuril Islands. After calling at
Paramushiro, she deployed to support the ongoing evacuation of Kiska,
patrolling with I-5 in the Bering Sea north-northeast of Kiska. Between 17 and
19 July 1943, the two submarines sighted three U.S. destroyers on three
separate occasions, but were unable to attack them. The Japanese completed the
evacuation on 28 July 1943, and I-6 concluded her patrol with her arrival at
Paramushiro on 4 August 1943.
I-6 departed Paramushiro on 16
August 1943 for her seventh war patrol, assigned a patrol area off Kiska. The
patrol was uneventful, and she returned to Paramushiro on 3 September 1943. She
got back underway on 5 September 1943 and arrived on 10 September at Yokosuka,
where she underwent repairs.
New Guinea and Bismarck
Archipelago
n a
new series of supply runs, shuttling between Rabaul and Iboki, New Guinea. Her
first and second round trips — from 4 to 10 January 1944, calling at Iboki on 6
January, and from 17 to 21 January 1944, calling at Iboki on 19 January —
involved the delivery of supplies. On her third run, in which she departed
Rabaul on 28 January 1944, she carried only troops, which she disembarked at
Iboki on 30 January 1944, damaging her screws on an uncharted reef in the
process. She returned to Rabaul on 1 February 1944, and on that day Submarine
Division 7 was attached directly to 6th Fleet headquarters. Her next supply
trip saw her depart Rabaul on 3 February 1944 to deliver supplies to Sarmi, New
Guinea. She received orders on 5 February 1944 to return to Yokosuka. She got
underway from Rabaul on 13 February 1944, called at Lorengau on Manus Island in
the Admiralty Islands on 17 February 1944 to deliver a cargo of 12 heavy
machine guns and their ammunition, then departed the same day for Yokosuka,
which she reached on 29 February 1944 to begin an overhaul.
Loss
On 15 June 1944, the Marianas
campaign began with the U.S. invasion of Saipan. Anticipating the invasion, on
13 June 1944 the commander of the 6th Fleet, Vice Admiral Takeo Takagi, ordered
all available Japanese submarines to deploy east of the Mariana Islands. With
her overhaul recently completed, I-6 set out from Yokosuka bound for the waters
off Saipan on 16 June 1944. At 22:33 that evening the Japanese 5,123-ton armed
cargo ship Toyokawa Maru — a member of Convoy 3606, consisting of four merchant
ships escorted by three coastal defense ships and a submarine chaser, which had
left Ogasawara in the Bonin Islands on 14 June 1944 bound for Yokosuka —
sighted I-6 surfacing near the convoy. Mistaking her for an enemy submarine,
Toyokawa Maru sounded a submarine alert, turned sharply toward I-6, and rammed
her on her starboard side just abaft her conning tower. I-6 listed heavily,
capsized, and sank a few minutes later, and Toyokawa Maru followed up by
dropping depth charges and machine gunning the water where I-6 sank. None of
I-6′s crew of 104 survived.
On 1 July 1944, the Japanese
ordered I-6 to rescue Takagi and his staff from their headquarters on Saipan,
which was threatened by advancing American forces. When I-6 did not acknowledge
receipt of the message, the Japanese declared her missing. Sixth Fleet
headquarters made a final attempt to contact her on 3 July 1944.
Alternative accounts of the loss
of I-6 claim that Toyokawa Maru sank her off Saipan on 30 June 1944, or that
the destroyer escort USS William C. Miller (DE-259) and high-speed transport
USS Gilmer (APD-11) sank her 70 nautical miles (130 km; 81 mi) west of Tinian
at 15°18′N 144°2